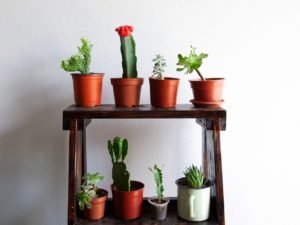
Taking Care of Succulents

Ever struggle with keeping your succulents alive? I know I have. It’s taken some time to understand these plants that have become so popular. This is because indoor conditions don’t naturally support these cute little creations. We need to take special care of succulents to keep them thriving and happy all year round!

**Note: This post contains affiliate links, which if purchased, I will receive a portion of the profits at no extra cost to you. This helps me to keep providing you with this awesome information!**

Click here to subscribe

Taking Care of Succulents: Water

The biggest factor for succulent success is proper watering. For these plants, always remember… less is more! Because their leaves are filled with water, they don’t need as much water in their roots. Only water your succulent when the soil is dry to the touch. Also, a huge factor in keeping your succulent from getting too much water is in making sure it has good drainage in the pot. Make sure that your succulent pots have holes in the bottom to let out extra water. Also make sure to use special soil, such as succulent and cactus mix, or regular potting soil mixed with vermiculite. These soils improve drainage and keep your succulent from sitting in water. Because nothing kills a succulent faster than too much water!

Janie over at Succulent Alley has an awesome post comparing the different types of succulent soil. So if you don’t have your own soil yet, definitely check this one out… Best Soil for Succulents!

*A way to tell if your succulent is getting too much or too little water is to look at the leaves. If they are getting wrinkled and turning brown, then you need to water more often. If they are staying fat and getting mushy, then your plant is getting way too much water.*

For more information, check out my post How Often Should You Water Succulents?

Taking Care of Succulents: Location

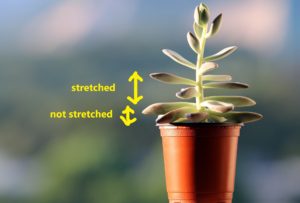
Another huge factor in succulent survival is where it is placed indoors. Succulents naturally occur in hot and warm environments. When choosing where to place your succulent think of sunny and warm. These plants need plenty of natural sunlight (from a south-, or east-facing window), or else they will start to stretch. This is the plant’s natural response as it tries to reach for additional sunlight. To keep your succulent healthy, it needs to be placed in a location where it will receive the proper lighting and temperature.

Taking Care of Succulents: Temperature

One last thing to watch out for is either too much direct sunlight in the summer, or cold drafts in the winter. If your succulent isn’t used to direct sunlight, then placing it in direct, afternoon sun can cause the leaves to burn. Leaf burn looks like brown, purplish patches across the surface of the leaf. If this is happening to your succulent, then immediately move it to a spot out of hot, direct sunlight. What they like best is direct morning or evening sun from an east- or west-facing window. But remember, if it starts to stretch, then it is a sign that it needs more sunlight. There is definitely a fine balance that succulents need.

Extra Bonus: Watering in Winter…

During the winter, succulents may need to be moved to a more sunny window… but beware of cold temperatures. The first sign that temperatures are too cold is that the water in the pot will take a lot longer to drain. Once this starts to happen, immediately start watering less! Most succulents only need a fraction of their usual water in the winter. The tip to remember here is that in the winter, only water enough to keep the soil from completely drying out. And only add small amounts of water each time.

If the succulent is getting too much water during the winter, then it will start to rot. This is seen when the leaves and stem begin to get mushy. This is the most common cause of death during the winter. Also be aware of your succulents that are placed directly on a windowsill or next to an exterior door. These might get too cold from drafts entering the space. If succulents get too cold, they will freeze. However, like I said before, your succulent is much more likely to rot due to overwatering in cold weather than it is to freeze.

Well, those are the main things to help care for your succulent! For information on growing more succulents, check out my post on Propagating Succulents! And for more quick tips on succulents and houseplants in general, check out Porch.com’s Everything About Plants Q&A!

Let me know if there are any tips or tricks that you’ve had success with, or if you have any specific questions for your own succulents… just join my Facebook group and share! I love to hear from you!

Happy Digging!

Click here to subscribe

Propagating Pothos Vine

Today I wanted to demonstrate how to grow one of my favorite indoor plants! Yep, that’s propagating Pothos vine! Also called Devil’s Ivy, this plant is one of the easiest plants to grow, earning it a spot on my hard to kill houseplants post, as well as my plants for dark apartments post. But for this post I wanted to tell you all how to grow your own Pothos vine. Trust me, it’s incredibly easy and you’ll have a beautiful, thriving plant in no time!

**For info on how to take care of your Pothos vine, check out my post Pothos Vine Care!**

Basically, there are two ways to propagate Pothos (aka, grow a new Pothos)…. with water, or with soil. But because most of you here are plant beginners, lets talk about water first (which is much easier), and then we’ll move on to the more advanced soil.

**Note: This post contains affiliate links, which if purchased, I will receive a portion of the profits at no extra cost to you. This helps me to keep providing you with this awesome information!**

Click here to subscribe

Propagating Pothos in Water: Step 1 – Get your cutting

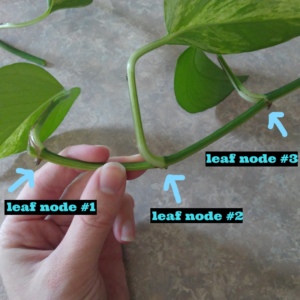
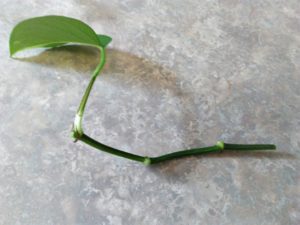
A good plant needs a good start. Select a healthy plant to trim from with leaves that aren’t diseased or yellowing. Cut about 3″ of stem length, making sure that there is at least one leaf node (where the leaf attaches to the stem). Personally, I like to take longer cuttings (they usually root faster) that have about 3-4 leaf nodes. This also makes it easier to keep upright.

Propagating Pothos in Water: Step 2 – Place in water

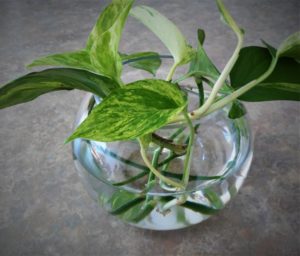
Now this step is pretty self-explanatory. Just make sure that if there are lower leaves that would be submerged in the container, make sure to remove them. If the leaves are left submerged, they may rot. Which doesn’t look that great. Believe me.

Propagating Pothos in Water: Step 3 – Plant

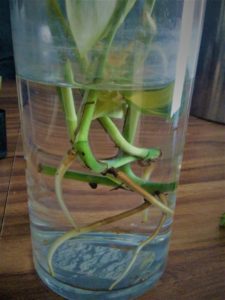
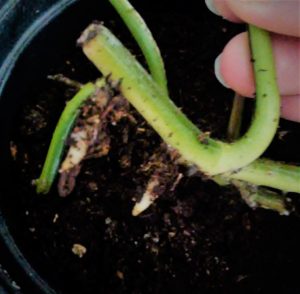
After a couple of weeks your Pothos vine will have rooted. So easy! I know! Now at this point, you can either plant your Pothos in soil, or you can keep it in water for life. Pothos does well in both water and soil, but make sure that once it is established that you don’t switch the growing media. Switching from water to soil (or vice versa) later in this plant’s life will cause it to decline in health. It might recover, but it might not. Those are the risks. But if you want to switch media later, you can always grab another cutting!

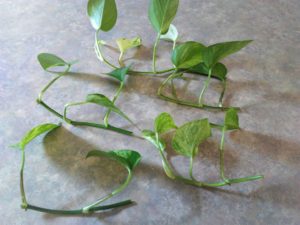
*This image is of some pothos cuttings I rooted last year. These can be planted at this point of development, or they can wait another week or two and planted then (if planting in soil).*

Propagating Pothos in Soil: Step 1 – Get your Cutting

For a soil cutting, follow the exact same directions as for the water cutting. This one is also important to remove any leaves that will be covered in soil, as they will rot. And remember, family members/roommates/friends don’t like to see rotting plants!

Propagating Pothos in Soil: Step 2 – Rooting Hormone

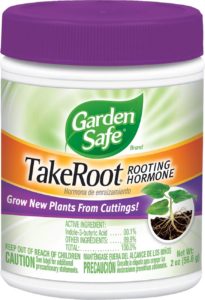
One thing that always helps you have success with cuttings is rooting hormone. Here’s a link to the one that I use! Simply dip the cutting into the hormone and shake off any excess powder. Make sure that you have at least one leaf node (the section of the stem where the leaf attaches) covered with the rooting hormone. I usually have two or three nodes on my cutting (stripped of the leaf) just to make sure that one of them roots successfully.

Propagating Pothos in Soil: Step 3 – Plant

The last step is to plant your cutting in soil. Do not skip this step!!! (Lol.) Make sure that at least one leaf node is submerged into the soil. As for pots, try to use a shallow container that drains well. I also prefer to use a well-draining potting mix in order to limit the chances of the cutting rotting. (I suggest the cactus & succulent potting mix, or regular potting soil mixed with coconut coir). The trick to watering your cutting is keeping it consistently lightly moist. Don’t overwater. If your pot/container doesn’t dry out within 2 days, then you’ve added too much water. You want to have to water it every day or two. This will prevent rotting of the cutting while it still doesn’t have any roots to take up the water. If you aren’t successful with your cuttings, try one of the soil options I listed above, as well as switch to a smaller container with plenty of drainage.

That’s it! It’s an easy, 3-step process, whether you choose soil or water. And like I said, if you are new to this, try the water option. It has a much higher success rate! So have fun growing this awesome, easy vine, and for tips on how to take care of your Pothos, check out my post on Pothos vine care!

Happy Digging!

Click here to subscribe

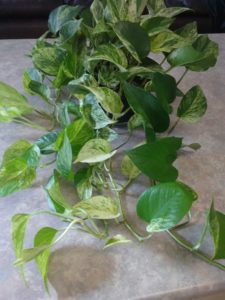
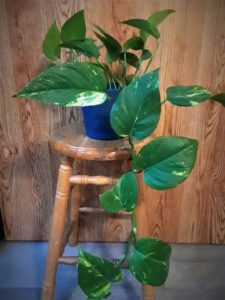
*Here’s a Pothos that I grew from a cutting less than a year ago!*

Top Sites for Indoor Plant Identification

Hey everyone! So… starting out knowing nothing about plants, it has taken me years to learn the names of all of them. Even today I sometimes have to look up the name of an awesome new plant that I saw. That’s why good indoor plant identification sites are a great tool to use. And it is important to know which plant you own. 

Knowing your plant is the first crucial step towards keeping it alive and healthy! So check out some of these indoor plant identification sites today!

Click here to subscribe

The first site that I recommend for plant identification is called Houseplant 411. This site has great images that can be selected and enlarged for correct plant identification! The picture guide also includes growing information and frequently asked questions about each unique plant. I found this to be very helpful, especially for anyone who needs specific information on how to care for their plant.

Check out Houseplant 411!

My next top site for indoor plant identification is called Houseplant Experts. This website not only has a comprehensive A-Z list of houseplants, but it also has a forum that you can join! 

By creating a free account, you can post a picture of your plant, as well as questions about names, care tips, etc. This way you can get the help that you need, as well as join an awesome community of plant lovers!

Check out Houseplant Experts!

My next site is Tropicopia online. This site is actually an indoor plant database for interior designers, which makes it incredibly thorough. Tropicopia  has many different varieties of each plant, so the database is rather large. 

I’d recommend finding out the general type of plant (plant genus) through a different site first, then go here if you want to find out the specific plant variety.

Check out Tropicopia online!

This next site is surprisingly awesome for plant identification! Facebook (specifically Facebook groups) can really help you to identify and get tips on how to care for your indoor plants. I’m part of several groups myself and am always amazed at how fast people respond to posts asking to identify their houseplants! 

There is also always a lot of people showing off their new, unique plants that can give you plenty of inspiration for your own home!

Below are a few of the great Facebook Groups that I love!

House Plant Lovers
Succulents, Tiny Gardens, & Terrariums
House Plant Hobbyist
Houseplant Hoarders

I hope these sites help you to correctly identify your plants! If you have any other questions, or comments, feel free to leave a comment below!

Happy digging!

Click here to subscribe

Rubber Tree Plant Care

The Rubber Plant, Ficus elastica, is one awesome plant for the indoors. Not only is it super popular and can be found at many of the mainstream gardening centers, but it has also gained this popularity for being showy and relatively easy to care for! But the big question is, how do you take care of it? No one wants to spend money on a beautiful plant, just to see it die within a month. That’s just sad. So here are some tips to keep your rubber plant green and healthy!

*If you don’t yet have one of these cool plants, you can get one here!*

**Note: This post contains affiliate links, which if purchased, I will receive a portion of the profits at no extra cost to you. This helps me to keep providing you with this awesome information!**

Click here to subscribe

Rubber Plant Light Requirements

Rubber plants are a bit more precise when it comes to light. They like bright, but indirect light. That means a nice sunny room, without being right in front of the window. If it has to be in some direct sunlight, it would prefer morning light, when the sun still isn’t too harsh. Some signs to look for are if the plant starts stretching out and the lower leaves drop, then your plant needs more light. If the leaves are full, but are drooping downwards, then you need to decrease the amount of light.

Rubber Plant Water Requirements

Rubber plants have two different seasons. Growing season and dormant season. Growing season occurs during the summer and this is when it needs the most water and likes to be fertilized. During the dormant season, your plant needs much less water (sometimes needing water as little as once a month!) Just make sure that your plant is in well-draining soil, as well as in a well-draining pot. This little guy hates to be sitting in water. Here’s a rule of thumb for your watering… if the leaves turn yellow or brown and fall off, then it is getting too much water. If the leaves are drooping, but don’t fall off, then your plant needs more water. For more tips on how to water your houseplants, click on the link here!

Additional Tips

If you’re worried about killing your plant as soon as it gets home, then try starting small. A smaller plant will acclimate much easier to a new environment than a larger plant will. Then if you want it to grow faster, you can put it outside during the summer (but still make sure it isn’t in direct sunlight, it receives plenty of time to acclimatize, and it receives plenty of water). In contrast, if you want your rubber plant to stay smaller, keep it in a smaller pot and trim the ends once it reaches the preferred heightThis will stop its upward growth and will instead encourage further branching.

A few more things to look out for… Don’t place your rubber tree where there are cold drafts. This is sure to kill your tree. And if you’re living in a cold, drafty basement, then believe me when I say from experience that none of your ficus plants will survive! You’ll be much better off with a non-tropical plant.

Also, make sure that you clean the foliage often so that the leaves stay shiny and will be as healthy as possible.

*Note: Rubber plants are toxic to dogs and cats. For a list of plants that are toxic to pets, check out my post here. Or, for a list of non-toxic houseplants, check out my post here!*

That’s all for growing tips for Ficus elastica! If you have any more tips or fun stories about your own rubber plants, feel free to leave a comment! And if you don’t have one of these amazing plants yet, grab one from the link below!

Happy Digging!

Click here to subscribe

Common Flowers that are Toxic to Pets

Hey y’all! So I know that everyone is looking for just the right gift for the Mom in their life, and being a Mom myself, I’d say you can never go wrong with a bouquet of flowers! There’s just something cheery about flowers that makes everyone smile. So go ahead and get your Mom, wife, or just someone special in your life (why not!) a gift of flowers! Just make sure that if they have pets, try to avoid some of these flowers. After all, you wouldn’t want to spend Mother’s Day, (or any other day) at the vet because your precious little ball of fur got his fill of the flowers too. So scroll down for the list of flowers to avoid, and check out this awesome post about safe flowers to use instead!

Click here to subscribe

Flowers Toxic to Pets #1 – Bulbs

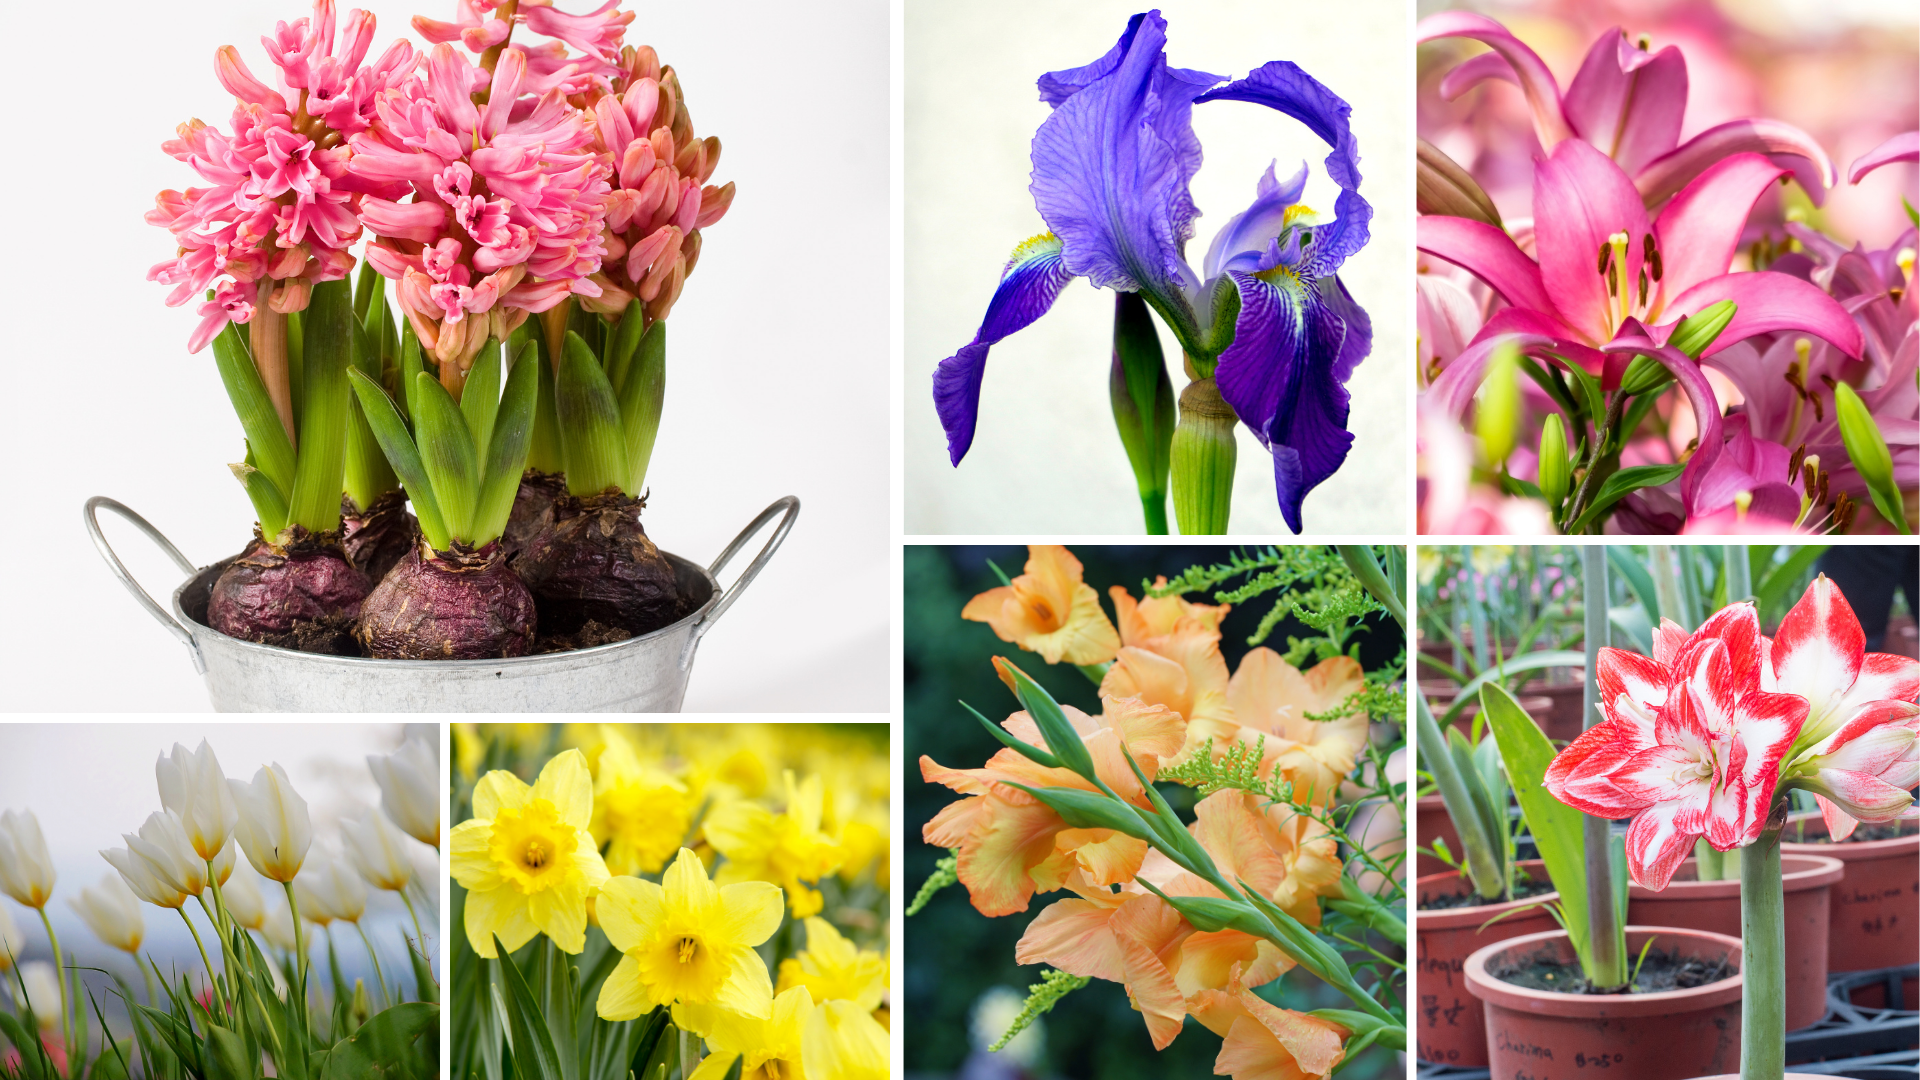
Heads up… most bulbs are toxic to pets. Especially the actual bulb part of the plant. In cut flowers, this includes hyacinths, iris, tulips, daffodils, amaryllis, lilies, and gladiolas. And because a picture is worth a thousand words, here are the main ones you should avoid in your bouquet…

#2 – Mums and Dahlias

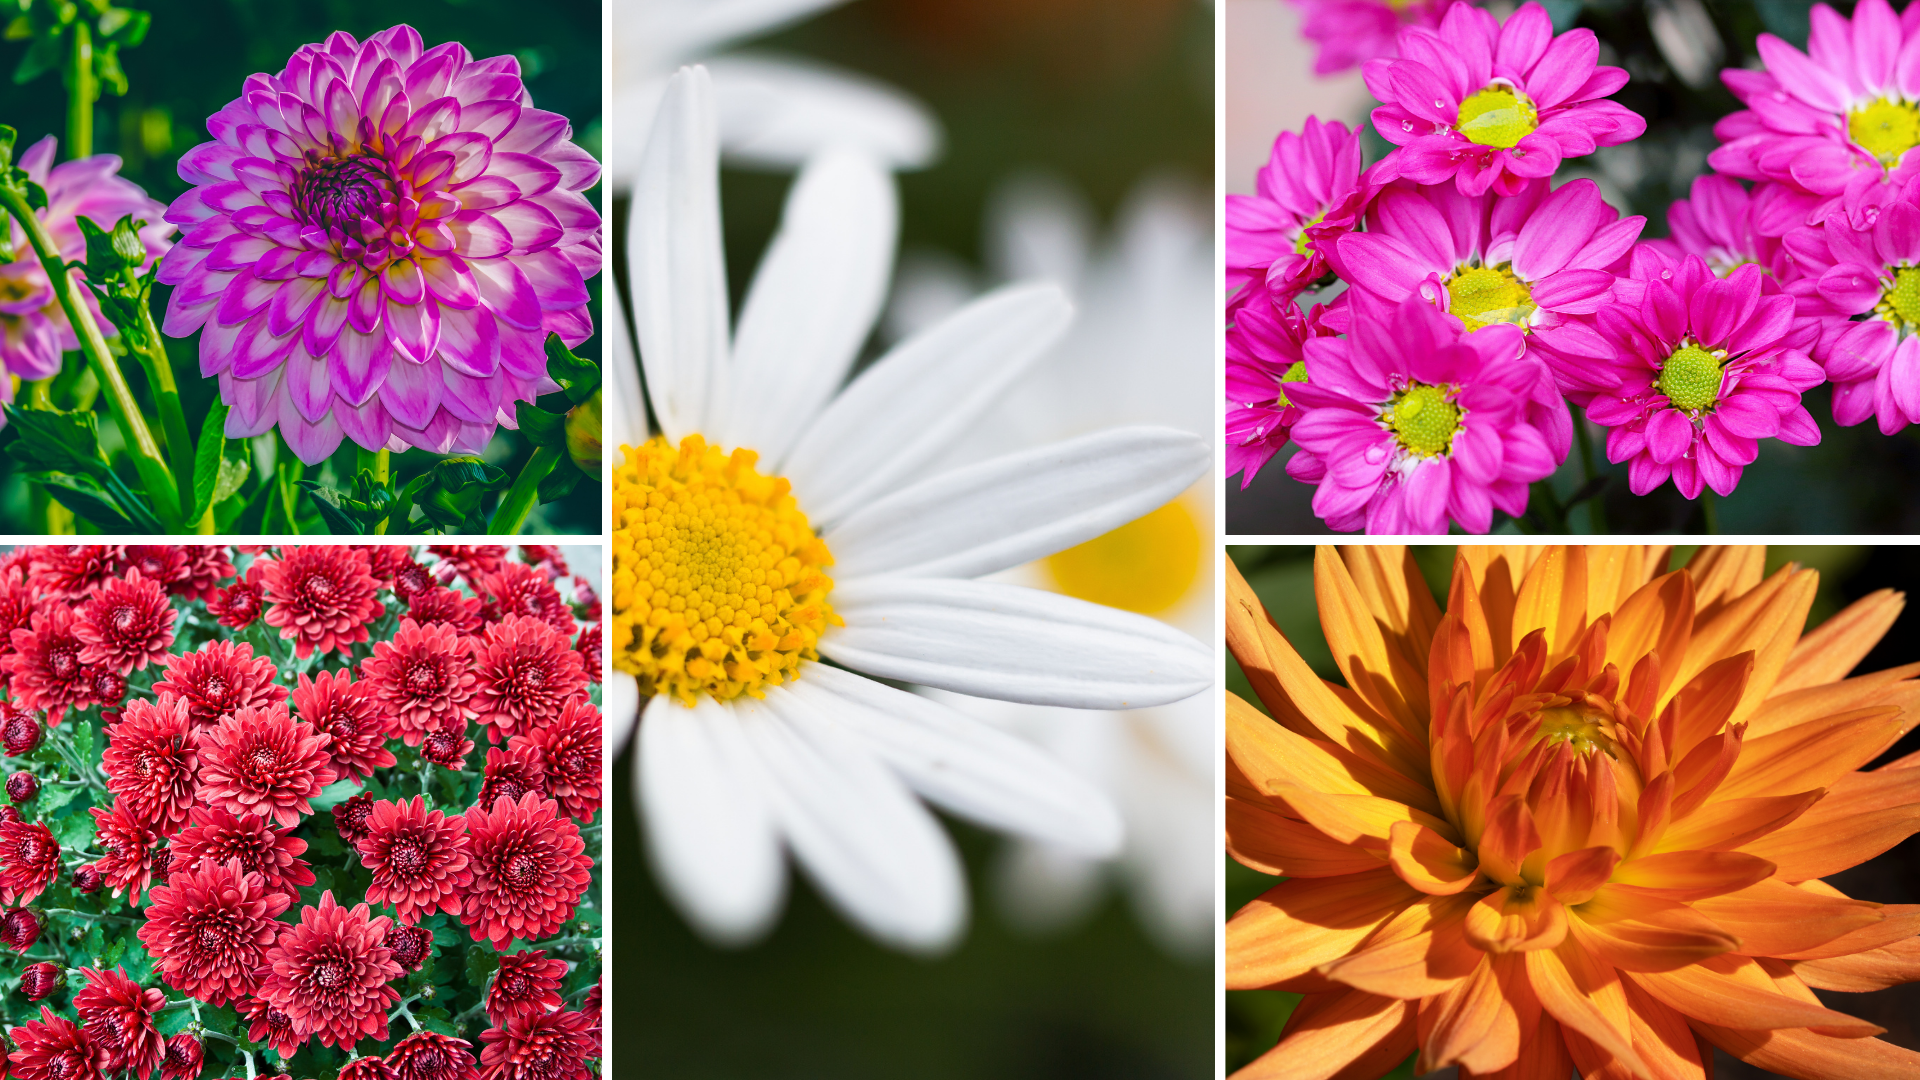
I know that these are some of the most common flowers found in bouquets. But yes, they are indeed toxic to pets. And remember that these flowers can look quite different depending on the variety, so if you’re unsure, don’t hesitate to ask the florist for proper identification! *Mums are short for chrysanthemums… florists will call them by both names…

#3 – Low Toxicity Flowers

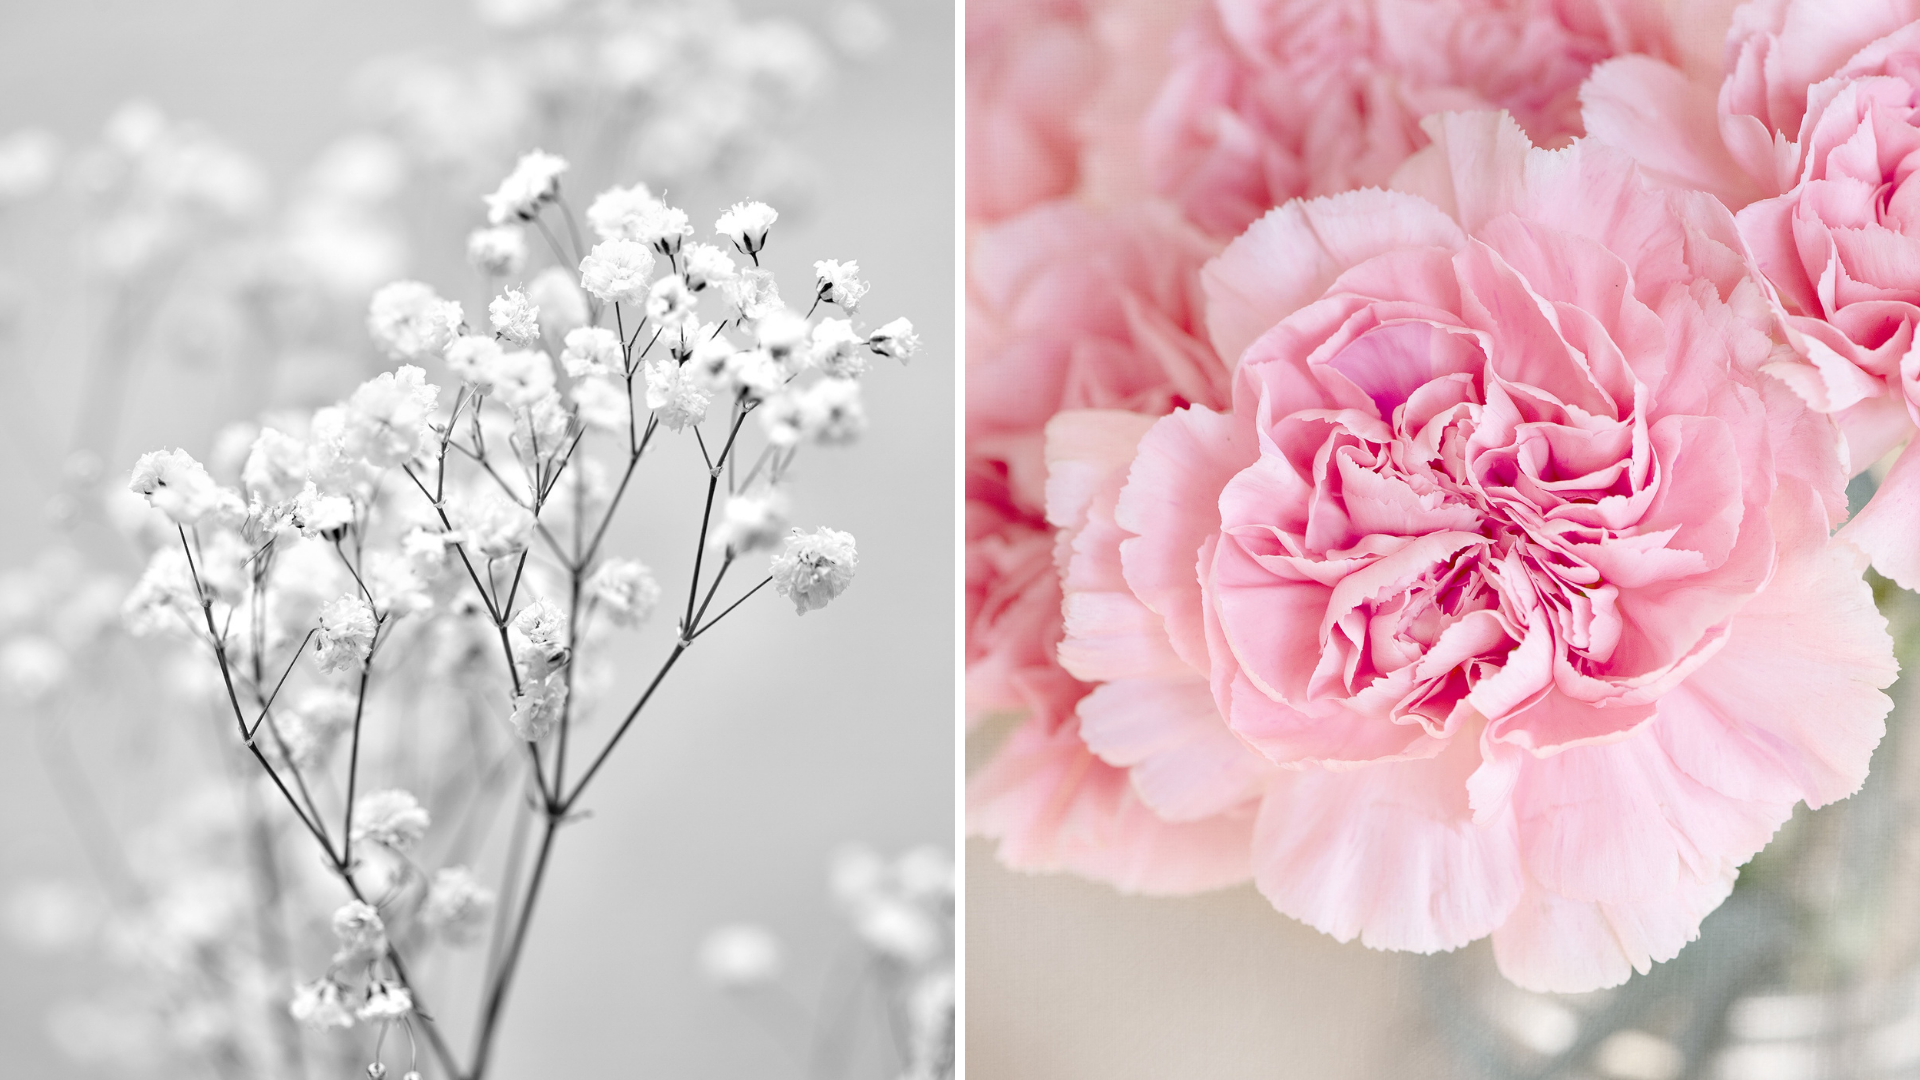
These two flowers may not be deadly, but they are still worth avoiding if your pet likes to nibble on your plants. These are baby’s breath and carnations. I know, I know… Two more insanely common bouquet flowers…

#4 – Potted Plants

Though not technically cut flowers, I thought I should throw these two flowering plants in just to be safe. Some of the most common potted plants that are sold for Mother’s Day (and for several other holidays) are azaleas and gardenias. Though they are extremely beautiful, they are also toxic to pets and should be kept out of reach of curious pets, or should only be kept indoors (or outdoors, depending on your pet’s situation). An added tip, however, is that azaleas and gardenias are extremely difficult to keep as an indoor plant. For other options in plant-giving, check out my post on non-toxic houseplants for pets. The plants in this post are generally easier to keep alive and your pet-owner will thank you!

So that’s my list of cut flowers that are toxic to pets! Make sure to check out this helpful post that will tell you which flowers you should buy for pet-owners! It also includes a FREE Printout that you can use as a handy reminder when purchasing flowers! So enjoy this little freebie and please leave any further questions or comments below!

Happy Digging!

Click here to subscribe

14 Easiest Succulents to Grow Indoors

Hey y’all! So here’s a post I’ve been wanting to write for a while. Mainly because succulent plants are so awesome, but can be tricky too! When I bought my first succulent, I definitely had to adjust my normal indoor-plant thinking. But once you get a few tricks down, then these little guys can be a breeze! Especially the succulents on this list. This list of the best indoor succulents to grow are both easy to keep alive and are the best succulents for beginners!

Basic Succulent Care

Real quick… if you are a beginner with succulents I wanted to point out a few tips on basic succulent care. First, make sure that you are using a pot with drainage holes. This is ESSENTIAL for succulent plants. Also, make sure that you are using a light, airy mix and a pot that isn’t too large for your little succulents. 

Next, while most succulents love full sun, not all succulents are accustomed to hot, afternoon sunlight. The best way for your indoor plants is to start your succulents in bright, indirect light and gradually acclimate your new plant to more direct sunlight. Any discoloration is a sign that your plant is being stressed and either needs more water or it needs less direct sunlight.

For more information on how to care for succulents, check out my blog post on succulent care tips!

**Note: This post contains affiliate links, which if purchased, I will receive a portion of the profits at no extra cost to you. This helps me to keep providing you with this awesome information!**

Click here to subscribe

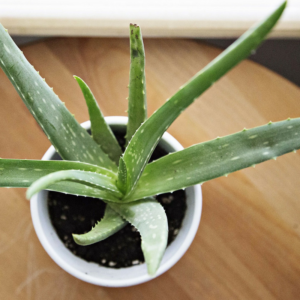
Easiest Succulents to Grow #1: Aloe – Aloe vera

This is a great place to start! Not only is the aloe vera plant very attractive, but it is also widely used for its medicinal properties. Just cut off a leaf/stem and rub the juices onto a burn or a wound (just be sure that you aren’t one of those few who are sensitive to it first).

To ensure a healthy aloe vera plant, make sure you allow the soil to dry out between waterings. Also try to give it at least a couple hours of direct sunlight each day. This plant can have sharp edges on its leaves, so make sure that it isn’t in a location where people might brush against it and get scraped. Only repot plant it once the roots are starting to push out of the pot. Follow these guidelines, and you’ll have a super easy, super useful, and super awesome little succulent! Get it here!

Aloe vera is the first on my list of the easiest succulents to grow indoors!

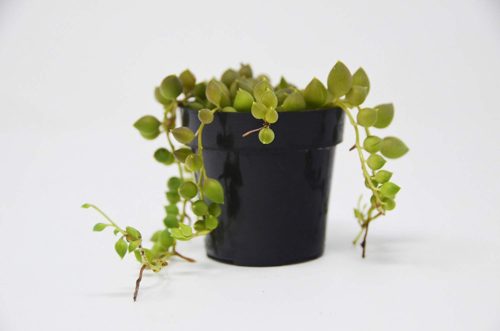
Easiest Succulents to Grow #2: String of Pearls – Senecio rowleyanus

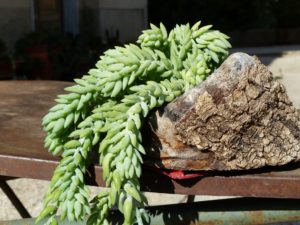
String of pearls is great for any beginner who loves hanging baskets. Used as a filler or as a main specimen, string of pearls looks almost unreal! Make sure that this little guy gets plenty of bright light, but don’t keep it in direct afternoon sun. It usually doesn’t need too much watering, but if it is in a warm climate and gets lots of bright light, then it may need a moderate amount of water. Just keep an eye on it and adjust accordingly. Get it here!

String of beads plant is the second on my list of the easiest succulents to grow indoors!

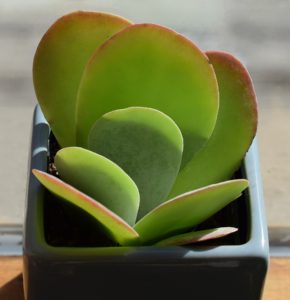
Easiest Succulents to Grow #3: Paddle Pant – Kalanchoe tetraphylla

This succulent definitely makes a statement in any modern-style home! With its red-tinted leaves and geometric shape, this succulent looks great in many different styles of containers. Make sure that it is only watered once the soil has become dry on the top. Don’t expose it to direct, hot sunlight, but do give it plenty of bright, indirect light to keep the edges red. Get it here!

Paddle plant is the third on my list of the easiest succulents to grow indoors!

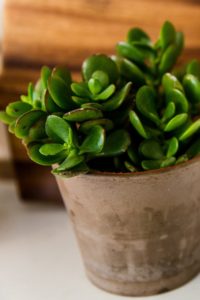
Easiest Succulents to Grow #4: Jade Plant – Crassula ovata

Jade plant is one of my favorite succulents! I love that it can grow from a simple cutting up to the size of a small tree! Some tips to succeed with this plant is to not over-water it. Wait until the soil dries out completely before watering. But don’t wait until its leaves look dull or withered. This means you’ve waited for too long and most likely those leaves will eventually fall off. So find a happy medium, but err on the side of dry. Another nice thing about the jade plant is that because of its small root system, you won’t need to re-pot it that often. So sit back and enjoy the beauty of this large, but easy succulent! Get it here!

Jade is the fourth on my list of the easiest succulents to grow indoors!

Easiest Succulents to Grow #5: Panda Plant – Kalanchoe tomentosa

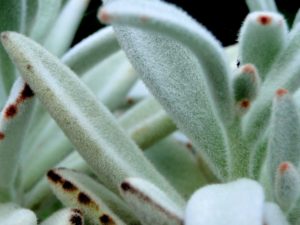
This is another very cute succulent! Named for its fuzzy leaves, the panda plant can flower, but it is very rare indoors. So don’t count on it flowering, but instead enjoy the beautiful shape and tinted edges of this easy-to-grow succulent. Make sure that it dries out between watering and that it receives lots of bright, indirect sunlight. It can also deal with a few hours of direct sunlight in the morning, but keep it away from the strong afternoon sun. Also, this plant doesn’t grow well in cold drafts. Get it here!

Panda plant is the fifth on my list of the easiest succulents to grow indoors!

Easiest Succulents to Grow #6 Burro’s Tail – Sedum morganianum

Here’s another great succulent to put into a hanging basket. Burro’s tail has thick rows of cascading leaves that can grow up to 2-3 feet long! However, place this little guy somewhere it won’t be disturbed because the leaves will fall off with the slightest touch. If you have young kids, I wouldn’t suggest this one for you. Go with the String of Pearls instead. But Burro’s Tail is pretty low-maintenance, especially during the wintertime when the plant enters dormancy and won’t need much watering at all. And this succulent can do well with bright to medium sun and can even be brought outdoors during the summer as long as it is carefully acclimated. Get it here!

Burro's Tail is the sixth succulent on my list of the easiest succulents to grow indoors!

Easiest Succulents to Grow #7: Lithops

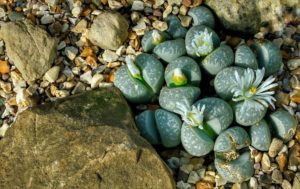
Lithops have recently returned in popularity and it’s no surprise why! They are super easy to grow indoors, are low-growing and come in a wide variety of colors and designs. They can also bloom if given enough sunlight. These plants do well in poor soils, but need to stay well-drained and dislike too much water. Lithops also go through a dormant period in the winter where they will need little to no watering at all (depending on your climate). So enjoy these pretty, unique succulents! Get it here!

Lithops is the seventh succulent on my list of the easiest succulents to grow indoors!

Easiest Succulents to Grow #8: Pincushion Cactus – Mammillaria

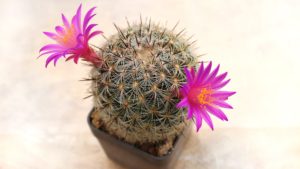
Pincushion Cactus is a very pretty cactus that got its name from its very sharp thorns! This guy needs plenty of space as each needle has a hooked end that can be hard to get out of the skin. So once again, I wouldn’t suggest this plant for people with young children in the home. Pincushion Cactus is fairly easy to maintain, however. It just requires a lot of sunlight (if you have a bright south-facing window, that would be best). The soil also needs to dry out before its next watering. Pincushion Cactus will also need a period of no watering (during the wintertime) to allow it to go into dormancy. This is needed if you want it to produce those gorgeous pink flowers! Get it here!

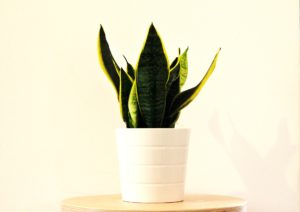
Easiest Succulents to Grow #9: Snake Plant – Sansevieria trifasciata

This is another of my favorite indoor succulents as it’s one of the few thick, fleshy-leaved plants that does well in low light conditions. It is also on my list of Top 10 Hard to Kill HouseplantsAnd… it is also one of the large succulents that is also easy to grow! With its bright, vertical lines, Snake Plant (also called mother-in-law’s tongue) does well in any room. Make sure to let the soil dry out between watering and plant in a well-draining soil. If left too wet, it may start to rot at the base. If given higher amounts of indirect lights, it is more likely to keep its colorful markings. Prune out any damaged leaves to keep it looking fresh and healthy, but know that once the tip has been clipped, it will no longer grow in height. Get it here!

Snake Plant is number nine on my list of the easiest succulents to grow indoors!

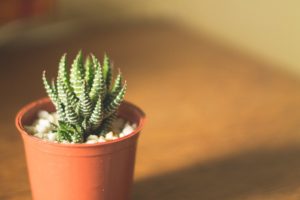
Easiest Succulents to Grow #10: Zebra Cactus – Haworthia fasciata

Zebra Cactus is another of my favorite succulents because it is so easy to grow! Seriously, my 1-year-old got a hold of several of my succulents, killing several (sad day!), but being ripped out of its soil and tossed around the living room didn’t even seem to phase this guy! It has definitely earned its spot here on my list of easiest to grow succulents. I’ve heard some people say that the tips are sharp, but they aren’t too sharp in my opinion. It also helps that this succulent stays small, so there won’t be any worries of it outgrowing its space. Just re-pot every year or two with fresh, well-draining soil to give it needed nutrients. This cactus can also do well in a shallow pot, as its roots stay in the top portion of the soil. Make sure that your Zebra Cactus stays in bright, but indirect sunlight. Hot, direct sunlight can burn the leaves.For more care information, check out my post, Zebra Plant Succulent Care! Or you can purchase one here!

Haworthia is number ten on my list of the easiest succulents to grow indoors!

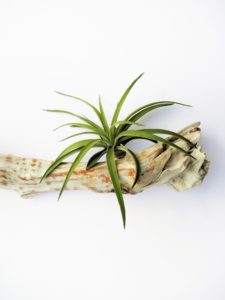
Easiest Succulents to Grow #11: Air Plants – Tillandsia

Air plants have recently gained more popularity due to the fact that they don’t require any soil to grow. However, they do need to be watered and given proper attention or they will die. But once you get a few simple tricks down, all of your air plants will thrive! So first, make sure that you water it correctly. This consists of lightly misting it once or twice a week (depending on how much light it is getting), and soaking it once a week for several hours. Then make sure that it completely dries out! This is one of my beginner mistakes with this plant. I bought one that was already glued into a glass orb and when it came time to dry it out, it was extremely difficult. This was because it couldn’t get enough airflow to it to allow it to dry out completely. So make sure that it soaks it all up, but then has plenty of time to completely dry out! For more care information, check out my post on Air Plant Care, or my post on How to Water Air Plants! Or you can purchase one here!

Air plants are number eleven on my list of the easiest succulents to grow indoors!

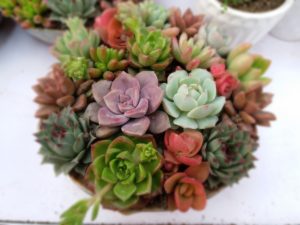
Easiest Succulents to Grow #12: Hens and Chicks

Next, is Hens and Chicks. Both Sempervivum and Echeveria species are often called Hens and Chicks because they not only look very similar, but they also both create small offshoots, or what is referred to as the ‘chicks’ part of the plant. These small chicks can be cut off and re-potted for more plants. Hens and Chicks does best in bright, indirect light, but can also tolerate some light shade. Just make sure that it is in well-draining potting soil and that it dries out a bit between watering. They will also need very little water in the winter months as they enter a dormancy period. And also make sure to keep water off the leaves while watering, as it can cause them to be permanently marked. Get it here!

Hen and chicks are number twelve on my list of the easiest succulents to grow indoors!

Easiest Succulents to Grow #13: Ponytail Palm

Ponytail palm is another succulent that is extremely forgiving as long as you don’t overwater it. Keep it in soil that is well-draining and this amazing semi-succulent will grow beautiful curly leaves that will give you a bouncy, light appearance. My last bit of advice for this plant is that cats seem to love chewing on this plant’s leaves. So if you have a feline friend, then I would suggest you choose a different one of these easy succulents and leave the ponytail palm to a pet-free zone.

Easiest Succulents to Grow #14: Christmas Cactus

Another succulent that is incredibly easy to care for is the Christmas cactus! Now I’m grouping in the Thanksgiving cactus together with these tropical cacti known as holiday cacti. These cacti actually do best in partial shade and higher humidity levels than the typical succulent. These, combined with the beautiful flowers that come in the winter, this cactus is not one to miss! For more information on how to care for christmas cactus, check out this post on christmas cactus care!

So there’s my list of 14 Easiest Succulents to Grow Indoors! I hope you found the tips helpful! Make sure to check out my other post on Top 10 Hard to Kill Houseplants that includes the easiest non-succulent type plants to grow indoors as well. I hope you all have success growing some of these awesome succulents and feel free to leave any additional tips or questions below!

Happy Digging!

Click here to subscribe

15 Fire Resistant Perennials

Looking at making your yard more fire-safe? Check out my previous post on creating a fire-safe yard, and check out this awesome list of fire-resistant perennial plants!

So what makes a plant fire-resistant? Mainly, plants are fire-resistant if they are free of sap or resin that can easily catch fire, as well as they have more water stored in their leaves, making them harder to burn. There are a surprising number of fire-resistant plants available for the landscape, giving you plenty of options for your specific style. However, remember that no plant is fire-proof and can still catch fire depending on fire intensity and weather patterns. But, planting fire-resistant plants will give your home an added measure of protection and might just buy you some needed time.*

Here’s the list!

**Note: This post contains affiliate links, which if purchased, I will receive a portion of the profits at no extra cost to you. This helps me to keep providing you with this awesome information!**

Click here to subscribe

#1: Coneflower – Echinacea purpurea

Coneflower is not only fire-resistant, but it is also one of my favorites to see in the landscape! Bright purple, pink, and white flowers bloom on long stems that are perfect for cut flower arrangements. They are also low-water and like full sun. Coneflower also attracts butterflies, and is deer resistant. What an awesome plant! (Hardiness zones 3-8)

Get your coneflower here!

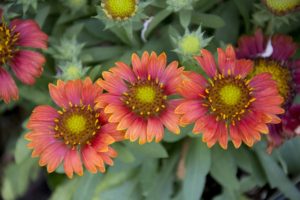
#2: Blanket Flower – Gaillardia var.

Blanket flower reminds me of a Native American blanket spread out along the yard. How pretty! Beautiful blooms range in combinations of red, orange, yellow, and gold will fill your space from early summer to early fall. These large blooms attract butterflies and do well as cut flowers on the taller varieties. Blanket flower prefers full sun, but is also low-water and does well in drought conditions. (Hardiness zones 3-9)

Find it here!

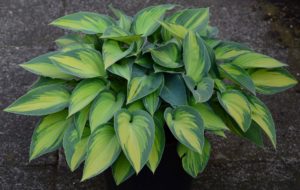
#3: Plantain Lily – Hosta spp.

Plantain Lily, also known as Hostas, do well in the shade garden. Ranging in leaf color from blue-green to silver, these hardy perennials are known for their gorgeous foliage. Their flowers are also pretty, but often overshadowed by the patterned leaves. In colder climates hostas will die back in the wintertime, but will send up new shoots in the spring! Just make sure that when new plants are getting established that they stay moist, but not wet. It is easy for hostas to get crown rot if its base gets too much water. (Hardiness zones 3-9)

Get some amazing hostas here!

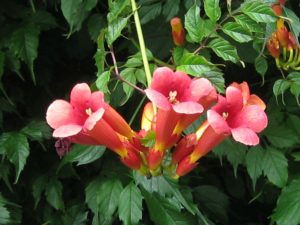
#4: Trumpet Vine – Campsis radicans

Trumpet vine is a beautiful vining plant that produces orange and red flowers that attract butterflies and hummingbirds. While some people would tell you to never plant trumpet vine due to its tendency to become invasive, it can be controlled if given the time necessary. Regular and heavy pruning, as well as proper placement and care for suckers will keep this fast growing vine under control. Make sure to have a sturdy support, as well as don’t place it near any buildings or have it climb up trees to avoid damage. All in all, this is a very beautiful, fast-growing vine, but needs to only be planted by those who have the time and dedication to keep it under control. (Hardiness zones 4-9)

Find it here!

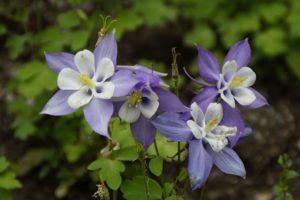
#5: Columbine – Aquilegia spp.

Columbine is also one of my favorite plants! Flowers come in any color of the rainbow and will bloom all summer long! Plant columbine in partial shade and it will be extremely low maintenance and drought tolerant. These plants are short-lived, but will readily re-seed. New plants will take 2-3 years to flower, but will still produce the unique, clover-shaped leaves of mature plants. In addition to being fire-resistant, these plants are also deer resistant, as well as attract butterflies and hummingbirds. What an awesome plant! (Hardiness zones 3-9)

Find it here!

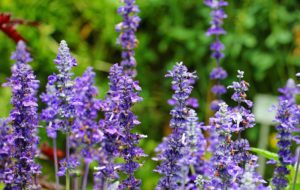
#6: Lavender – Lavandula spp.

This well-known plant will be very resistant to flames as long as it is kept moist. Lavender is extremely popular due to its natural scent, beneficial oils, and pretty purple or white blooms. What some people might not know, however, is that Lavender is also fairly drought tolerant and attracts butterflies, hummingbirds, and is deer resistant. No wonder so many people have this in their yards! (Hardiness zones 4-8)

Find it here!

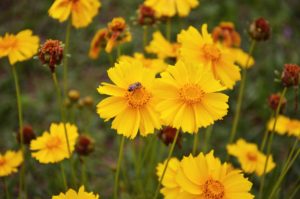
#7: Coreopsis – Coreopsis spp.

Coreopsis’ bright yellow flowers are hard to miss! A great self-seeder, most plants are perennials, though they do have some annual varieties available. Once established, these little plants are very drought tolerant. They can also tolerate partial shade, especially in warmer climates. Deadheading spent flowers can prolong bloom time, but if left on, coreopsis seeds are a great source of food for birds during the wintertime! (Hardiness zones 4-9)

Find it here!

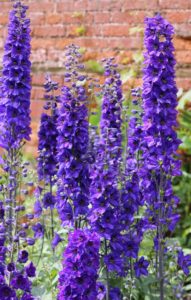
#8: Delphinium – Delphinium spp.

Delphinium is often thought of as a somewhat difficult plant to care for. However, with proper care, anyone with the right conditions can grow these amazing stalks of color. Just make sure that your delphinium gets plenty of morning sun, but has some shade in the afternoon, especially in hot climates. Also, make sure that this little guy stays moist. Delphinium doesn’t like to dry out. Varieties include flowers ranging from the classic blue to red, white, and lavender. Make sure that any tall flower stalks are properly staked or else they can easily break off. (Hardiness zones 3-7)

Find it here!

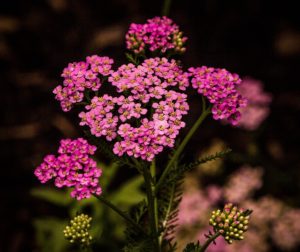
#9: Yarrow – Achillea spp.

This low-maintenance plant is perfect for the fire-resistant yard! With blooms in red, yellow, orange, purple, or white, anyone can find the perfect spot for these drought-tolerant plants. Just make sure to provide full sun and well-draining soil. Deadheading throughout the summer will ensure nearly constant blooms and add lots of color to your yard. (Hardiness zones 3-9)

Check out this yellow variety!

#10: Sage – Salvia spp.

This multi-use plant is great for not only the outdoors, but can also be dried and used in the kitchen! Sage leaves are what is used for the popular seasoning, but plants will also produce white, purple, pink, or blue flowers in late spring. This aromatic plant will also attract butterflies and birds into your garden! So consider this as a great fire-resistant plant that will also give you a great harvest. (Hardiness zones 5-9)

Find it here!

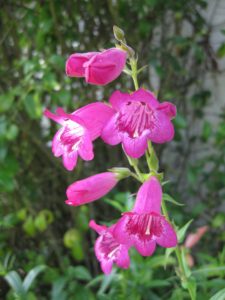
#11: Penstemon – Penstemon spp.

Penstemons are a great drought-tolerant, low-maintenance plant! With stunning purple, pink, blue, white, yellow, or red flower spikes, this plant is sure to draw attention as a specimen plant, or provide a colorful background when planted in groups. Plant in full sun and once established, these tough perennials will only need infrequent, deep watering. These tall flowers will also attract plenty of bees and hummingbirds to your yard. (Hardiness zones 3-8)

Find it here!

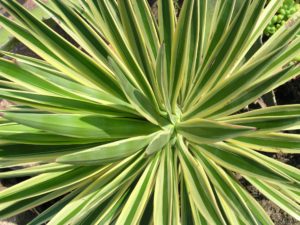
#12: Yucca – Yucca spp.

Yuccas are one of the most common desert plants grown in the landscape. Their sword-like leaves come in many shades of greens and blues and can even be variegated with yellow and white. Yuccas produce large white flowers in the late summer and will grow in very poor soil conditions. Just make sure to not overwater as this plant doesn’t like to stay wet. This low-maintenance, drought-resistant plant is perfect for the fire-resistant yard! (Hardiness zones 4-11)

Find it here!

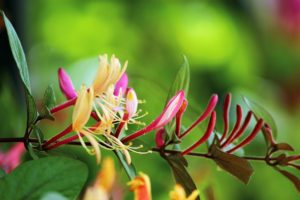
#13: Honeysuckle – Lonicera spp.

Honeysuckle vines are among the same classification as trumpet vine in the fact that they can also become invasive if not properly cared for. Make sure to keep this vine (or groundcover) well contained in a specific area. Then make sure to do some heavy pruning every fall. Honeysuckle also does well in full sun to partial shade, but if the top is allowed to grow too big, it can overshadow the lower vines, causing them to lose some of their leaves and become more of a woody plant. To avoid this, make sure that you thin out the top branches to allow some light to reach the lower portion of the plant. Once this fast grower is tamed, however, you can sit back and enjoy this fragrant beauty! (Hardiness zones 4-9)

Find it here!

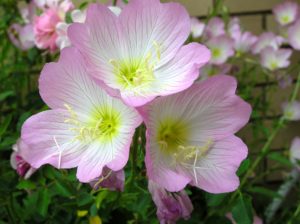
#14: Evening Primrose – Oenothera spp.

There are many different reasons to grow this native flower in your yard. Not only is it fire-resistant, but Evening Primrose is also grown for its medicinal and culinary use. Soft pink, yellow, and white blooms open every evening and stay open through the night. They grow well from seed and thrive in full sun to partial shade. This hardy annual (or perennial depending on your climate and variety) is also drought-tolerant once established and the seeds are also edible for human consumption as well as a popular attraction for birds. (Hardiness zones 3-11)

Get some seed here!

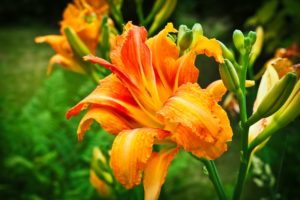
#15: Daylily – Hemerocallis spp.

Daylilies are another of my favorite plants! These little guys have thick, grass-like leaves that soften any border in the landscape. Their blooms rise above the plant and show off large, star-shaped flowers that come in thousands of different colors and varieties. Daylilies do well in full sun to partial shade and need only a moderate amount of water. Once established they need very little care besides thinning them out every several years.  (Hardiness zones 3 to 9)

For a colorful collection, get it here!

There’s my list of fire-resistant plants! There are many more than these, I just went with some of the more common plants that are easily found in the local garden center. Just remember that no plant is fire-proof, but that plants listed as fire-resistant will be much harder to get a flame going than other common landscape plants. And for tips on how to create a fire-resistant yard, check out my post here!

Happy digging!

*Note: This is in no way a means of providing insurance against fire. All content is the author’s opinion and is thereby not liable for any damages to any person or property, whether brought about by fire or any other causes.*

Click here to subscribe

How to Create a Fire Resistant Yard

These past few weeks I’ve been thinking a lot about fire resistant landscaping.

As some of you might know, I was raised in Northern California.

Over the past several months, large portions of Northern California have burnt in some of the largest wildfires ever recorded in the area. It is devastating for the many people who have lost loved ones in these fires. It is also difficult to imagine how many people have lost their homes and all of their possessions over the last several months. I hope that we can all pray for and send our aid to those affected.

Now, this made me think. Northern California isn’t the only area that is affected by wildfires. I hear about fires in Southern California every year. Not to mention all the other fires that happen throughout the United States. So what can we do to help with all of this, as well as to help protect our own homes? We can create a fire-resistant yard!

Let’s help out our local firefighters and create spaces where they can be safe, while they protect our homes and our lives.

*Note: This is not meant to be fire insurance. Fire damage is dependent upon the strength of the fire, as well as the weather conditions. There is no guarantee that your home will not be affected by nearby fires.*

Click here to subscribe

**Note: This post contains affiliate links, which if purchased, I will receive a portion of the profits at no extra cost to you. This helps me to keep providing you with this awesome information!**

Here’s how to create a fire-resistant yard:

Mark a space all around your home that is at least 30 feet wide. Designate this as the fire-safe zone!

Remove all dead and dying plant material, as well as any trash or weeds that are also flammable. Make sure to rake up all leaves and pine needles and to also remove them from rooftops and rain gutters. Also remove any wood piles from within this 30 foot radius.

Give the plants space! Trim back any tree branches that are touching (leaving a minimum of 10 feet between branches). Trim bushes and grasses to keep space open around them.  Also trim up tree branches to keep space open between tops of shrubs and low-hanging limbs. Make sure that there is also space between shrubs and the sides of the house and that there are no tree branches overhanging the roof.

Consider installing non-flammable hardscape within this area. This would be materials such as pavers, gravel, and stone.

Last, but definitely not least, consider replacing some of your plant material with fire-resistant plants. This doesn’t mean to just plant cactus and succulents (though if it’s what you want, then go for it!). But there are many different types of beautiful plants that are resistant to fire. Check out my list here!

So that’s my list of things to do to make your yard more fire resistant. Let’s do our part to keep our homes, our neighborhoods, and our firefighters safe from wildfires!

Happy Digging!

Click here to subscribe

Buying Succulents Online

Here’s the deal… I live in a small town. And in a small town, there just aren’t that many options for buying indoor plants. I’ve always wanted to try out some succulents, but I never found any good options around here. And so with this frustration on my mind, I decided to try buying some online…

**Note: This post contains affiliate links, which if purchased, I will receive a portion of the profits at no extra cost to you. This helps me to keep providing you with this awesome information!**

Click here to subscribe

After looking at several different sites, I found some decent prices on AmazonI was a bit skeptical at first. I mean, who buys their plants off of Amazon?! But even though I had my doubts, I went ahead and ordered. And I’m glad that I did. Here’s what I thought…

First off, the plants arrived within the week. Not as fast as picking them up from a garden center, but then again, it was shipped straight to me (which is helpful saving a trip). I got a variety of succulents (5 different types to be exact) and did I mention, they were delivered right to my door! Having kids, it’s especially helpful when I can just answer the door and get a box with exactly what I wanted inside. Not too bad!

Pro’s to Buying Succulents Online

I also got them delivered in the middle of the winter! I don’t know about you, but up here in Idaho the garden center is closed about 9 months out of the year. So to get plants in the middle of winter totally satisfied my winter need for something green!

Some more little details… they were a bit smaller than I’d imagined, but were the perfect size for a group planter on my windowsill. They arrived in the mail without getting crushed or damaged and were extremely well packaged. They even did well being shipped in the cold! (I was afraid they’d get frost damage from the freezing temperatures we’ve been having.) There were also a few little pups already on the plants that I could use to grow even more! This was definitely an added bonus!

Con’s to Buying Succulents Online

However, the one thing that I noticed was that the soil they arrived in needed to be switched out. So plan ahead and buy either 5 small 3″ pots, or one shallow 6″ pot to put them all into. Also have some cactus and succulent potting soil on hand to plant them in. And make sure that your soil is very well-draining. Cactus potting mix is the recommended soil type for all succulents. Water thoroughly when transplanted, but make sure that it drains well and that there is no excess water in the pot. These are also a super cute option of pots to go along with your brand new succulents! I personally ordered them and all of my succulents fit perfectly!

So all in all, I think my succulents from Amazon were great! It’s good to know that I shouldn’t be afraid to buy them online and neither should you. Plants ordered online were just as healthy and cute as any I would have picked up from the store! And for care information for these plants, check out my post on Succulent Plant Care! And remember, have fun with it!

Happy Digging!

Click here to subscribe

Why is my Plant Dying?

We’ve all been there. We’ve all looked down at our sad little plant and asked ourselves this question… Why is my plant dying? Believe me. I’ve had my issues with dead plants too. But the key is to figure out what is wrong, change it, and nurse your little guy back to full health! So what are the main reasons our plants die? 

**Note: This post contains affiliate links, which if purchased, I will receive a portion of the profits at no extra cost to you. This helps me to keep providing you with this awesome information!**

Click here to subscribe

#1 – Improper Watering

Let’s just get this one out of the way. Overwatering is the #1 reason for plants dying. People just have this feeling like if their favorite vine doesn’t look to great, well, maybe I should water it more. No. Stop. Don’t water it more.

Then there are those of us who just get so busy with life that we come home one day, look over, and the plant has collapsed. We look in the pot and see the Sahara desert staring back at us. Yep. Been there too. Oops. These are the times when you should water it more. Try setting an alarm on your phone, or marking it on your calendar. That way it will be easier for everyone.

If you think your problem is incorrect watering, then check out my post on How to Water your Houseplant. This will give you some great watering tips!

#2 – Light Issues

So for many of us living in apartments, one of our biggest problems is either not enough light, or too much light. My little succulents are just not thriving thanks to this problem of having too little light. (That, and it’s hard to keep them away from my one-year-old!). If you need more light, try a grow light. I know Amazon has several options available for those just needing a light or two.

Also, make sure that you aren’t giving a plant too much light. Most of our interior plants are tropical plants, taken from the wild understory of the jungle. Now, a lot of these plants are used to either low light or medium light. Only a very few need bright light. But regardless… most of these plants aren’t used to direct sunlight. That means my poor little dieffenbachia that I had back in college didn’t enjoy my enthusiastic placement of it in my windowsill. Basically, it got scorched. Leaf scorch to be technical. So know which of your plants want to be in that sunny windowsill and which ones would rather have a little protection… which leads me to my next problem…

#3 – Unknown Plants

Let’s face it. Not many people can tell me the common name as well as light- and water-requirements for their favorite houseplant. If you can, then you’re doing great! But for the rest of us, it helps to know exactly what type of plant you have. This will help you place it better in your house, as well as to know what it wants from you!

#4 – Drafts

Whether it’s a warm draft or a cold draft, most plants don’t like them. Right now in the winter, I need to take special precautions for any of my plants that are near the front door. They don’t appreciate the cold air gushing in every time I take the trash out. So, if it’s the change of a season (causing different temperatures in the house, as well as switching from heating to cooling or vice versa), then the decline of your plant is probably due to the changing temperatures caused by a draft.

#5 – Change in Location

If you recently changed a plant’s location, then it could easily be declining in health because it simply doesn’t like the new spot. This can be caused by one of the previous mentioned problems (like too much or too little light, or encountering drafts), but some plants can also just be picky and not like change. The biggest culprit of having tropophobia (the fear of moving… yes I had to look that one up), is the Weeping Fig. This ficus is the most stubborn plant as it likes to stay where it’s at. If you move it to a less-favorable spot, a common side-effect is that it will drop all of its leaves and die. Yep. Dramatic. I know. So be aware, and if you need to move your plant… give it some TLC the first couple of days.

So these are the most common reasons why indoor plants die. Some other problems such as insect or disease infestation, improper potting mix, or too little or too much humidity, can also cause problems in plants. However, these are usually less common indoors. Just make sure that you have a well-draining pot and that you know the requirements of your plants. For more information, check out my post, 10 Quick Tips to Keep your Houseplant Alive. Feel free to leave any comments or questions below!

Happy digging!

Click here to subscribe