Top 10 Trending Indoor Plant Pots

What is up again everyone?!?! So today we’re going to have some fun with the top trending indoor plant pots! Right now we’ve seen some awesome, sleek, simplistic designs becoming popular. I give credit to the huge minimalist living movement, which has inspired simple lines and basic colors that soothe the mind after a long day at work.

So pick your favorite of these super cute pots and add it to your collection today!

**Note: This post contains affiliate links, which if purchased, I will receive a portion of the profits. This helps me to keep providing awesome information to all of you!**

Click here to subscribe

Indoor Plant Pots #1: Coral Lemons

Kicking it off with the bright ‘Living Coral’ Color of the Year, we’ve got a cute set of pots that feature bright lemons on a background of coral. These pots remind me a bit of an Andy Warhol painting… sure to brighten up any space with these splashes of color!

Get it here!

Indoor Plant Pots #2: White Ceramic Plant Containers with Gold and Grey Detailing

This pot set combines a modern shape with cool, minimalist colors that are sure to look great in any design! These are perfect for any area you want a small, attractive grouping of plants.

Get it here!

Indoor Plant Pots #3: Dundee Bronze Floor Planter

The Dundee Bronze floor planter is actually made of 100% iron with a bronze finish. Absolutely stunning for a modern, minimalist style, this pot is sure to last for years with its durable build. And consider purchasing it together with a plant stand to show it off!

Get it here!

Indoor Plant Pots #4: A & B Home Terracotta Planters

Going back to vintage, this blue color goes perfectly with the ‘Living Coral’ Color of the Year! This four-pot set each has a unique, antique pattern that looks great indoors or out.

Get it here!

Indoor Plant Pots #5: Ferris Wheel Succulent Pot Holder

It’s no wonder this cute little plant stand has been trending. What plant lover doesn’t want a plant Ferris Wheel! This set includes the pots along with the rotating stand that is sure to help your succulents make a statement!

Get it here!

Indoor Plant Pots #6: Ceramic Succulent Planter with Bamboo Drainage Trays

This set of 3 round succulents is meant for creating a grouping of small succulents that add a variety of colors and textures. It includes bamboo drainage trays that not only add another natural element to your planter, but it is also extremely practical in saving your tabletops from water damage!

Get it here!

Indoor Plant Pots #7: Ceramic Succulent Magnetic Pots

Be sure to check out this awesome succulent pot that is magnetic! This makes it perfect to easily hang on any magnetic surface. There is the square, trapezoidal, and watering can shaped pots available!

Get it here!

Indoor Plant Pots #8: Unbreakable Resin Plant Containers

This set of two indoor/outdoor pots is extremely durable! Made out of resin, they are heavier than plastic pots, but much lighter than real stone. Just be aware of the raised drainage plug at the bottom of the pot. It makes the actual pot depth about 8″.

Get it here!

Indoor Plant Pots #9: Geometric Hanging Planter

With the trend of vertical gardening, it’s no wonder that these modern hanging planters are such a hot item right now! Either buy one to accent a small space, or get several to create stylish wall decor!

Get it here!

Indoor Plant Pots #10: Modern Plant Stand Pots

If you’ve been paying any attention to the indoor plant scene, then I’m sure you’ve seen these super sleek modern plant stands. But the hardest part of achieving this look is finding a pot that doesn’t have sloping walls. Well, here it is! Here are the amazing vertical plant pots that have been starring in the most current modern homes!

Get it here!

There’s the roundup of 2019’s top trending pots! I’m excited to see what next year brings! Let me know in the comments below what you think about these pots, as well as which ones you have and like the best! For some indoor plant recommendations, check out my post on Modern Indoor Plants, Low Light Houseplants, or Plants for a BOHO Bedroom!

Happy Digging!

Click here to subscribe

How to Care for Lavender | An Ultimate Growing Guide!

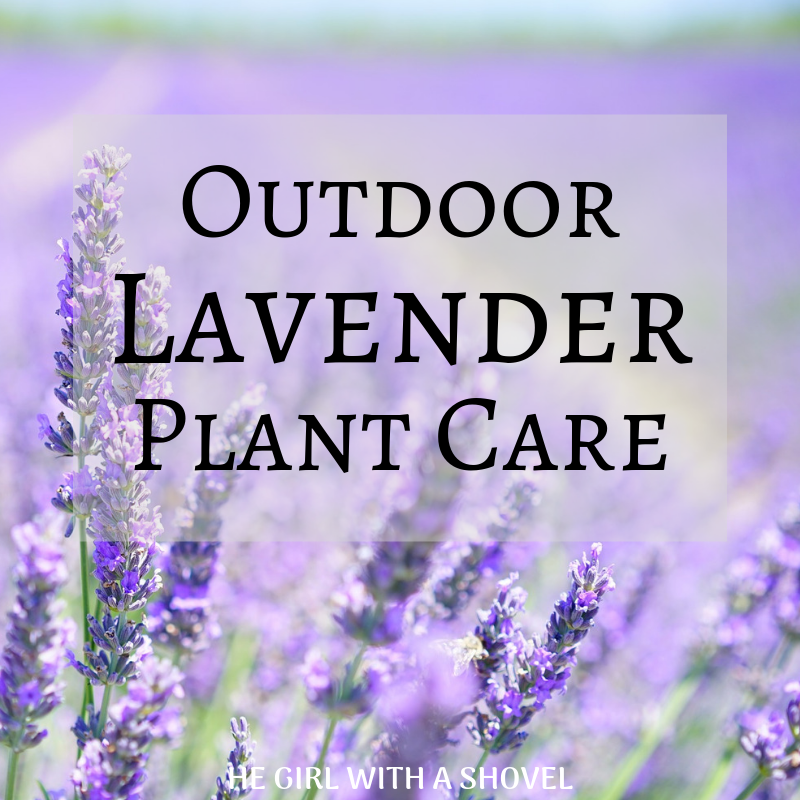
Picture this: you’re strolling through a fragrant garden, and the unmistakable scent of lavender wafts through the air, instantly calming your senses. There’s just something magical about these purple beauties, isn’t there?

As a gardening enthusiast, I’ve always been drawn to the allure of lavender plants. Not only do they add a stunning pop of color to any landscape, but they also offer a myriad of uses, from culinary delights to soothing aromatherapy.

If you’ve ever dreamed of having your own lavender right in your backyard, you’re in luck! Growing and caring for lavender plants is easier than you might think, and I’m here to guide you every step of the way.

In this article, we’ll dive deep into the world of lavender, exploring the different types of lavender plants, sharing planting tips and tricks, and revealing the secrets to keeping your lavender thriving for years to come. Whether you’re a seasoned green thumb or a novice gardener, you’ll find all the information you need to cultivate your very own piece of purple paradise.

So, grab your gardening gloves, and let’s get started!

Types of Lavender Varieties

Before we dive into the nitty-gritty of planting and caring for lavender, let’s take a moment to explore the different types of lavenders available. Each variety has its own unique characteristics and care requirements, so it’s essential to choose the one that best suits your garden and growing conditions.

English Lavender

Lavandula angustifolia, or English lavender, is the most common type of lavender plant. It’s known for its sweet, floral aroma and is often used in perfumes, soaps, and culinary dishes. English lavender plants are hardy and can withstand colder temperatures than other lavender types, making it a great choice foryou if you live in a cold climate.

French Lavender

French lavender, or Lavandula dentata, is a bit more delicate than its English cousin. It features gray-green, serrated leaves and produces light purple flowers. French lavender prefers warmer temperatures and may not survive harsh winters, so it’s best suited for milder climates or grown in containers that can be brought indoors in late summer to be protected during colder months.

Spanish Lavender

Lavandula stoechas, or Spanish lavender, is a stunning variety with distinctive rabbit-ear-like bracts on top of the flower spikes. It has a strong, camphor-like scent and is more heat-tolerant than other types of lavender. Spanish lavender is an excellent choice for gardens in warmer regions or for those looking to add a unique touch to their lavender collection.

Lavandin

Lavandin is a hybrid of English and Portuguese lavender, combining the best qualities of both varieties. It’s known for its high oil content, making it a popular choice for commercial oil production for essential oils. Lavandin plants are typically larger and more vigorous than other lavender types, and they can tolerate a wider range of growing conditions.

Now that you’re familiar with the different types of lavender plants, you can make an informed decision about which variety will work best in your garden. Keep in mind that each type has slightly different care requirements, so be sure to research the specific needs of your chosen lavender plant to ensure its success.

Planting Lavender

Now that you’ve chosen your perfect lavender variety, it’s time to get your hands dirty and start planting! Whether you’re starting from seeds or seedlings, planting lavender is a relatively straightforward process. Let’s break it down step by step.

When to Plant Lavender

The best time to plant lavender depends on your climate and the type of lavender you’ve chosen. In general, it’s best to plant lavender in the spring or early fall, when the weather is mild and the soil is warm. Avoid planting during the heat of summer or the depths of winter, as this can stress the plants and hinder their growth.

Preparing the Planting Site

Lavender plants thrive in well-draining soil and full sun, so it’s crucial to choose a planting site that meets these requirements. If your soil is heavy or a clay soil, consider amending it with sand or gravel to improve drainage. You can also create raised beds or mounds to ensure proper drainage.

Before planting, remove any weeds or grass from the planting site and loosen the soil to a depth of about 12 inches. This will help the lavender roots establish themselves more easily.

Planting Lavender Seeds vs Seedlings

If you’re feeling adventurous, you can start your lavender plants from seeds. However, keep in mind that lavender seeds can be slow to germinate and may take several months to reach transplanting size. If you’re looking for a quicker route to a lavender-filled garden, consider purchasing seedlings from your local nursery or garden center.

When planting seedlings, be sure to space them about 12 to 18 inches apart, depending on the mature size of the variety. Dig a hole slightly larger than the root ball, place the seedling in the hole, and backfill with a well-draining garden soil. Water the seedlings well after planting to help them settle in.

Growing Lavender in Containers

No garden space? No problem! Lavender plants can also thrive in containers, making them a great option for apartment dwellers or those with limited outdoor space. When growing lavender in containers, be sure to choose a pot with adequate drainage holes and use a well-draining potting mix.

Keep in mind that lavender plants in containers may require more frequent watering than those planted in the ground, especially during hot, dry weather. However, be careful not to overwater, as this can lead to root rot. Lavender in particular likes to let its roots breathe so make sure that if it’s indoors, that you allow the soil to dry out in between watering.

And now that you have your lavender plants nestled into their new home, it’s time to focus on providing them with the care they need to flourish. In the next section, we’ll dive into the essential aspects of lavender plant care and maintenance.

Lavender Plant Care and Maintenance

Sunlight Requirements

Lavender plants are sun worshippers, so make sure they get plenty of direct sunlight. Aim for at least 6 hours of full sun per day. However, if you live in a particularly hot climate, your lavender may appreciate a bit of afternoon shade to prevent scorching.

Watering Requirements

One of the biggest mistakes novice lavender growers make is overwatering. Lavender plants prefer well-draining soil and can tolerate drought once established. Water deeply but infrequently, allowing the soil to dry out between watering sessions. In humid climates, be extra cautious not to overwater, as this can lead to fungal disease.

a closeup of water droplets on a leaf

Soil Type and Drainage

Lavender plants thrive in well-draining, sandy, or gravelly soil. If your soil is heavy or clay-like, consider amending it with sand, gravel, or organic matter to improve drainage. Avoid planting lavender in low-lying or soggy areas, as this can also lead to root rot.

These plants also prefer alkaline soil in the pH range from 6.7 to 7.3. If you live in a region with acidic soils (aka a lower soil ph number), you can either plant your lavender in a pot, or you can amend your soil with 2 to 3 ounces of lime per cubic foot of soil. 

Fertilizing Lavender Plants

Lavender plants are not heavy feeders and do not require frequent fertilization. In fact, over-fertilizing can lead to excessive foliage growth at the expense of flower production. If desired, apply a light layer of compost or a slow-release, low-nitrogen fertilizer once a year in the spring.

Temperature Range and Hardiness Zones

Lavender plants are generally hardy in USDA zones 5-9, depending on the variety. English lavender is the most cold-tolerant, while French and Spanish lavender prefer milder climates. In colder regions, consider planting lavender in containers that can be brought indoors during the winter months.

the sun shining through oak trees

Spacing and Air Circulation

When planting lavender, be sure to provide adequate spacing between plants to allow for proper air circulation. This helps prevent fungal diseases and promotes healthy growth. As a general rule, space plants about 12 to 18 inches apart, depending on the mature size of the variety. If your plants start outgrowing their space, consider pruning around them to allow them good airflow around their branches. 

Mulching Around Lavender

While mulching is generally beneficial for many plants, lavender prefers bare soil around its base. Avoid mulching directly around the plant, as this can trap moisture and lead to stem rot. Instead, use a light layer of gravel or sand to suppress weeds and improve drainage.

Pruning and Shaping Lavender Shrubs

Pruning is essential to maintain the shape and health of your lavender plants. Prune your lavender once a year, immediately after flowering, by removing about one-third of the plant’s height. This encourages new growth and helps prevent the plant from becoming woody and unproductive.

Overwintering Lavender Plants

In colder regions, lavender plants may need protection during the winter months. Before the first frost, prune your lavender plants and cover them with a layer of mulch or straw. In areas with harsh winters, consider planting lavender in containers that can be brought indoors or moved to a protected location.

Propagating Lavender

One of the joys of growing lavender is the ability to propagate your plants, creating new lavender babies to add to your garden or share with fellow plant enthusiasts. There are several ways to propagate lavender, each with its own advantages and challenges. Let’s explore the three main methods: growing from seed, taking cuttings, and dividing mature plants.

Propagating Lavender from Seed

Growing lavender from seed can be a bit of a patience game, but it’s a rewarding experience nonetheless. To start, sow lavender seeds in a well-draining seed starting mix in early spring. Keep the soil moist but not soggy, and place the seed tray in a warm, bright location. Lavender seeds can take up to a month to germinate, so don’t get discouraged if you don’t see sprouts right away!

Once your lavender seedlings have several sets of true leaves, you can transplant them into individual pots or into your garden. Keep in mind that lavender grown from seed may not have the same characteristics as the parent plant, as many varieties are hybrids.

Taking Lavender Cuttings

Taking cuttings is a popular and relatively easy way to propagate lavender. In late spring or early summer, select healthy, non-flowering stems and cut them about 4-6 inches below the leaf node. Remove the lower leaves, leaving only a few at the top of the cutting.

Dip the cut end of the stem in rooting hormone and plant it in a well-draining potting mix. Water the cuttings and place them in a warm, bright location out of direct sunlight. Keep the soil moist but not waterlogged, and in a few weeks, you should see new growth indicating that the cutting has rooted.

Dividing Mature Lavender Plants

If you have mature lavender plants that have become woody or unproductive, division can be a great way to rejuvenate them while also creating new plants. In early spring or fall, carefully dig up the lavender plant and gently separate the roots into smaller sections, each with its own set of leaves and roots.

Replant the divisions in well-draining soil, spacing them about 12 to 18 inches apart. Water the newly planted divisions well and keep the soil moist but not soggy until they establish themselves.

No matter which propagation method you choose, it’s always a thrill to watch your new lavender plants grow and flourish. In the next section, we’ll explore the various ways you can harvest and use your homegrown lavender, from culinary creations to beautiful crafts.

Harvesting and Using Lavender

The moment you’ve been waiting for has finally arrived: your lavender plants are bursting with fragrant blooms, ready to be harvested and enjoyed. But when is the best time to harvest lavender, and what can you do with all those delightful purple flowers? Let’s dive in and explore the many ways you can make the most of your lavender blooms.

When to Harvest Lavender Flowers

Timing is everything when it comes to harvesting lavender. For the best fragrance and oil content, harvest lavender when about half of the flower buds have opened. This typically occurs in late spring or early summer, depending on your climate and the variety of lavender you’re growing.

To harvest, simply snip the flower stems about an inch above the foliage using clean, sharp scissors or pruning shears. Gather the stems into bundles and secure them with twine or rubber bands.

Drying and Storing Lavender

To preserve your lavender harvest, you’ll need to dry the flowers. Hang the bundles of lavender upside down in a cool, dry, dark place with good air circulation. You can use a clothes hanger, drying rack, or even a clothesline to hang your lavender bundles.

Allow the lavender to dry for about 2-4 weeks, or until the stems snap easily when bent. Once dried, remove the flowers from the stems and store them in airtight containers away from direct sunlight. Properly dried and stored lavender can retain its fragrance for several months to a year!

Culinary Uses for Lavender

Lavender isn’t just a pretty face in the garden; it’s also a delightful culinary herb! Here are a few ways to incorporate lavender into your kitchen creations:

  • Brew a soothing cup of lavender tea
  • Infuse sugar or honey with lavender for a floral twist
  • Add a pinch of dried lavender to baked goods like scones, cookies, or cakes
  • Create a refreshing lavender lemonade or cocktail
  • Use lavender as a rub for grilled meats or roasted vegetables

Remember to use culinary-grade lavender and start with a light hand, as the flavor can be quite strong.

Crafting with Lavender

Lavender’s beauty and fragrance make it a popular choice for a variety of crafts. Here are a few ideas to get your creative juices flowing:

  • Create fragrant sachets filled with dried lavender to freshen drawers and closets
  • Make lavender bath salts or body scrubs for a luxurious spa experience
  • Weave lavender wands or wreaths for a beautiful, aromatic decoration
  • Infuse oil or vinegar with lavender for a unique gift or pantry staple
  • Press and dry lavender flowers for use in candles, soaps, or potpourri

The possibilities are endless when it comes to crafting with lavender, so let your imagination run wild!

a bunch of lavender tied together with a purple ribbon

Harvesting and using your homegrown lavender is a rewarding experience that engages all the senses. Whether you’re sipping a cup of lavender tea, baking a batch of lavender scones, or creating a beautiful lavender wreath, you’ll be able to enjoy the fruits (or rather, the flowers) of your labor. In the next section, we’ll tackle some common problems you may encounter while growing lavender and how to troubleshoot them.

Troubleshooting Lavender Problems

As much as we’d like our lavender plants to be problem-free, sometimes issues arise. Don’t worry, though – most lavender problems are easily remedied with a little know-how and some TLC. Let’s take a look at some common issues and how to fix them.

Common Pests and Diseases

While lavender is generally pest-resistant, it can occasionally fall victim to certain insects and diseases. Here are a few to watch out for:

  • Aphids: These tiny pests can cause distorted growth and yellowing leaves. Blast them off with a strong jet of water or treat with insecticidal soap.
  • Spittlebugs: These pests create a frothy foam on the stems and leaves. Remove the foam and bugs by hand or treat with insecticidal soap.
  • Root rot: Caused by overwatering or poor drainage, root rot can cause wilting, yellowing, and stunted growth. Ensure proper drainage and avoid overwatering to prevent this issue.
  • Leaf spot: Fungal diseases can cause spots on the leaves. Remove affected leaves and ensure good air circulation around the plant.

By keeping an eye out for these issues and addressing them quickly, you can keep your lavender plants healthy and thriving.

Issues with Lavender Not Blooming

If your lavender plant isn’t producing those lovely fragrant flowers, there could be a few reasons why:

  • Insufficient sunlight: Lavender needs at least 6 hours of full sun per day to bloom properly. Ensure your plant is getting enough sunlight.
  • Overwatering: Too much water can lead to foliage growth at the expense of flower production. Ensure your lavender is planted in well-draining soil and avoid overwatering.
  • Overfertilizing: Excessive nitrogen can lead to lush foliage but few flowers. Go easy on the fertilizer, and choose a low-nitrogen option.
  • Pruning at the wrong time: Pruning lavender too late in the season can remove the flower buds for the following year. Prune immediately after flowering for best results.

By addressing these issues, you can encourage your lavender plant to produce a bountiful harvest of fragrant blooms.

Fixing Leggy or Woody Lavender Plants

Over time, lavender plants can become leggy or woody, producing fewer flowers and looking less than their best. Here’s how to rejuvenate them:

  • Prune annually: Prune your lavender plants back by about one-third immediately after flowering each year. This encourages new growth and helps maintain a compact shape.
  • Reshape older plants: If your lavender has become woody and unproductive, you can try reshaping it by cutting it back to about 6 inches above the ground in the spring. This drastic pruning can stimulate new growth, but be aware that not all plants will survive this treatment.
  • Replace old plants: If your lavender is more than 5 years old and has become woody and unproductive, it may be time to replace it with a new plant. Consider using some of the propagation tips above if you have a bit of patience!

Remember, even the most experienced gardeners encounter problems from time to time. The key is to stay vigilant, address issues promptly, and not be afraid to ask for help when needed. With a little patience and care, your lavender plants will bounce back and reward you with their stunning beauty and intoxicating fragrance.

Conclusion

Well, there you have it, my fellow lavender enthusiasts! We’ve covered a lot of ground in this journey through the wonderful world of lavender plants. From choosing the right variety for your herb garden to planting, caring for, and harvesting these fragrant beauties, you now have the knowledge and tools to create your own lavender oasis.

Remember, growing lavender is not just about the destination, but also the journey. There will be triumphs and challenges along the way, but with each lesson learned, you’ll become a more confident and skilled gardener. Embrace the process, and don’t be afraid to experiment and try new things.

And remember, if you ever have questions or need advice, don’t hesitate to reach out to your fellow gardeners or consult reliable resources. The gardening community is a welcoming and supportive one, always ready to lend a helping hand or share a bit of wisdom.

So, go forth and grow, my friends! May your lavender plants be bountiful, your harvests plentiful, and your gardens filled with the enchanting beauty and fragrance of these timeless herbs. Happy digging!

Frequently Asked Questions

Is lavender easy to grow?

Lavender is generally considered an easy-to-grow herb, as long as you provide it with the right conditions. It thrives in well-draining soil, full sun, and good drainage. If you can offer these basic requirements, your lavender plants should be relatively low-maintenance and problem-free.

How long does it take for lavender to grow?

The time it takes for lavender to reach maturity depends on the variety and growing conditions. Most lavender plants will reach their full size within 2-3 years, although some may take longer. However, you can typically expect to see flowers in the first or second year after planting.

If you’re starting lavender from seed, keep in mind that germination can take several weeks, and the seedlings will need some time to grow before they’re ready to be transplanted into the garden.

Does lavender come back every year?

Yes, lavender is a perennial herb, which means it will come back year after year with proper care. In fact, lavender plants can live for 5-10 years or more, depending on the variety and growing conditions.

To ensure your lavender plants remain healthy and productive, be sure to prune them annually immediately after flowering. This will encourage new growth and prevent the plants from becoming woody and unproductive over time.

If you have any other questions about growing lavender that haven’t been covered in this article, don’t hesitate to reach out to your local gardening community or extension office for advice specific to your local area. With a little guidance and experience, you’ll soon become a lavender-growing pro!

Click here to subscribe

Air Plant Care

Air plants are some amazing plants! Undergoing thousands of years of evolution, they’ve found unique ways to compete for water and sunlight among an entire forest! But now the question is how do we get these highly specialized plants to survive in or extremely different home environments?! Well, that’s what we’re going to talk about today!

Don’t have any air plants yet?! You can get some here!

**Note: This post contains affiliate links, which if purchased, I will receive a portion of the profits. This helps me to keep providing awesome information to all of you!**

Click here to subscribe

Air Plant Care: Light Requirements

Air plants do best in bright, indirect light. The only time they can withstand direct sunlight is during the winter when temperatures are lower. If plants are in hot, direct sunlight, their leaves will burn and they could die.

Air Plant Care: Water Requirements

Incorrect watering is the main cause of air plant death. Because of this, and because of the unique way of watering, I’ve decided to create an entire post dedicated to show you how to water your air plant. You can check it out here!

Air Plant Care: Additional Tips

One of the craziest things about air plants is that they can absorb nutrients through their leaves! Fertilize your plant once every two weeks with a high-phosphorous fertilizer. This can be done by spraying the leaves with a liquid fertilizer and then shaking off any excess moisture. Only fertilize it during the spring and summer. Do not fertilize it during the fall or winter.

I hope you’ve enjoyed these tips about air plant care! And feel free to leave any further questions or comments about your own successes or failures below!

Happy Digging!

Click here to subscribe

African Violet Plant Care

African violets are a very common plant in the indoors. Not only do they have soft, attractive leaves, but they also flower like crazy! For example, you can propagate your own plant (that might take up to three months), but once the plantlet is established, it could flower within 6 months! For plant time, that is fast!!! But I’m sure you already know how adorable this little guy is, so I’m just going to tell you about how to take care of your African Violet to enjoy these blooms year after year!

Don’t own an African Violet yet?! You can get one here!!!

**Note: This post contains affiliate links, which if purchased, I will receive a portion of the profits. This helps me to keep providing awesome information to all of you!**

Click here to subscribe

African Violet Plant Care: Light Requirements

African violets can tolerate a wide range of lighting, however, they do not do well in hot, direct sunlight. Try to give it either morning or evening sunlight or keep it in indirect light. If your plant isn’t flowering it could either need more light, or more darkness. In order for African violets to flower, they need at least 8 hours of complete darkness at night. They also need at least 12 hours of sunlight during the day. So if it’s getting plenty of darkness at night and buds still aren’t forming, then consider purchasing some supplemental lighting.

African Violet Plant Care: Water Requirements

African violets like to be kept lightly moist, but not wet. If the soil feels spongy because of moisture, then it is too wet. During the winter, your plant will have a resting period and will need to be allowed to dry down to the top 1 inch (2.5 cm) of soil before watering it again. Also, make sure that you don’t get the leaves wet when watering. The best way to avoid this is to bottom-water your plant. Make sure that your pot has drainage holes and place it in a shallow tray of water. After 10 minutes, remove the pot and let any excess water drain. This is the best method for watering African Violets.

African Violet Plant Care: Additional Tips

One big thing to keep in mind is that African Violets like to grow in acidic soil. Pot your plant in either an African Violet soil mix, a Hydrangea mix, or a mix of potting soil and peat moss. This will ensure that your plant stays healthy!

I hope you’ve enjoyed these tips and good luck carrying for your beautiful African Violet! Feel free to leave any questions or comments below. And for more extensive plant care information please join my email list and receive a free welcome guide!

Happy Digging!

Click here to subscribe

Zebra Plant Succulent Care

Hey guys! And welcome to another awesome plant care post! Today we’re going to talk about the Zebra plant! This is the Haworthia succulent to be specific… not the Calathea zebra plant. But Haworthia can be a little tricky. This is because there are two main types of Haworthias: the one with little white ridges on the underside of their leaves (hereafter referred to as the Zebra Haworthia), and the translucent or completely transparent wonders (hereafter called the Transparent Haworthia). These two types differ slightly in their care, but I’m feeling awesome today so I’m going to tell you about both!

**Note: This post contains affiliate links, which if purchased, I will receive a portion of the profits. This helps me to keep providing awesome information to all of you!**

Click here to subscribe

Zebra Plant Succulent Care: Light Requirements

Haworthias generally need some direct sunlight but you need to be careful. Zebra Haworthias can tolerate some afternoon heat with its sunlight, but Transparent Haworthias are easily burned, so these little guys do better in east or west facing windows where they will still get some sunlight, but they will be protected from the heat of the day!

Zebra Plant Succulent Care: Water Requirements

In general, Haworthias need to be watered only once their soil has lightly dried up. However, during their dormant period, they use less water and should only be watered enough to keep the soil from completely drying out.

Zebra Plant Succulent Care: Additional Tips

I’m sure you’re asking, “When does my Haworthia go dormant?!” Well, that depends on what type of Haworthia you have. Zebra Haworthias go dormant from October through April and Transparent Haworthias go dormant from April through September. Why is this? Think of the northern and southern hemispheres… the Zebra Haworthia goes dormant during the northern hemisphere’s winter, but the Transparent Haworthia goes dormant during the southern hemisphere’s winter (from April to September!). Make sure to see which Haworthia you have and to care for it accordingly!

I hope this helps to clear up a few things! For propagation information on this plant, check out my post on Haworthia Propagation! Please leave any other questions or comments below! I know these are fun succulents, but any plant can be confusing sometimes! And for more expert tips sent weekly to your email, sign up for my email list! Every new subscriber gets a free welcome guide!

Happy Digging!

Click here to subscribe

Haworthia Propagation

Welcome back everyone! Today I’m going to show you how to propagate your favorite Haworthia plant! There are two different ways that Haworthias can grow… either from seed or from separation of plant material. I’m not fortunate enough to have some Haworthia seed on hand to show you, but I will talk about the two most common types of propagation through plant material: propagation through leaf cuttings, and separation of offsets.

**Note: This post contains affiliate links, which if purchased, I will receive a portion of the profits. This helps me to keep providing awesome information to all of you!**

Click here to subscribe

Haworthia Propagation through Leaf Cuttings

Haworthias can be propagated through leaf cuttings just like many other succulents. But beware because this plant is difficult to get the entire leaf off without ripping off the tip of the leaf. Because of this, most people choose to cut the leaves off with a small precision knife, cutting off a bit of the stem in the process to ensure that it will propagate. Others choose to propagate their entire plant at once and cut apart the inner stem as they separate all of the leaves.

Either way, this method is tricky and success rates are low for the zebra-type haworthias. Leaf cuttings are more successful in the round, thicker-leaf haworthias. That being said, if you don’t have any offshoots (or pups) on your zebra haworthia, then carefully remove a few leaves at the base of the plant. Then if the leaves aren’t successful, the plant should give you some new pups where the leaves were removed!

Just make sure that the entire leaf tip is removed and undamaged for this process to work. For step-by-step instructions, refer to my post on succulent propagation here!

Haworthia Propagation through Division of Offsets

In time, most Haworthia species produce offsets (little baby clones of the parent plant). This method of propagation is much easier and has much higher success rates than the leaf cutting propagation. These can be separated and potted in the following steps…

  • #1: Wait until the offset has at least four leaves to ensure that it is big enough to have formed its own roots and to survive the separation.
  • #2: Loosen the soil with water, then gently remove. We want to get as many of the roots out as possible so loosening up the soil first will be very helpful in saving those little guys.
  • #3: Gently brush the soil from the roots and separate the offset’s roots from the parent plant’s roots.
  • #4: Find where the offset is connected to the parent plant and gently cut them apart.
  • #5: Replant your Haworthias, making sure they are in well-draining soil and in small pots. Ignoring either of these will cause your plants to rot (and no one wants that!)

I hope you’ve enjoyed this post! Please leave any questions or comments below! I love hearing from you! Have a great day and good luck with your Haworthia propagation! And for Haworthia care information, check out my post on zebra plant succulent care!

Happy Digging!

Click here to subscribe

Desk Plants for the Bedroom

For a plant to be a good desk plant, it needs to be both small and clean. Most people, when buying plants, don’t know how big it will get, or how messy it will be. That’s why I’ve compiled a list of plants that will boost your creativity without getting in your way!

**Note: This post contains affiliate links, which if purchased, I will receive a portion of the profits, at no extra cost to you. This helps me to keep providing you this awesome information!**

Click here to subscribe

Desk Plants for the Bedroom #1: Air Plants – Tillandsia spp.

Air plants are the perfect plants for the desk. Not only are they small and don’t drop any leaves, but they can also be placed in any kind of a container. This allows you to pick the style that best fits your work space!

Buy one here!

Desk Plants for the Bedroom #2: Purple Shamrock – Oxalis triangularis

Purple Shamrock is a great plant to use to add some color to your work space! And if it starts to wilt, simply trim off all the tops and re-pot the root system. Place it in a warm location and keep it lightly moist, and your plant will come back to life within a month!

Buy one here!

Desk Plants for the Bedroom #3: Kalanchoe – Kalanchoe var.

There are lots of different varieties of Kalanchoe available… from the soft, blue-green panda plant to the ridged, Mother-of-thousands. So it should be easy to find one that matches your unique style!

Buy one here!

Desk Plants for the Bedroom #4: Gerber Daisy – Gerbera var.

If you’re looking for a bright, but no-mess flower, then get yourself a Gerber daisy! If well-cared for, it could flower for up to a year! After this, however, your daisy should either be planted outdoors or discarded and replaced with a new daisy.

Buy one here!

Desk Plants for the Bedroom #5: Jade Plant – Crassula ovata

The jade plant isn’t only a beautiful, low-maintenance plant, but it is also a symbol of prosperity and wealth. So if you want some extra prosperity in your life, get one of these for your desk!

Buy one here!

Desk Plants for the Bedroom #6: Cactus – Cactaceae

If you prefer low-water plants, then try out a cactus! These can be found in many different shapes, sizes, and colors! Just make sure to leave yourself plenty of work space around it, so you don’t accidentally bump it!

Buy one here!

Desk Plants for the Bedroom #7: Madagascar Dragon Tree – Dracaena

The Madagascar Dragon Tree is shaped perfectly for a desk as it can add height with its canopy, but the bare trunk keeps your work space clean and clutter-free!

Buy one here!

Desk Plants for the Bedroom #8: English Ivy – Hedera helix

If you prefer a beautiful hanging vine, then get one of the classic English ivy plants! This hardy, low-maintenance vine does well in cooler temperatures and will look classy for years to come!

Buy one here!

Desk Plants for the Bedroom #9: Arrowhead Plant – Syngonium podophyllum

The last of my desk plants is the arrowhead plant! This plant comes in many different colors and patterns that will boost both your creativity and your mood!

Buy one here!

That’s it for my list! Feel free to leave any questions or comments below! And let me know which one of these is your favorite or if you have any other suggestions! Then, if you want any more ideas, check out my list of Small Indoor Plants!

Happy Digging!

Click here to subscribe

9 Unique Houseplants

Are you looking for a houseplant that captivates people’s attention when they walk into the room? Or are you looking to add variety to your already large plant collection? Whatever the reason, this list of unique houseplants is sure to be a hit!

**Note: This post contains affiliate links, which if purchased, I will receive a portion of the profits at no extra cost to you. This helps to support this blog and allows me to keep providing awesome information to you!**

Click here to subscribe

Unique Houseplants #1: Banana Tree – Musa spp.

Starting off big, having an indoor banana tree might require a bit of space, but think of the awe when your friend spies their favorite lunchtime snack growing in your living room!

Buy one here!

Unique Houseplants #2: String of Hearts – Ceropegia woodii

This plant with heart-shaped leaves is the perfect gift for a plant lover. Not only does it reflect love and kindness, but it is also a unique plant that most collectors would love to add to their home!

Buy one here!

Unique Houseplants #3: Venus Fly Trap – Dionaea muscipula

Spider plants always look amazing in hanging baskets! When properly cared for, this plant will grow little ‘pups’ that hang down. You will soon have a plethora of tiny plantlets surrounding your basket.

Buy one here!

Unique Houseplants #4: Devil’s Backbone – Kalanchoe diagremontianum

Also called Mother-of-Thousands or Mexican Hat Plant, each tiny leaf edge can grow its own plant! Propagate a few for your neighbors and still have enough for around your home!

Buy one here!

Unique Houseplants #5: Purple Shamrock – Oxalis triangularis

This colorful plant has recently been coming back into popularity… and for good reason! The purple variety (as well as the green-and-purple variety) are both sure to make a statement in your home.

Buy one here!

Unique Houseplants #6: Ogre Ears – Crassula ovata cv. ‘Gollum’

I just love this fun little succulent! Ogre Ears proves that you don’t have to be big to make a statement. Even small plants can have a big impact! Being related to the Jade plant, this little guy is also very low-maintenance and hard to kill! But just be sure to not give this little guy too much water!

Buy one here!

#7: Wandering Jew – Tradescantia zebrina

This striped spectacle looks amazing either in a pot or in a hanging basket! The silver-purple leaves stand out boldly from any other green foliage. Only remember to trim it often to encourage bushy growth.

Buy one here!

#8: Tiger’s Jaw – Faucaria tigrina

Here’s another small succulent that makes a statement! Tiger’s Jaw looks like it could fit into the carnivorous plant family. However, its teeth are just for show. No need to buy special food for this guy!

Buy one here!

#9: Dr. Seuss Plant – Albuca spiralis ‘Frizzle Sizzle’

For our last plant, the Dr. Seuss plant had to be mentioned. These spiral leaves cause most people to ask if this plant is even real! But simply place one of these plants as a centerpiece, and you are sure to start a lot of conversation!

Buy one here!

There’s my list of unique houseplants! I hope that they make you as happy as I’ve been with mine! For more inspiration, check out my list of Modern Indoor Plants! With any comments or questions, feel free to leave a comment below. I love hearing from you all! And for more expert tips and a free welcome guide, sign up for my email list!

Happy Digging!

Click here to subscribe

9 Best Hanging Plants

Don’t you just love the look of a beautiful hanging planter?! Whether you’re looking to buy a hanging pot, or you’re trying to figure out what to put in it, this list of the best hanging plants will get you your very own beautiful planter in no time!

**Note: This post contains affiliate links, which if purchased, I will receive a portion of the profits. This helps me to keep providing awesome information to all of you!**

Click here to subscribe

Best Hanging Plants #1: Spider Plant – Chlorophytum comosum

Spider plants always look amazing in hanging baskets! When properly cared for, this plant will grow little ‘pups’ that hang down. You will soon have a plethora of tiny plantlets surrounding your basket. For care tips, check out my post on Spider Plant Care!

Buy one here!

Best Hanging Plants #2: String of Hearts – Ceropegia woodii

String of hearts, also known as rosary vine, is a cute hanging succulent with heart-shaped leaves! Just make sure to trim the long ends and re-plant them in the pot. This will keep it large and full!

Buy one here!

Best Hanging Plants #3: Pothos – Epipremnum aureum

Pothos is one of my favorite plants, and for good reason! Almost anyone could keep this tough guy alive. For more info about this plant, check out my post on Pothos Plant Care, or Pothos Propagation. Have fun with this beautiful vine!

Buy one here!

Best Hanging Plants #4: English Ivy – Hedera helix

For a more classical look, nothing beats a hanging ivy basket! This plant does great indoors or out and enjoys spending summers outdoors in the shade. But depending on your climate, your English Ivy may need to be brought indoors for the winter.

Buy one here!

Best Hanging Plants #5: Prayer Plant – Maranta leuconeura

This plant looks stunning, especially when left to hang from a minimalist container. Prayer plant also has a small root system (relative to its size), which makes it perfect for smaller hanging planters!

Buy one here!

Best Hanging Plants #6 – Heartleaf Philodendron – Philodendron cordatum

The heartleaf philodendron is another beautiful, full vine that is often confused with the Pothos vine. Heartleaf philodendron, however, has some unique, eye-catching varieties that you can’t find anywhere else!

Buy one here!

Best Hanging Plants #7: Donkey’s Tail – Sedum morganianum

This is another succulent that looks great in a hanging basket! Just make sure that this low-care plant is also placed in a low-traffic area, as the leaves are fragile. One brush against them can cause them to fall off. But even if this does happen, the leaves can be easily propagated!

Buy one here!

Best Hanging Plants #8: String of Pearls – Senecio rowleyanus

String of Pearls is another succulent that does best in a hanging planter. It is also less sensitive than Donkey’s Tail and can be placed in high-traffic areas with no worries! Just enjoy these fun, ball-shaped leaves!

Buy one here!

Best Hanging Plants #9: Boston Fern – Nephrolepis exaltata

hen people think of a hanging planter, most people picture a Boston Fern. These beautiful plants add regal, lush foliage to any indoor space! Just be sure to trim any yellowing fronds before they shed.

Buy one here!

BONUS!!! Best Hanging Plants #10: Hindu Rope Plant – Hoya carnosa ‘krinkle kurl’

The Hindu Rope plant not only has interesting foliage, but given the proper care, it will also produce bright pink clusters of star-shaped flowers! Looking for a unique conversation-starter? It’s definitely a Hindu Rope plant!

Buy one here!

That’s it for my list! Feel free to comment below if you have any questions or if you have a few more plants to add. I absolutely love hearing from you! And for more awesome care tips, sign up for my email list! Every new subscriber gets a free welcome guide!

Happy Digging!

Click here to subscribe

Snake Plant Care

Snake plants are awesome low-light, low-water plants that can tolerate quite a bit of neglect. No wonder they have been coming back into popularity! These modern, minimalist plants look great in any space! But now that you have your snake plant, the biggest question becomes… “How do I care for my snake plant?!” If this is you, then either watch the videos below, or keep reading!!!

Click here to subscribe

Snake Plant Care: Light Requirements

Snake plant is known to do well in low-light situations, but it will grow faster and have brighter colors if it is placed in a medium- or high-light location. One thing to avoid, though, is direct sunlight. Hot, direct sunlight will easily burn your snake plant’s leaves. When a snake plant is getting too much light, it will start getting a pale brown color on its leaves, which will then lead it to turn a darker brown and begin to shrivel. Needless to say, do not put your snake plant in hot, direct sunlight!

Snake Plant Care: Water Requirements

Snake plant does best if it is kept lightly moist during the spring and summer. Then during the fall, decrease watering amounts until you are only watering your plant enough to keep the soil from completely drying out. Then boost watering once again to following spring.

Snake Plant Care: Additional Tips

Remember to water this plant according to how much light it is receiving. If it is in low light, then water lightly. If it is in a bright, indirect light location, then you can be more generous with your water. But due to this plant’s semi-succulent nature, the biggest killer of snake plant is overwatering.

To avoid overwatering, it is ESSENTIAL that this plant is in a pot with drainage holes, as well as is in a light, well-draining soil mixture (either a succulent & cactus soil mix, or a regular potting soil amended with perlite.)

Also, be sure to keep your snake plant away from cold winter drafts as sustained temperatures below 60 F (15 C) can cause the leaves to rot at the base.

Well, that’s all you need to know to keep this awesome plant alive! For more easy, low-maintenance houseplants, check out my list of Top 10 Hard to Kill Houseplants! Then, for more plant care information, join my email list! Every new member gets a free welcome guide! Then, be sure to leave any further questions or comments below!

Happy Digging!

Click here to subscribe