Did you know that, according to the ASPCA, there were over 351,000 reported cases of pet poisoning last year alone? Yes, that charming Fiddle Leaf Fig or that innocent-looking bouquet of lilies you adore could be a potential hazard. With plants ranking as the 6th most common pet toxin, it’s a wake-up call for plant enthusiasts who are also pet parents. It’s not all gloomy, though. Awareness is the first step towards creating a safe environment for our furry companions.
After looking at my post regarding poisonous indoor plants, I wanted to show you a list of safe indoor plants for pets. This list includes some of the most common houseplants that are not only available in most areas, but are also pet-friendly plants. So if you’re worried about your furry friends’ safety, then check out this list!
*Note: You can also check out my list of Common Cut Flowers that are Poisonous to Pets. This will ensure that pets don’t get sick eating your bouquet!*

Pet-Safe Houseplants
1. Areca Palm (Dypsis lutescens)
A popular indoor palm with feathery, arching fronds that add a tropical touch to any room. It grows well in bright, indirect light and requires regular watering to keep the soil moist but not soggy.

2. Parlor Palm (Chamaedorea elegans)
A small, graceful palm that thrives in low light, making it perfect for indoor spaces. It has delicate, arching fronds and can grow up to 4 feet tall with minimal care.
3. Bamboo Palm (Chamaedorea seifrizii)
A hardy palm with thin, reed-like stems and delicate fronds, ideal for filtering indoor air. It prefers bright, indirect light and moderate watering, making it a low-maintenance addition to your home.
4. Spider Plant (Chlorophytum comosum)
Known for its arching leaves and spider-like offshoots, this plant is easy to care for and pet-friendly. It thrives in bright to moderate indirect light and tolerates occasional neglect.The Spider plant has so many things going for it! Not only are spider plants non-toxic for pets, but they is also on our list of air-purifying plants, hard to kill plants, and low light plants! This is definitely a plant that no one will have issues with!

5. Boston Fern (Nephrolepis exaltata)
A lush, green fern with arching fronds that is perfect for hanging baskets and low-light areas. It prefers high humidity and consistent moisture to keep its fronds vibrant and healthy. But there are also some ferns that are toxic to dogs and cats, such as the Asparagus fern. So just make sure that you know what you’re buying and that the label is correct.

6. Maidenhair Fern (Adiantum raddianum)
This delicate fern features lacy fronds that add elegance to any room. It thrives in humid environments with indirect light and requires consistently moist soil.

7. Kimberly Queen Fern (Nephrolepis obliterata)
A robust fern with upright fronds that is excellent for air purification. It prefers bright, indirect light and regular watering to maintain its lush appearance.
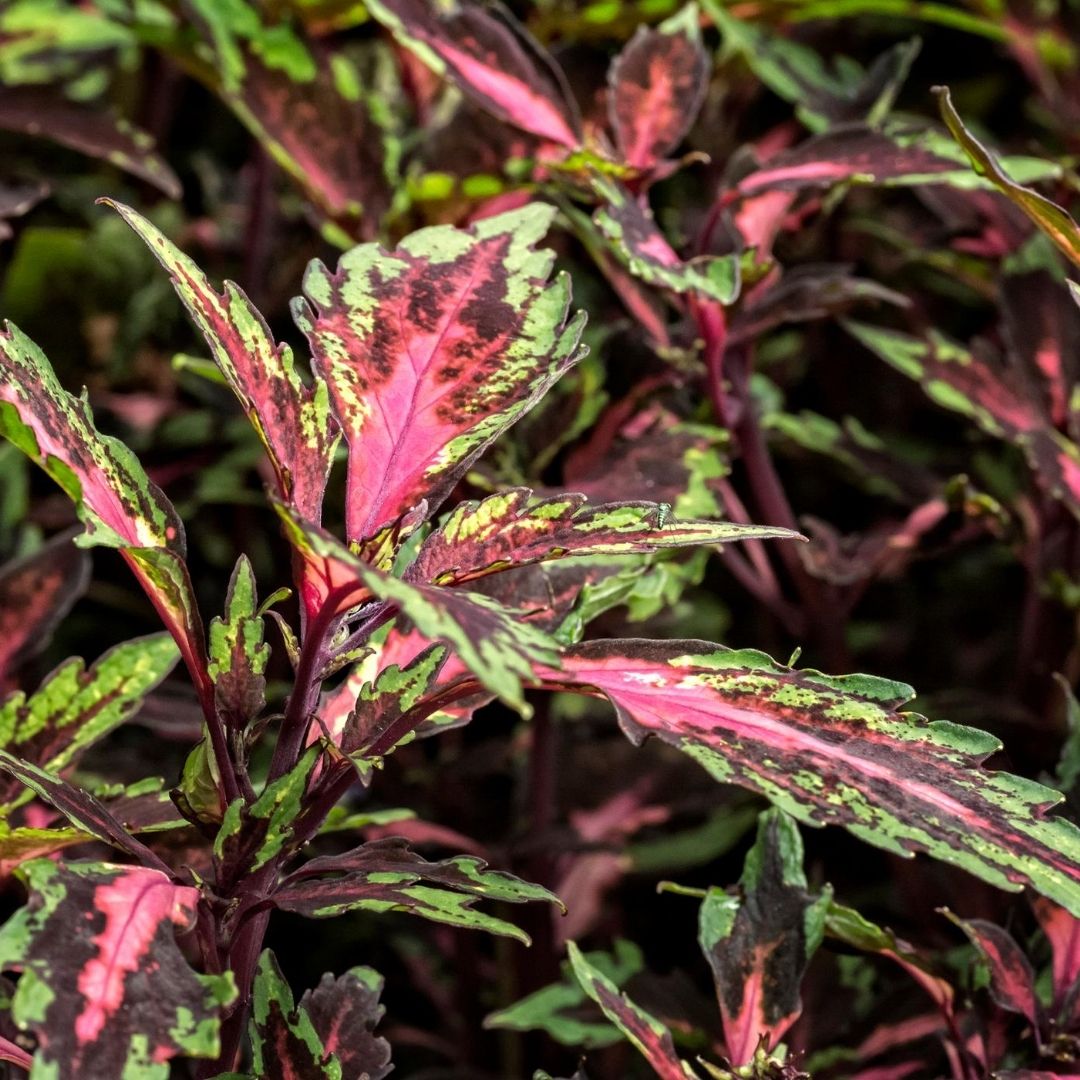
8. Calathea (Calathea spp.)
Calatheas feature striking, colorful foliage with unique patterns that add visual interest to your home. They thrive in indirect light and high humidity.

9. Prayer Plant (Maranta leuconeura)
Known for its moving leaves that fold up at night, this plant has beautiful patterns on its foliage. It prefers moist soil and low light, making it ideal for indoor environments.Prayer plants, also known as peacock plants are not only non-toxic plants, but they also do well in low light conditions. Along with bromeliads, prayer plants can also add a lot of color to a darker indoor space.

10. Peperomia (Peperomia spp.)
Peperomias are compact, easy-to-grow plants with a variety of leaf shapes and colors. They thrive in bright, indirect light and require minimal watering, making them perfect for busy households. It is also listed as one of the best air-cleaning plants, as well as one that is low maintenance and hard to kill! Just make sure that it isn’t overwatered. Let is get a little dry between waterings and both your plant and your pets will be safe and happy!

11. Baby Rubber Plant (Peperomia obtusifolia)
This small plant has glossy, thick leaves that are perfect for small spaces and low-light conditions. It is low-maintenance and prefers to dry out between waterings.
12. Pilea (Pilea peperomioides)
Also known as the Chinese Money Plant, this plant features round, coin-like leaves that add a playful touch to your decor. It prefers bright, indirect light and regular watering.

13. Friendship Plant (Pilea involucrata)
Known for its textured, quilted leaves and fast-growing nature, this plant is easy to propagate and share with friends. It thrives in bright, indirect light and moderate moisture.
14. Polka Dot Plant (Hypoestes phyllostachya)
This plant has colorful, spotted leaves that add a splash of color to any indoor space. It prefers bright, indirect light and consistently moist soil to keep its vibrant appearance.
15. Hoya (Hoya spp.)
Also known as the Wax Plant, Hoyas have thick, waxy leaves and produce fragrant, star-shaped flowers. They thrive in bright, indirect light and prefer to dry out between waterings. Known for its fragrant blooms, the wax plant is usually bought because of its aroma. When placed in the bedroom, this aroma is said to aid people in getting a more restful sleep! Just keep it in warmer temperatures to ensure overall health of the plant.

16. Lipstick Plant (Aeschynanthus radicans)
An attractive trailing plant with tubular red flowers resembling lipstick tubes, perfect for hanging baskets. It prefers bright, indirect light and moderate watering.
17. African Violet (Saintpaulia)
This popular flowering plant has fuzzy leaves and vibrant blooms in various colors. It thrives in bright, indirect light and prefers to be watered from the bottom to avoid leaf damage. African violets are not safe for human consumption, however. Often confused with wild violets (which are edible for human consumption), african violets are harmful if consumed by people. These are safe for pets, but do not purchase if there are small children in the home.

18. Christmas Cactus (Schlumbergera spp.)
The Christmas cactus is a great choice for anyone wanting fragrant blooms that are also safe. Though not as attractive without these blooms, the Christmas cactus can also be tricked into re-blooming. This isn’t for beginner plant parents, however, as it can be a long process to force new blooms. But if successful, these gorgeous flowers are worth it! Check out my post on how to get christmas cactus to bloom!

19. Zebra Plant (Aphelandra squarrosa)
An eye-catching plant with dark green leaves and striking white veins. It requires bright, indirect light and high humidity to keep its leaves vibrant and healthy.
20. Phalaenopsis Orchid (Phalaenopsis spp.)
Not all orchids are safe for pets. However, the phalaenopsis orchid is not only safe for cats and dogs, but the flowers are even safe for human consumption! Definitely an added bonus! These elegant orchids have long-lasting flowers that come in a variety of colors. They thrive in bright, indirect light and prefer to be watered sparingly, allowing the roots to dry out between waterings.

21. Dendrobium Orchid (Dendrobium spp.)
This diverse group of orchids features delicate, fragrant flowers that come in various colors. They prefer bright, indirect light and moderate watering, with higher humidity during the growing season.
22. Moth Orchid (Phalaenopsis amabilis)
A type of Phalaenopsis Orchid with large, moth-like flowers that can last for several months. It thrives in bright, indirect light and requires minimal watering.
23. Blue Echeveria (Echeveria glauca)
This attractive rosette-shaped succulent has blue-green leaves and is easy to care for. It prefers bright light and infrequent watering, making it ideal for sunny windowsills.
24. Haworthia (Haworthia spp.)
Small, rosette-forming succulents with unique, patterned leaves. They thrive in bright, indirect light and require minimal watering, making them perfect for busy households.

25. Burro’s Tail (Sedum morganianum)
This is a great succulent for anyone thinking about pet safety. A trailing succulent with fleshy, blue-green leaves resembling a donkey’s tail. It prefers bright light and infrequent watering, making it an excellent choice for hanging baskets. It is a great alternative to the string of pearls succulent, which is toxic to both dogs and cats. You can find it cheap by ordering cuttings. Then check out my post on Propagating Succulents to easily grow this fun succulent!
")
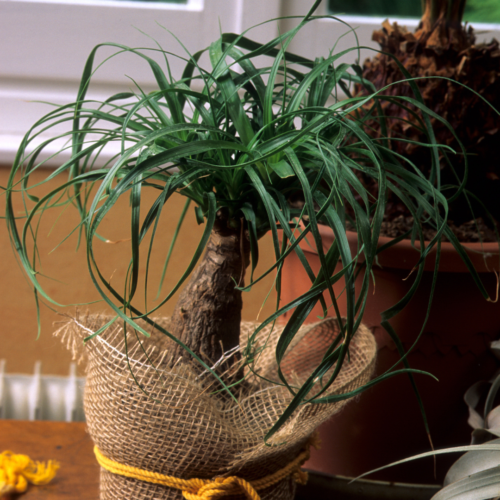
26. Ponytail Palm (Beaucarnea recurvata)
This unique plant has a swollen base and long, arching leaves that resemble a ponytail. It thrives in bright light and requires minimal watering, making it a low-maintenance option.
27. Rattlesnake Plant (Calathea lancifolia)
This distinctive plant has long, wavy leaves patterned with dark green spots. It thrives in indirect light and high humidity, making it perfect for bathrooms or kitchens.

28. Cast Iron Plant (Aspidistra elatior)
The Cast Iron Plant is not only non-toxic for pets, but is also a low maintenance, hard to kill, and low light plant. Aspidistra can easily replace a peace lily with its beautiful, lush foliage. An extremely hardy plant with long, glossy leaves that is perfect for low-light conditions. It tolerates neglect and infrequent watering, making it an excellent choice for beginners.

29. Bromeliad (Bromeliaceae)
These exotic-looking plants have bright, colorful bracts and rosette-forming leaves. They thrive in bright, indirect light and prefer to be watered in their central cup. As one of the brightest low-light houseplants, bromeliads have become quite popular in the interiors. Not only are they bright and cheery, but they are also safe for your furry friends!

30. Guzmania (Guzmania spp.)
A type of bromeliad with vibrant, long-lasting flowers and arching leaves. It thrives in bright, indirect light and high humidity, making it a stunning addition to any room.
31. Tillandsia (Tillandsia spp.)
Known as air plants, these unique plants require no soil and come in various shapes and sizes. They thrive in bright, indirect light and need regular misting to keep their leaves hydrated.

32. Spiderwort (Tradescantia spp.)
A trailing plant with purple and green striped leaves that is easy to propagate. It thrives in bright, indirect light and prefers to be kept slightly moist.
33. Purple Waffle Plant (Hemigraphis alternata)
This small plant has crinkled, purple-tinged leaves that are excellent for low light. It prefers high humidity and regular watering to keep its leaves vibrant and healthy.
34. Staghorn Fern (Platycerium spp.)
A unique fern with antler-like fronds that is often mounted on plaques for display. It thrives in bright, indirect light and requires regular misting to maintain its moisture levels.

35. Aluminum Plant (Pilea cadierei)
This compact plant has silver-striped leaves and thrives in indirect light. It prefers to be kept slightly moist and is easy to care for, making it perfect for beginners.
36. Watermelon Peperomia (Peperomia argyreia)
This attractive plant has leaves resembling watermelon rind patterns. It thrives in bright, indirect light and prefers to dry out between waterings, making it an excellent choice for busy households.
In wrapping up, remember that our homes can be a haven for both our plants and our pets with a little bit of knowledge and a lot of love. Balancing our green thumbs with our love for our furry companions doesn’t have to be a daunting task. With the insights we’ve shared, you’re now well-equipped to cultivate a living space that flourishes in harmony. Here’s to our pets, our plants, and the peace of mind that comes with knowing we’re creating a safe, vibrant environment for all our loved ones. Happy digging!
Pet-Safe Houseplants FAQs
A pet-safe houseplant is one that is non-toxic and poses no risk if ingested by pets such as dogs or cats. These plants are generally free from any chemicals or compounds that could lead to health issues like digestive upset, poisoning, or worse in pets. It’s crucial to research or consult resources like the ASPCA to ensure a houseplant’s safety before introducing it to a home with pets.
The best way to determine if your existing houseplants are safe for pets is to identify each plant by its common or botanical name and refer to a reliable source such as the ASPCA’s comprehensive list of toxic and nontoxic plants. Additionally, consulting with a veterinarian or a local poison control center can provide assurance and safety for your pets.
If you suspect your pet has ingested a part of a plant that’s not pet-safe, it’s imperative to act quickly. First, try to identify the plant ingested and then contact your veterinarian or an emergency animal poison control service immediately for advice. They can provide specific instructions and may recommend bringing your pet in for examination. Quick action can make a significant difference in ensuring your pet’s health and safety.
Yes, many pet-safe houseplants also possess air-purifying qualities that can benefit your home environment. Examples include spider plants and certain varieties of palms, which are known for removing pollutants from the air while being safe for pets. These plants offer a win-win situation by enhancing indoor air quality and ensuring the safety of your furry friends.
Adding new plants to your pet-safe houseplant collection can depend on various factors including your living space, the care needs of your plants, and your ability to maintain them. It’s important to introduce new plants gradually to ensure they thrive and do not overwhelm your space or your existing plant care routine. Additionally, make sure each new plant is thoroughly researched to be pet-safe before bringing it into your home.


")