How to Choose the Best Pots for Succulents (+5 Faves)

Have you been eyeing a new succulent lately? Or maybe you have a growing collection and just need a new pot? Whether you’re a beginner or a succulent expert, we all need to have one thing right in our succulent care. And that is… we need to choose the right pot!

So what are the best pots for succulents? Today I’m going to tell you exactly what works and what doesn’t work for succulent pots, as well as give you some recommendations of my personal faves. Then if you still have questions, check out my “Frequently Asked Questions” section at the bottom of the page. Or just scroll down to see my top 5 best succulent pots!

Ready?! 

Let’s dig in!

**Note: This post may contains affiliate links, which helps support this website, at no extra cost to you!**

Click here to subscribe

What Makes the Best Pots?

There are three keys that you need to look for in the right container. The perfect succulent pot would consider:

  • Drainage
  • Material
  • Size

Let’s address these things one at a time.

#1: Proper Drainage

I’m sure you’ve heard it before, but let me stress this fact… succulent pots NEED drainage holes!!!!

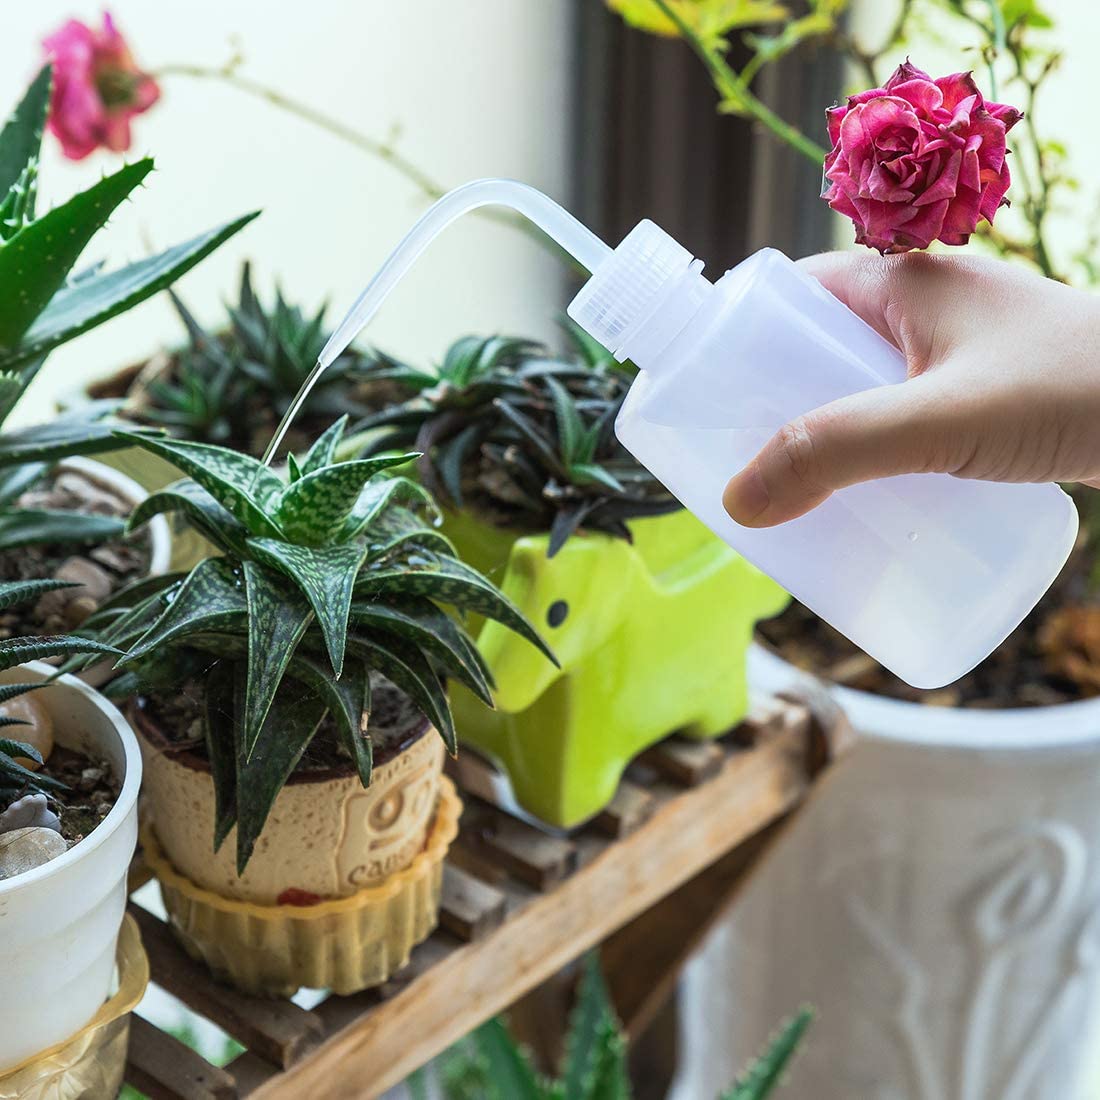
Technically, you CAN keep succulents alive in pots without drainage holes by simply adding only small amounts of water at a time. I know, because I’ve done this. But speaking from experience, these succulents never thrive like the succulents that I have in my pots with good drainage. This is because when your pots have proper drainage, you can water your plant as much as you want at each watering and the excess water will simply drain out.

But with pots that have no drainage holes (such as the pretty glass containers they show on Pinterest), these pots will leave you to always be fighting your moisture levels, since one little extra watering could potentially kill your whole plant. Personally, I tend to under-water these succulents to avoid accidentally giving them too much water. But as a result, my succulent plants are never as healthy.

So long story short… get a pot with drainage holes! Just do it!

#2: Pot Material

I would argue that pot material is the least important thing out of the three keys for choosing the best pot for succulents. This is because pot material alone will not kill your succulents.

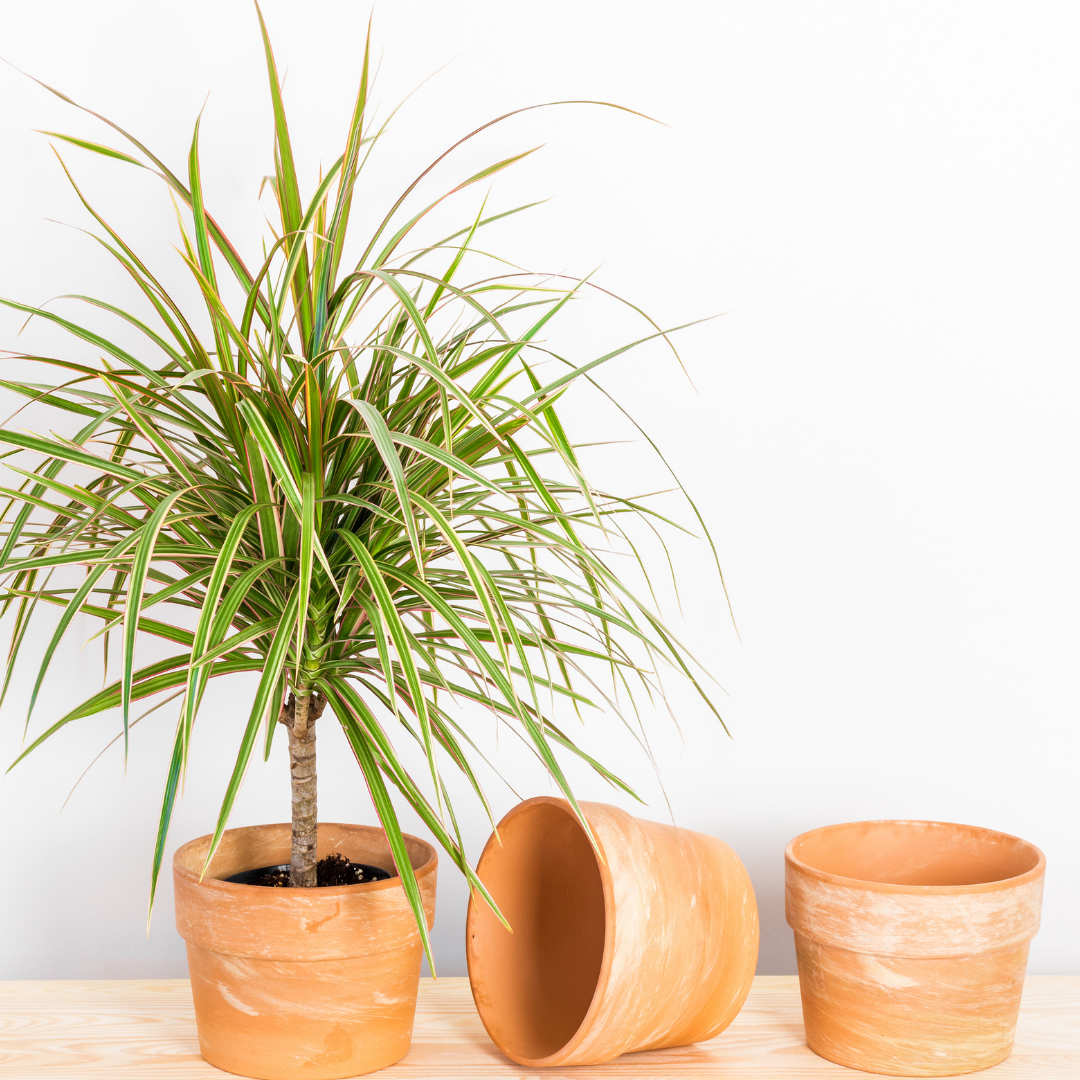
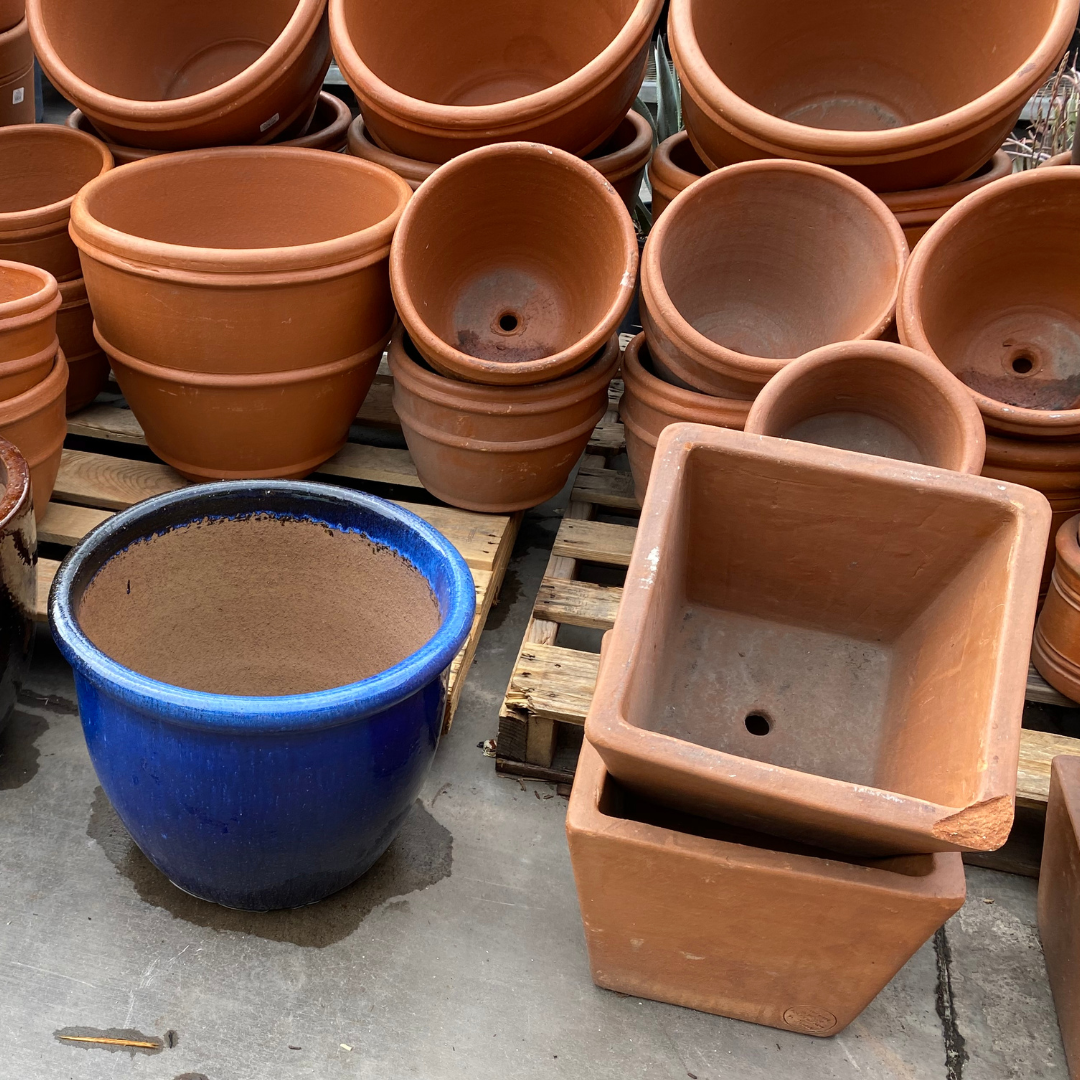
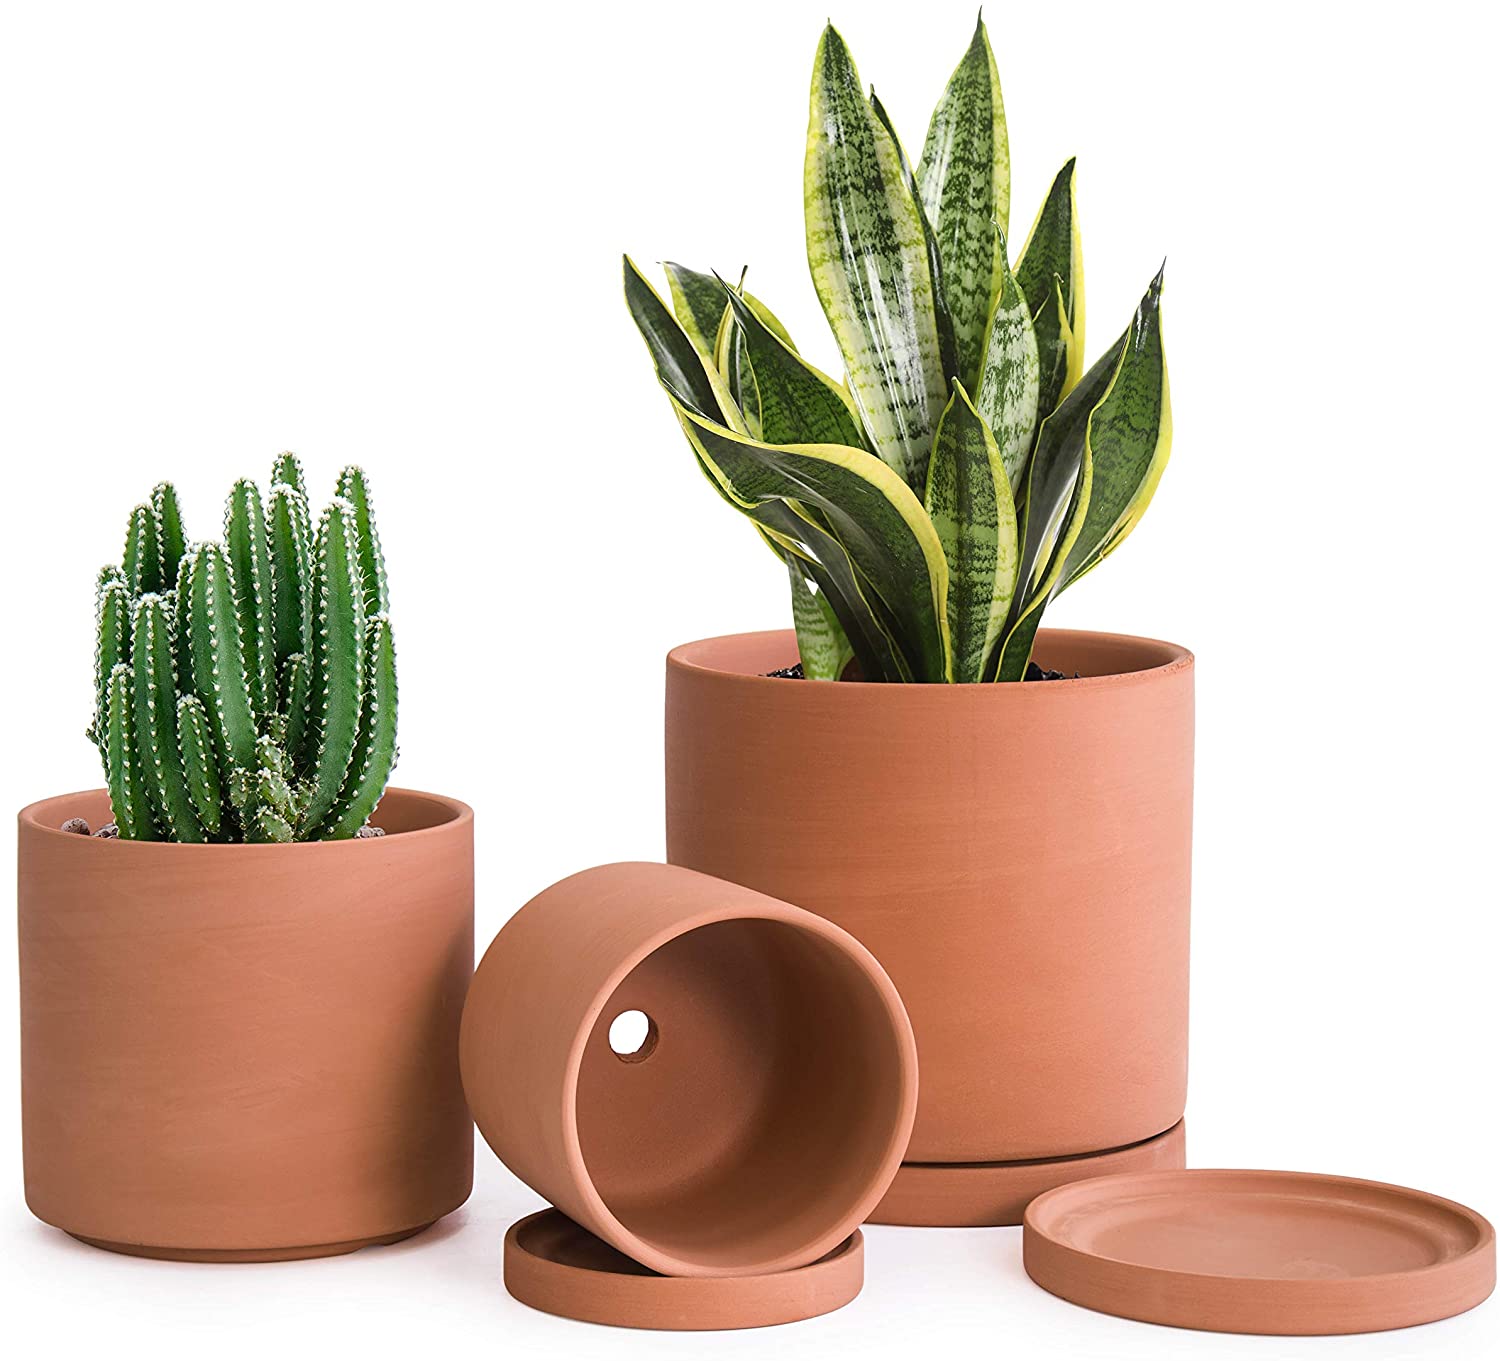
Terra Cotta/Ceramic Pots

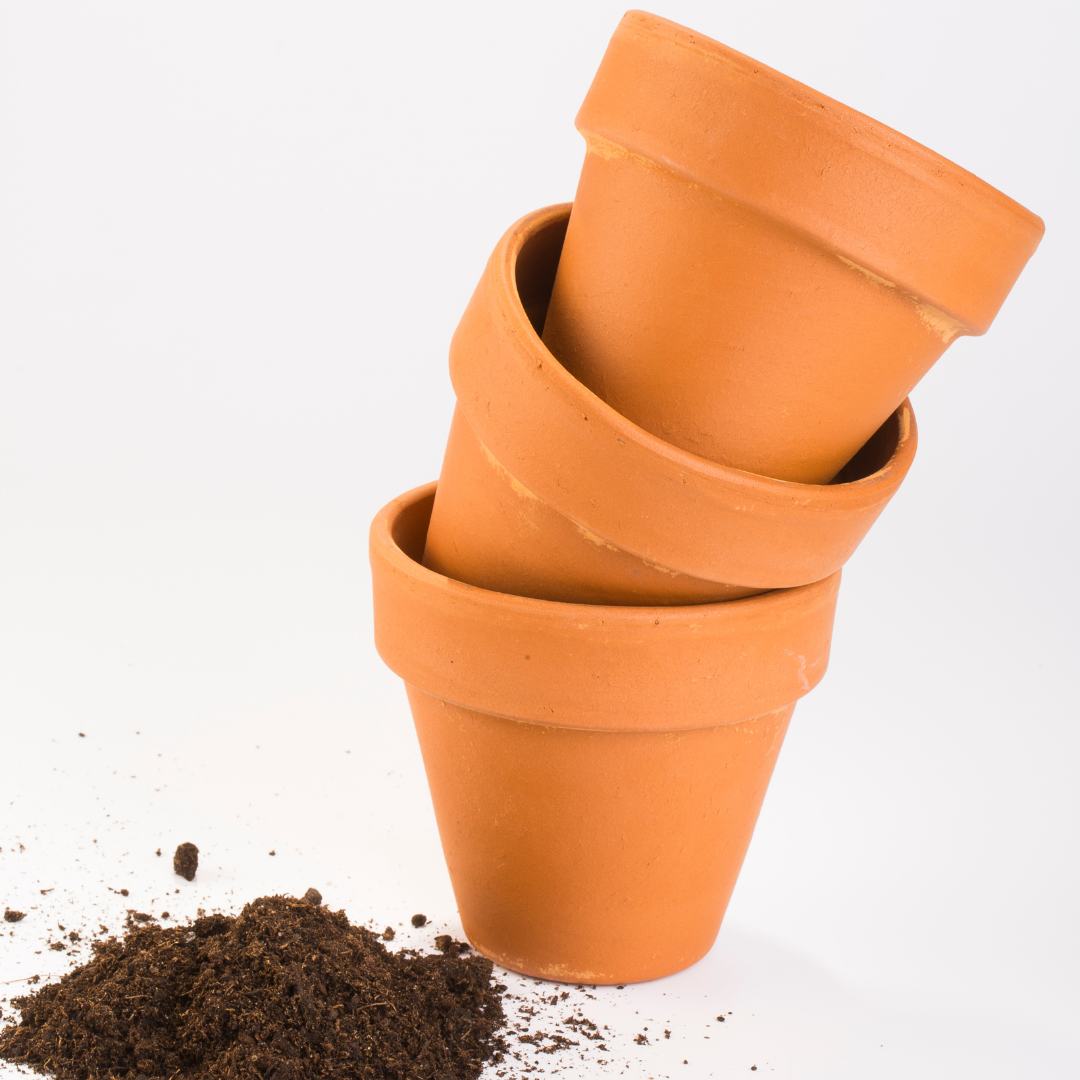
Terracotta pots, or ceramic pots, are definitely the best choice for succulent pots. This is due to the fact that the clay can actually soak up some of the excess moisture, giving your plant a little extra buffer between wet and dry phases. Be careful in the winter, though, as wet ceramic pots (in cold temperatures) can take longer to dry out. This could potentially cause overwatering problems for people who tend to water too much in the winter.

So the best pot material for succulents is terra cotta pots, unless you tend to overwater your plants during the winter. 

Plastic Pots

Plastic pots and plastic containers are also a fine choice for succulents as long as they have sufficient drainage, are heavy enough to not tip over, and are not left outdoors.

Some succulents grow more vertically and can become top heavy. Plastic pots are usually lighter and easily fall over in these situations. To fix this, use sand instead of perlite in your succulent soil mix. This will help to weigh down any tipsy pots!

Next, if you are keeping your succulent outdoors, I do not recommend using plastic pots. This is first because of their higher chances of falling over due to their low weight. Second, plastic pots have a tendency to heat up and dry out faster when exposed to high temperature than clay pots or concrete pots. And third, plastic pots can freeze and deteriorate quickly in very cold climates. This is why I only recommend plastic pots for indoor use.

Metal Pots

Metal pots and metal containers usually have the same heat issue as plastic pots. For this reason, you should keep a metal pot indoors only. If you want to move your succulents outdoors, then a good choice would be a terracotta or concrete pot.

Concrete Pots

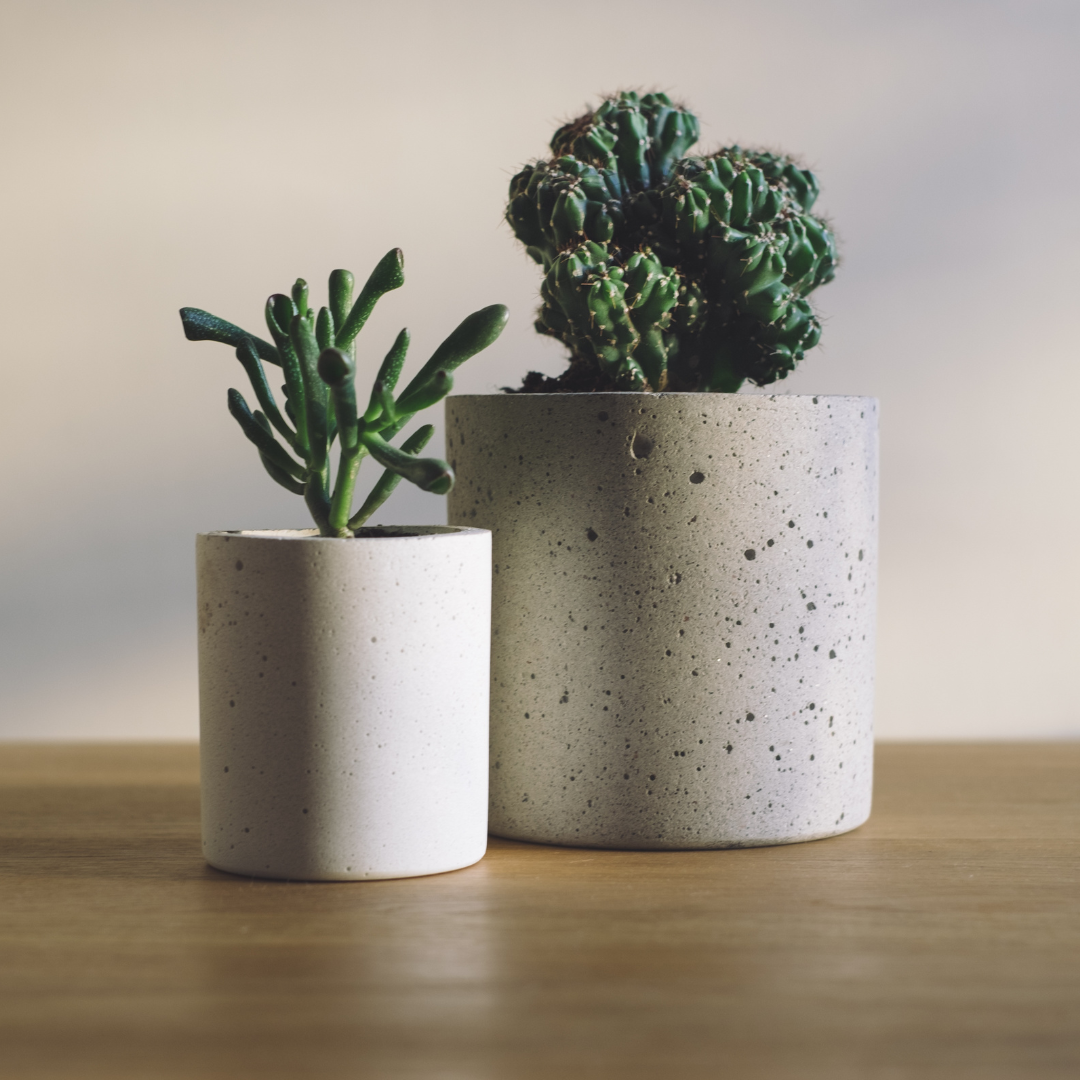
Concrete pots are similar to clay pots in that they are both a breathable material. Concrete pots are particularly good in outdoor spaces where they will be durable and protective to your succulents. Just be sure to keep in mind that real concrete pots can be extremely heavy. This is good for areas that are prone to high winds (especially if you live within hurricane areas), since your concrete planters will be sure to protect your plants when the weather gets tough!
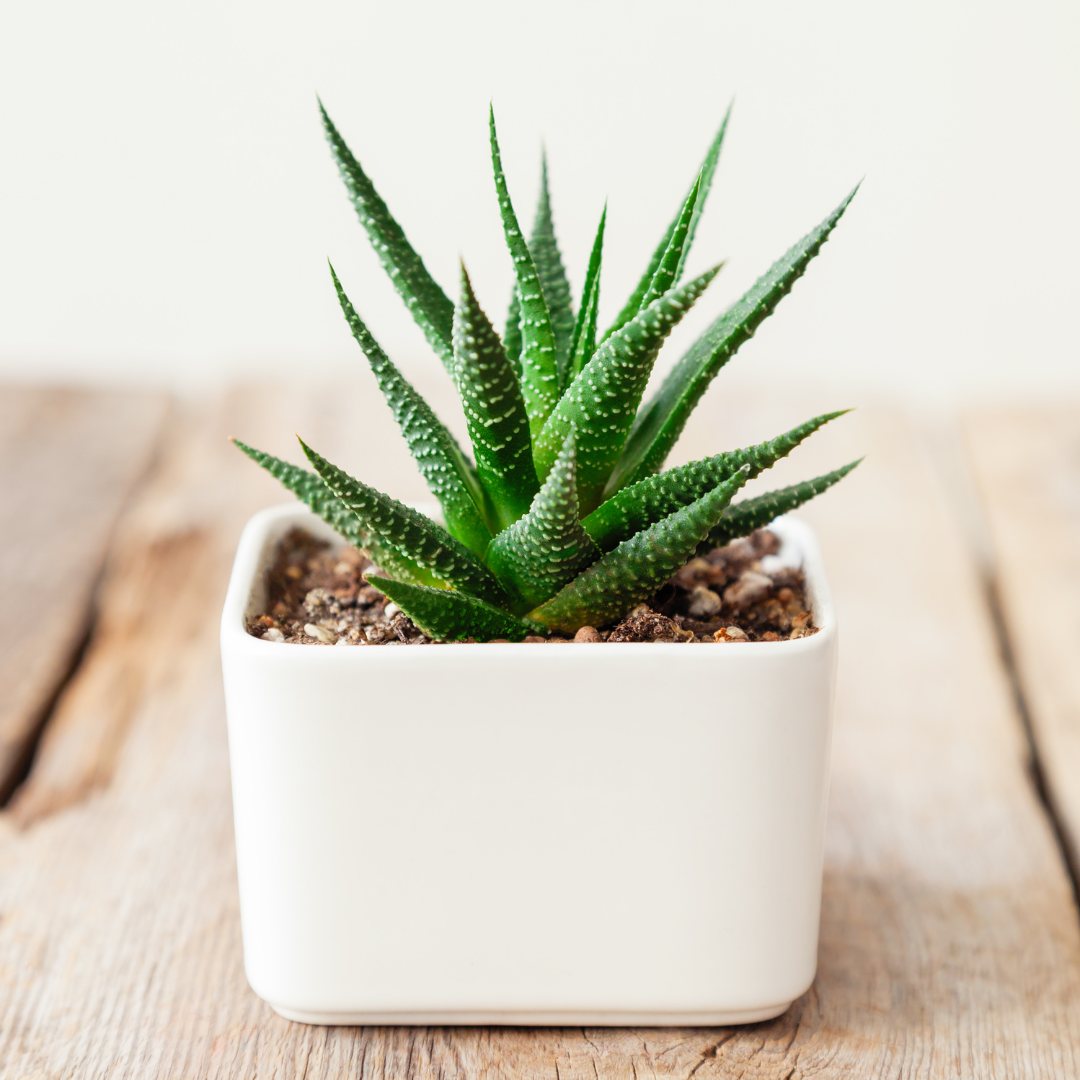
#3: Size of Pot

Pot size is, in my opinion, the MOST OVERLOOKED problem of succulent killers. Because if your pot is too big, your succulent will die!!! 

This is more of a water problem than a size problem. If you have a large pot, then you will have lots of soil that will be wet. This soil will have water where the small plant roots can’t reach. This extra, unreachable water will cause too much moisture to sit for too long and will lead to root rot.

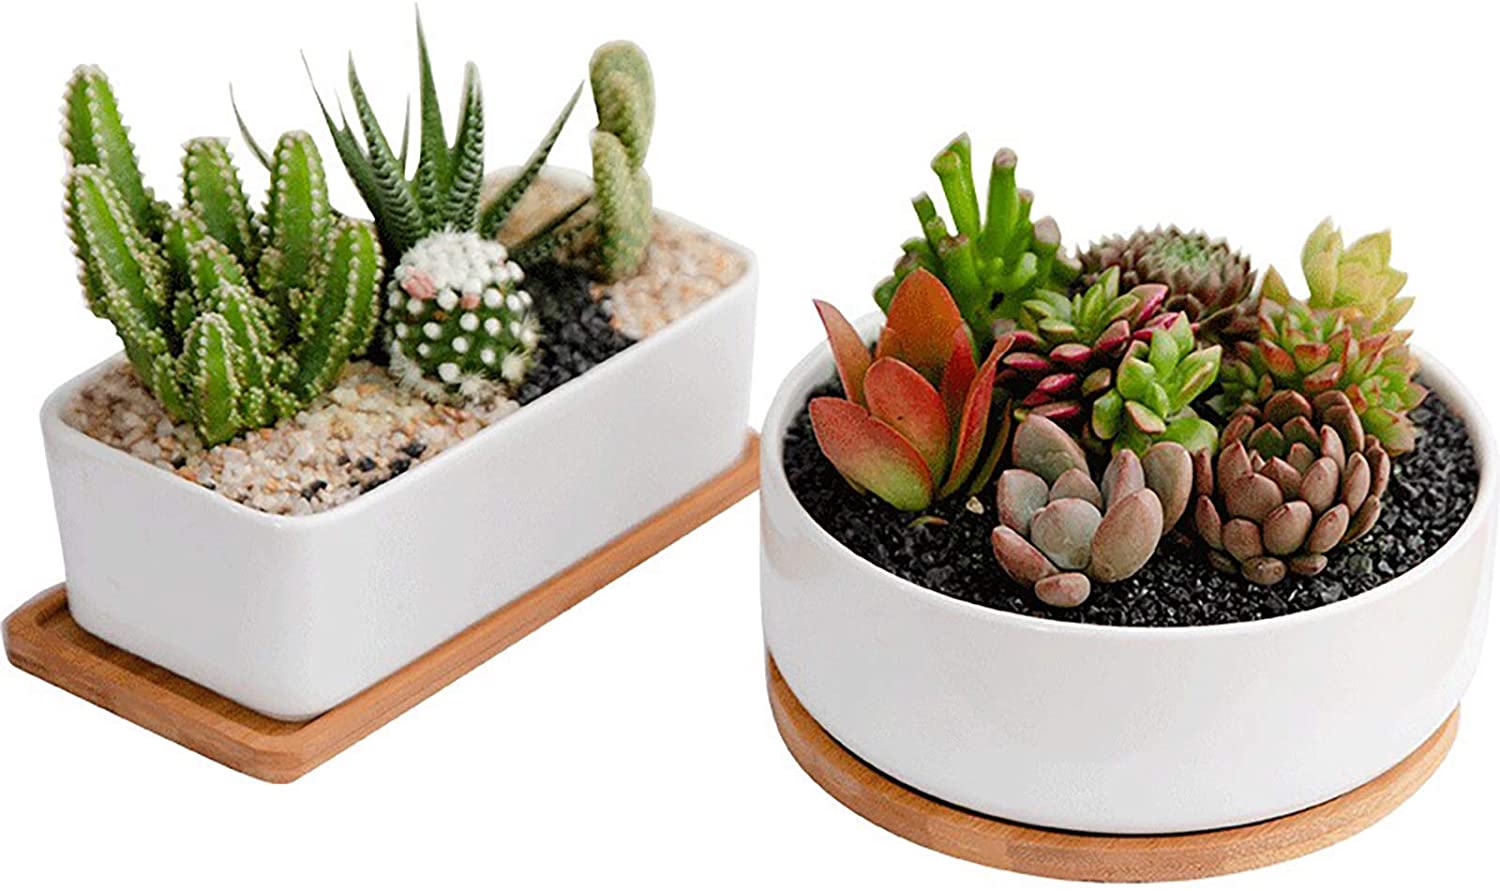
Even with proper drainage, you need to make sure that the walls of your pot are only an inch or two bigger than your succulents’ current pot (on all sides). This is why a lot of succulent planters tend to be shallow pots that can fit a few succulents together in an arrangement, but that are still shallow enough that the small roots can still reach the bottom of the pot.

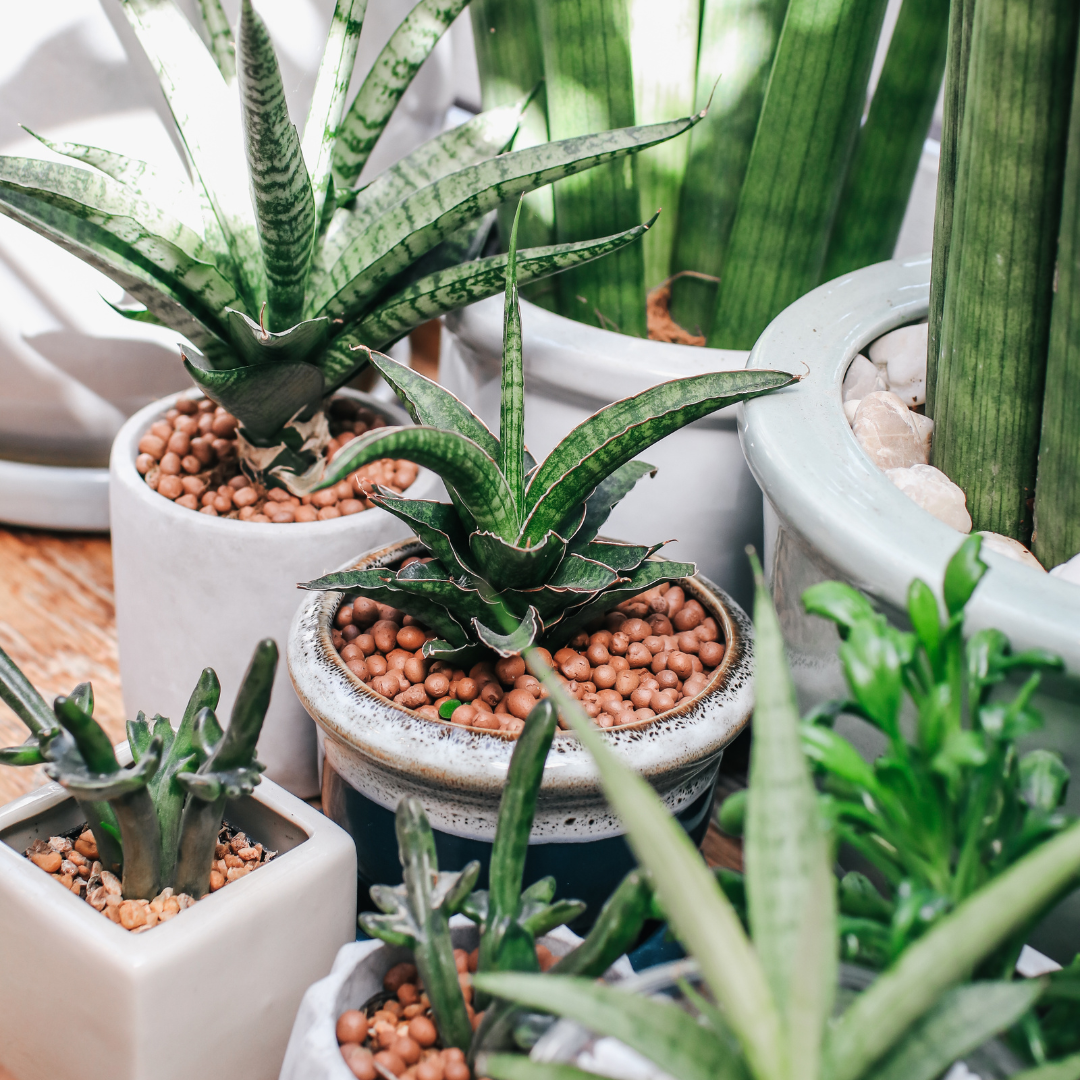
Potting Multiple Succulents Together

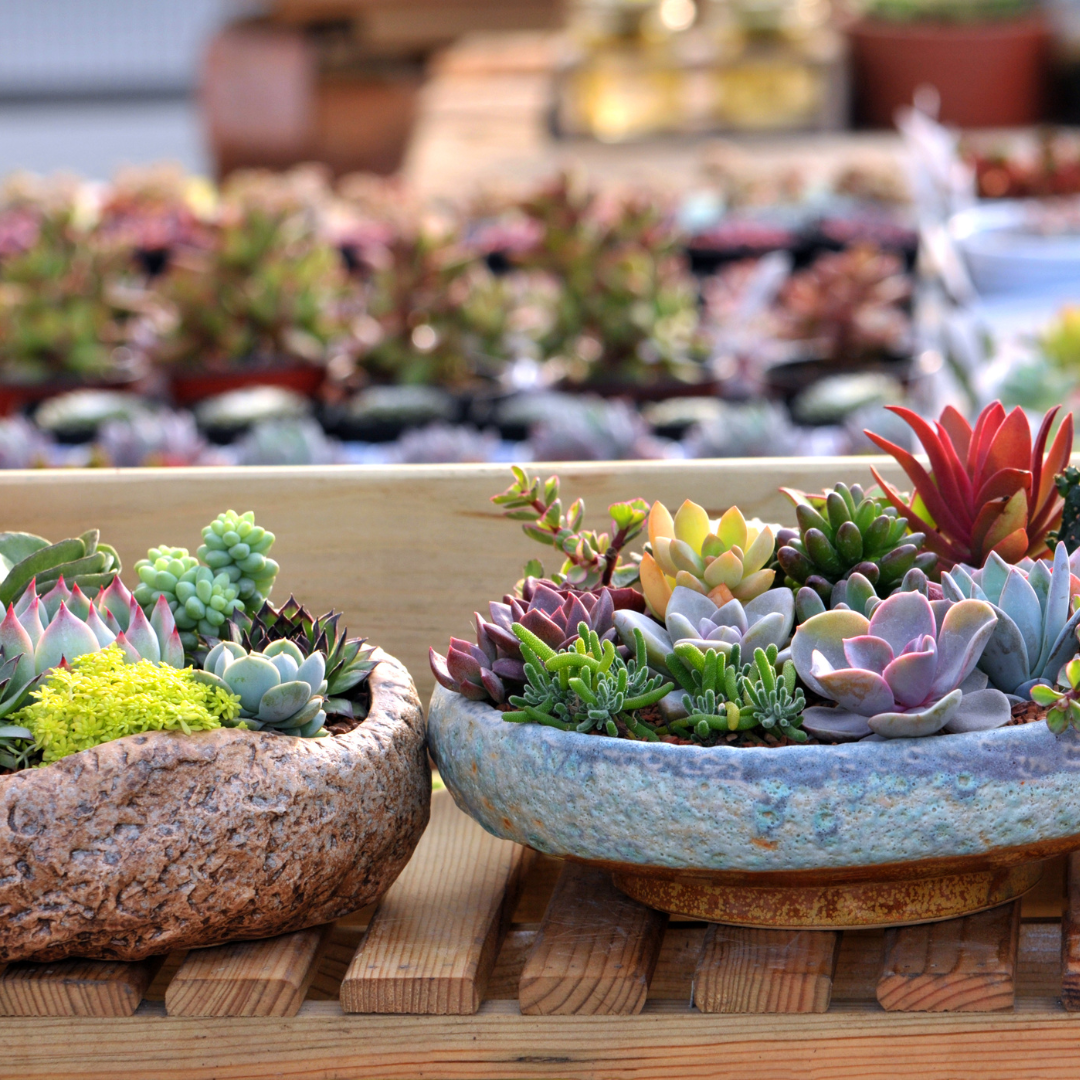
If you want to pot multiple succulents together in a succulent arrangement or succulent planter, then your best bet is to buy a large, shallow container. Then, make sure that it is stuffed full of succulents! This will help it have enough roots everywhere so you won’t have those pockets of soil that the roots can’t reach…

Pot Recommendations:

  • All-Around Favorite: D’vine Dev Terracotta Pots
  • Best for Shorter Succulents (And Best Value!): Brajtt Plant Pots
  • Best for a Group of Succulents: Kimisty 10 Inch Round Succulent Planter Bowl
  • Best for Hanging Succulents: Mkono 8 inch Ceramic Hanging Planter
  • Best for Large Succulents: Aveyas 6/8/10 inch Ceramic Planter Pot

#1: All-Around Favorite – Terracotta Pots by D’vine Dev

These pots are fantastic because they are not only terracotta pots, but they also have drainage holes, the perfect-fit saucer, a drainage net (to keep the soil from coming out), and a “scratch pad” to put under your pot. This ensures that your pot has great drainage, but also that it keeps your surfaces dry and scratch-free! 

These guys have really thought of everything that an indoor succulent grower needs out of a pot. And that’s why it’s my all-around favorite set of succulent pots!

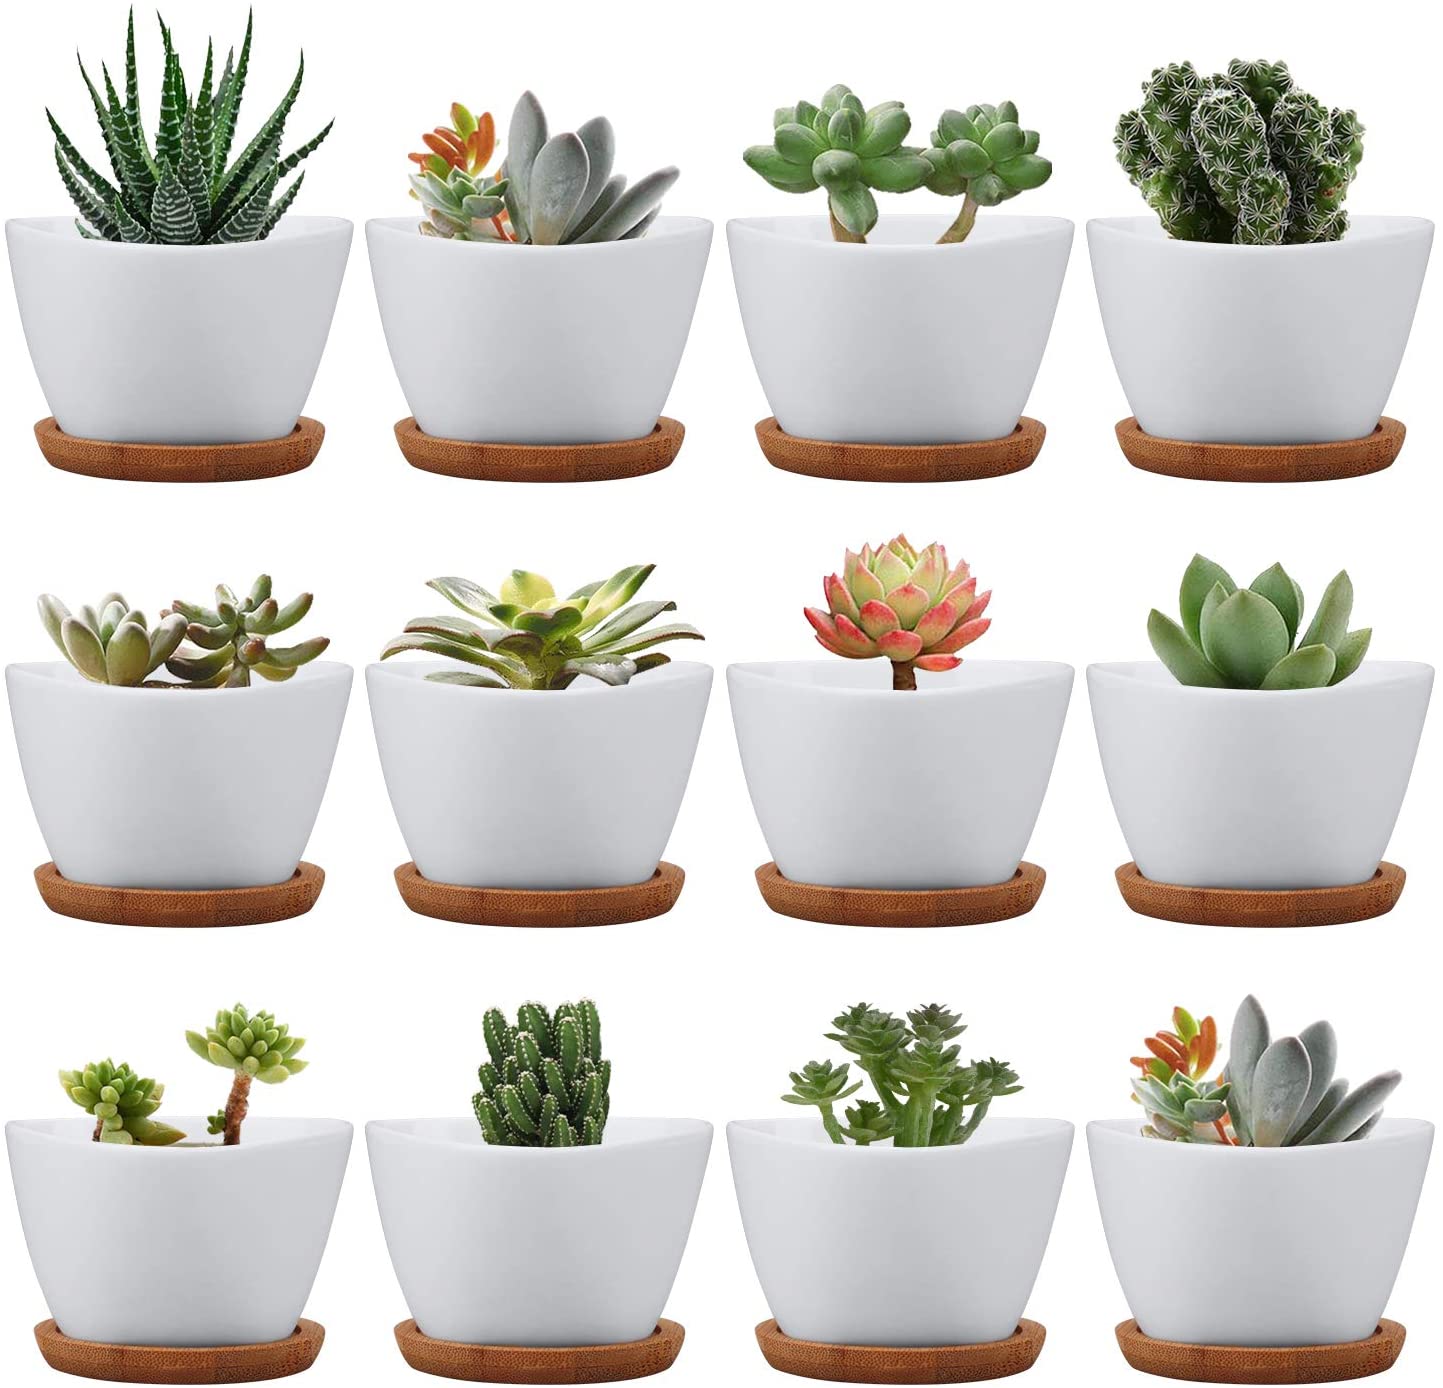
#2: Best for Shorter Succulents (And Best Value) – Brajtt Succulent Pots

These white, modern pots are perfect for your shorter succulents that don’t have deep root systems. I love that each pot has a small drainage hole, and they come with a functional, stylish bamboo tray to catch any excess water before it stains your window ledge.

And to get 8 pots for only $14.99 (at the time of writing this post)… that’s an AMAZING deal!!!

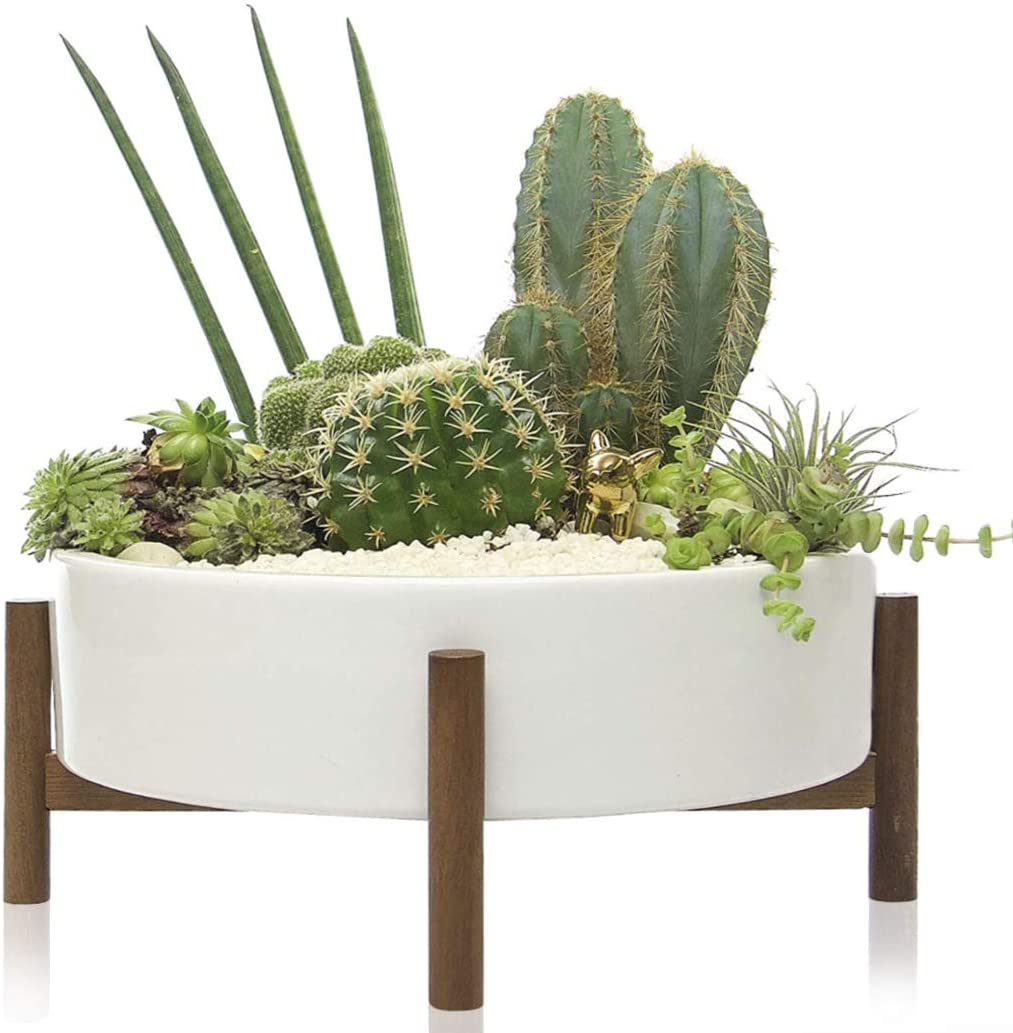
#3: Best for a Group of Succulents – Kimisty 10 inch Round Succulent Planter Bowl

This planter dish is perfect for succulent arrangements or succulent gardens! It is a glazed ceramic pot with a drainage hole and a plug (to keep your surfaces clean!). It also has a gorgeous, airy stand and white decorative rocks to make your succulent garden go from amateur to professional!

I especially love the size of this planter dish, since most are only about 6” long. With this dish coming in at a solid 10” diameter, (choose the “large” size), it fits a lot of succulents!

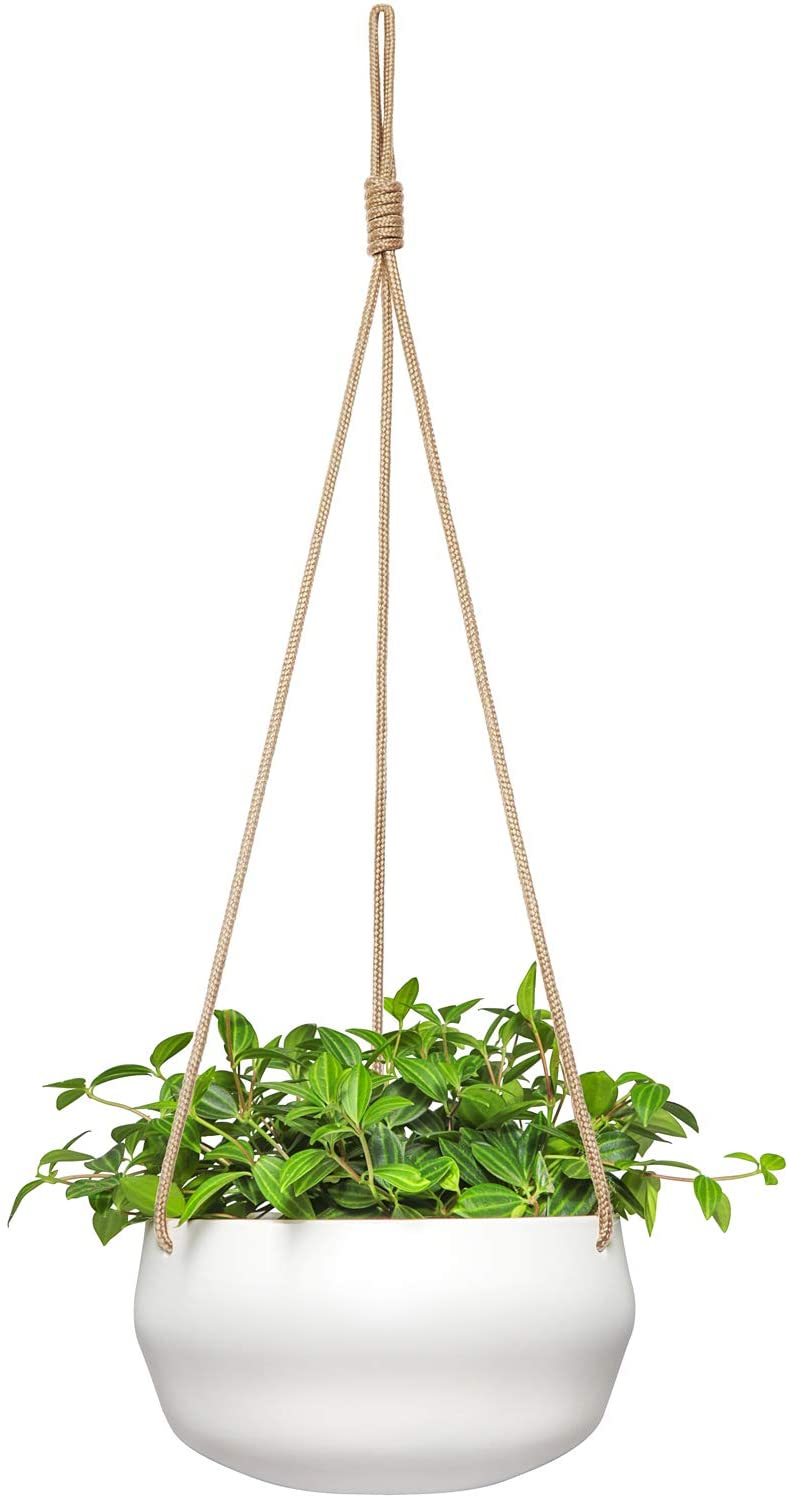
#4: Best for Hanging Succulents – Mkono 8 Inch Ceramic Hanging Planter

I searched far and wide for the perfect hanging succulent planters, and this is the one that I finally discovered!

It is a sturdy glazed ceramic pot that comes with a removable drainage plug for excess water. It also comes with a rope and pre-drilled holes, so all you need now is a strong hook! This hanging pot is suitable for indoor or outdoor use.

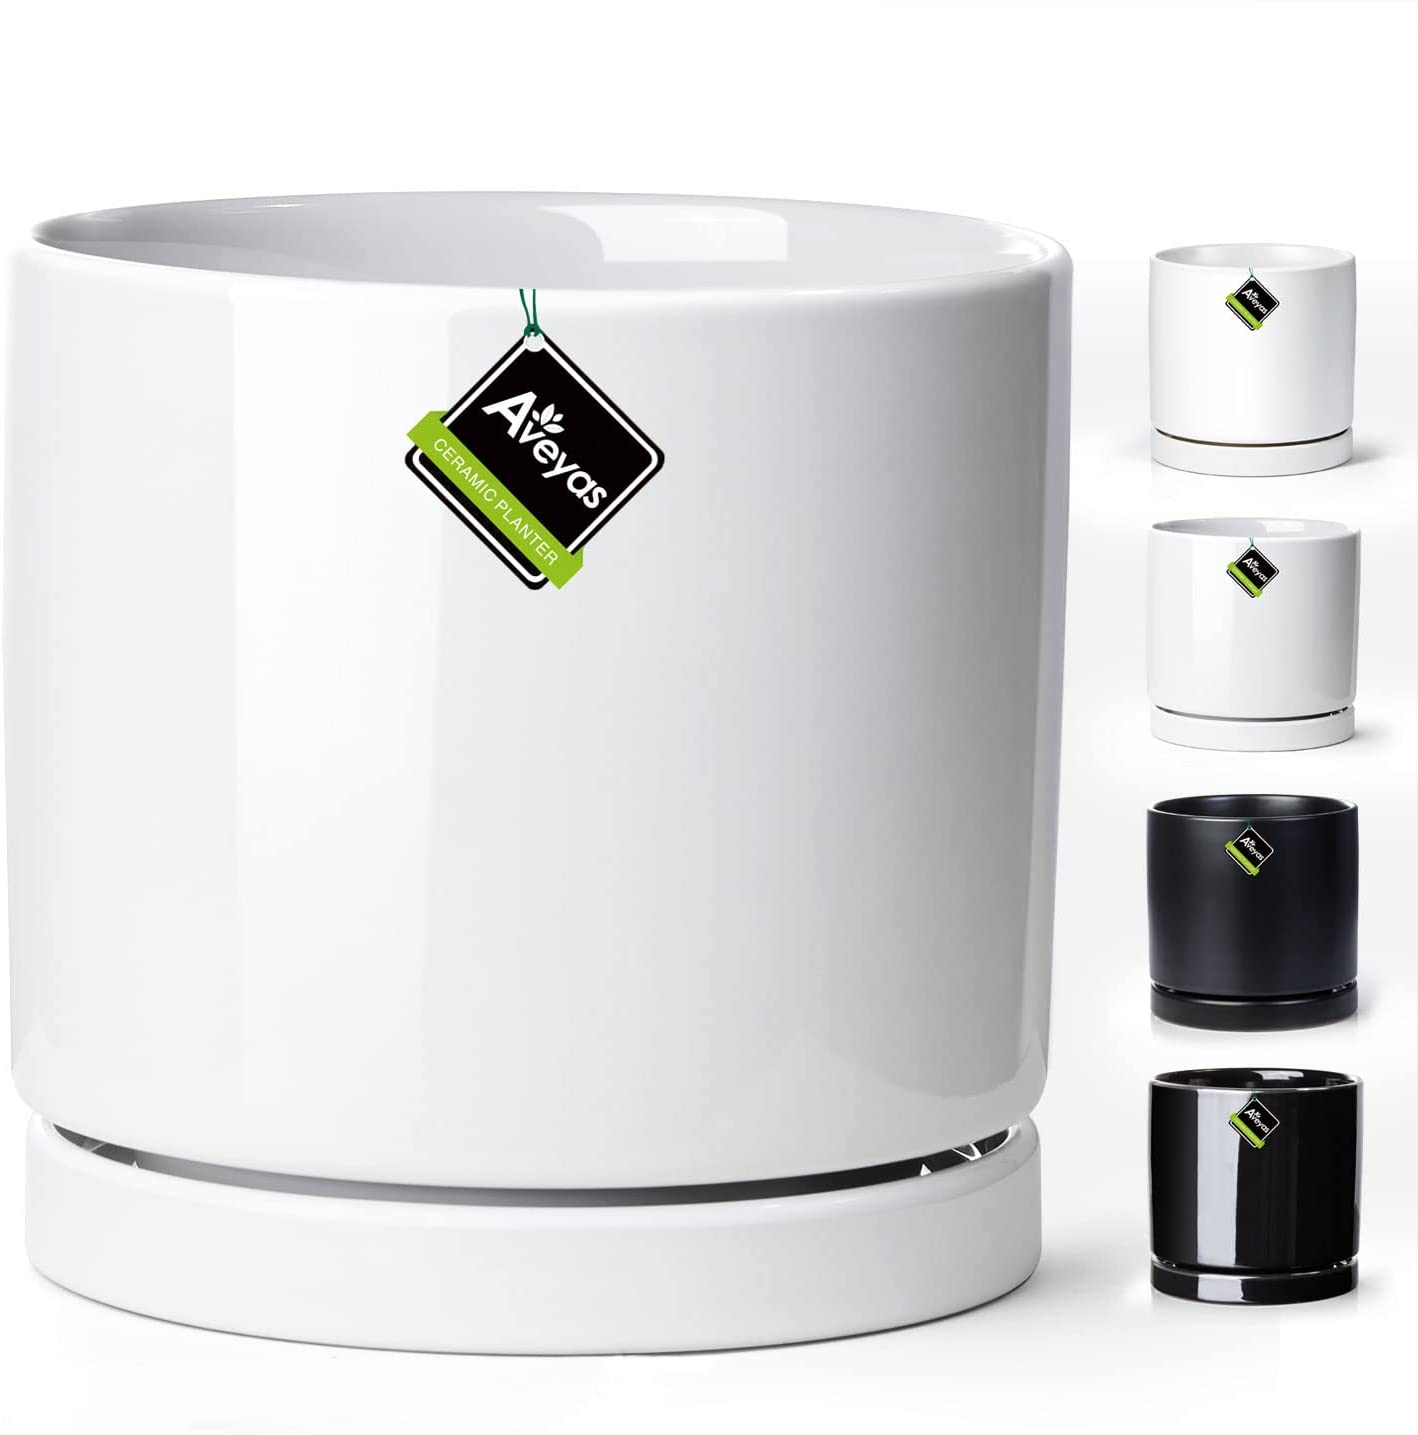
#5: Best For Large Succulents – Aveyas 6/8/10 Inch Ceramic Planter Pot

This sleek, modern pot is perfect for larger succulents! It comes with both a drainage plug and a saucer so you can really control the pot’s drain holes and protect your furniture. This pot also comes with a matching pot stand, a drainage net, and planter filler to add even more drainage to the bottom of your pot!

Your large succulents are definitely going to enjoy being in one of these!

Those are my best pots for succulents! If you still have questions, check out the frequently asked questions below, or join my plant community on Facebook, Houseplants for Plant Killers!

Then if you’re looking for your next step in your succulent journey, download my free resource, the Succulent Care Guide!

Happy Digging!

Frequently Asked Questions:

Do succulents need deep pots?

Larger succulents need deep pots, but small succulents would die in deep pots. The trick is to plant your succulent in a pot that is only an inch or two deeper than its current pot. This way, the root system will be able to reach the water all the way at the bottom of your pot.

Do succulents grow better in pots?

Most plants grow better when planted in the ground. However, if your environment isn’t hot and dry, then your succulents would actually prefer to be in a pot, where they will have better drainage and can be brought indoors when it gets cold or damp.

Can succulents stay in small pots?

Some small succulent varieties will stay perfectly happy in their small pots. However, some larger succulents will grow to where they don’t have enough room and will eventually need to be repotted into larger pots. This all depends on your type of succulent and its mature size and growth habit.

Do succulents like to be crowded?

Yes. If your succulents are in a wide pot, they do better if they are crowded. This lessens the possibility of your pot having drainage issues. It also makes the most beautiful succulent arrangements. So feel free to pack them in!

Do you put succulents in plastic pots?

Yes, you can. Just make sure that your pot still has good drainage. Don’t use plastic pots for outdoor succulents, though, as these tend to heat up, dry out, and fall over more than ceramic pots. For indoor use, however, plastic pots will be just fine.

What is the easiest succulent to grow?

There are a number of succulents that are easier to grow than others. These include haworthias, echeverias, and sedums. For a complete list, check out my post 12 Easiest Succulents to Grow Indoors.

How often should you water a succulent?

Generally, you should water your succulents once the soil has become dry, but before it begins to pull away from the sides of your pot. This is usually between every five to seven days, depending on the amount of sunlight, temperature, and season. Check out my post “How Often Should I Water my Succulent” for more details.

Click here to subscribe

The Ultimate Guide to Pothos Plant Care [+Free Care Pages!]

Pothos, or Epipremnum aureum, is a fantastic plant for anyone wanting a little more green in their home… It is one of the easiest tropical plants to grow and I recommend it to everyone. Especially to those who think that they can’t grow anything. Pothos is also listed as one of NASA’s top list of plants that clean the air! And if that isn’t enough, here are also some awesome tips to help you with your pothos plant care. Enjoy!

Click here to subscribe

Pothos Vine Care: Light Requirements

There are many different types of Pothos, or devil’s ivy, that are sold in garden centers today. The most common ones are:

  • Golden Pothos (green with a yellow pattern)
  • Marble Queen Pothos (green with a white pattern)
  • Jade Pothos (simply, but elegantly green)
  • N’Joy (a variegated white and green leaf)
  • Pearls and Jade (similar to N’Joy but usually has more white along the outside edges)
  • Neon Pothos (a fun, bright green variety)
  • Cebu blue (an Epipremnum pinnatum, with long, blue-green leaves)

As it goes, the brighter the leaf, the more bright indirect light it needs. The darker leaves can withstand lower light levels, but if you want larger leaves, then give it more light!

For example, Neon would like the brightest light, then Marble Queen, Golden, and finally Jade doesn’t do well in too bright light. However, all Pothos varieties can still grow and do well in low light conditions. They will just eventually lose their colors and all start to look like the normal Jade Pothos when in low light conditions. This is totally fine, but if you are absolutely devastated that the colors are leaving, then just move it to a brighter location.

One thing to remember with lighting, though, is that Pothos does not like to be in direct sunlight! This will cause the leaves to start looking dull and they may even turn a pale-yellow color. This is a sign of a “plant sunburn” from too much light. So adjust accordingly. If your pothos is losing its variegation and colors, then this is a sign of too little light. However, if your plant is turning a pale yellow, too much light. Simple, right?!

Pothos Vine Care: Water Requirements

As for watering, pothos plants can be easier than most indoor plants, but there are a few points to consider. This is because pothos can do well growing in a pot with soil, or can grow in straight water! But if your plant has been living in soil, you don’t want to put it in straight water and vice versa. These plants adapt very well so if it’s in soil, then only water when the top inch of soil has dried. Too much water and they will start to rot. But if it’s in water, then keep it in water and just make sure that the water is changed out every two weeks.

Pothos plants can adjust from water to soil, but they need to be well-watered during this transition.

If your leaves are a bright yellow color, then your plant is too dry. You can let the leaves get a little wilted before watering, but if they curl or turn yellow, then you’ve waited too long. On the flip side, if your plant’s new and older growth turns black, then this is a sign that it is either being over-watered, or that the air temperature is too low. (They don’t like being in air colder than about 50° F.)

Pothos Vine Care: Fertilizer & Pot Choice

Remember that Pothos in soil like to get a bit root-bound, so don’t re-pot it until the roots have filled out the container. They can also be fertilized once every two to three months during the summer. Only be careful because too much fertilizer (large amounts every week) can cause stunted growth. Personally, I feel that Pothos generally grows fast enough and doesn’t need any additional fertilizer, but it is really up to you. If you want a plant with huge, 2 foot leaves, then it’ll need fertilizer and plenty of light.

Also, make sure that your pot has at least one good drainage hole in the bottom of the pot. This is recommended for all houseplants as excess water can pool at the bottom of your pot, causing root rot, which is one of the few ways this plant could potentially die. If you tend to have problems with knowing when to water your pothos, I would recommend using a self-watering pot.

Quick story with this self-watering pot… One day last year I came home with two 3″ pothos (a golden and a marble queen). I placed them both in my office, and loved them so much! But a few weeks after purchasing, I received a few self-watering pots in the mail. So, my golden pothos ended up getting placed in a self-watering pot directly underneath my plant light, while my marble queen was left in her 6″ pot near the light, but not directly under it…

Fast forward about three months, and my golden pothos was DOUBLE the size of my marble queen!

This just shows how much a plant light and a self-watering pot can do to make your plant LOVE YOU!!!

*Update: Since this experiment, I have switched my marble queen to a self-watering pot, and she is starting to grow like crazy too, even though it’s winter time (aka NOT the typical growing season!)*

Pothos Vine Care: Pruning Tips

A lot of people also have a hard time keeping their Pothos from becoming too long and thin. We want a bushy-looking, full trailing vine. This only comes with regular trimming. Simply cut off the ends of the vines every month or so. You can either re-pot them in a light potting mix, such as vermiculite, or simply grow them in a glass of water. This will not only make your plant look healthy and vibrant, but will also give you plenty more little Pothos plants to add into your home!

Pothos Vine Care: Propagation

Pothos vines are one of the easiest houseplants to propagate due to its aerial roots and fast growth rate. For information on how to propagate your pothos, (and how to get PERFECT stem cuttings…) check out my post on Pothos Propagation!

Be aware: This plant is toxic to pets and children who may ingest large quantities of plant material. It isn’t fatal, but it may cause irritation and vomiting. It may also cause a skin rash for some people who have very highly sensitive skin. Check out my list of plants that are toxic to pets, as well as my list of non-toxic houseplants!

Well there are my tips! I hope you decide to pick up one of these little guys, or root out your own cutting! They are seriously one of the easiest houseplants to grow, and are great for those who want a low-maintenance, low-light option!

Happy Digging!

Frequently Asked Questions:

Do Pothos Plants Need a lot of Sunlight?

Yes and no. If you are okay with your leaves losing their yellow or white markings, then they will be just fine in low-light conditions. However, if you want your pothos to grow faster, and keep its beautiful colorings, then it will need enough light to keep it happy. This means lots of bright, indirect sunlight, as hot, direct sunlight can potentially burn your pothos vines.

How do you make Pothos Happy?

The easiest way to make a pothos happy is to stick it in a self-watering pot in an east- or west-facing window. They also love bright bathrooms where they can enjoy high humidity levels. (Just make sure there isn’t too much sun in the hot afternoons!)

Why are Pothos Leaves turning Yellow?

Yellow leaves are usually a sign of either too little water, or too little sunlight. This is the plant’s way of coping with an unfavorable environment. To fix this, simply increase your watering (to have moist soil that only slightly dries out between watering). You can also move it to a location with more light, or consider bringing in additional lighting, such as fluorescent lighting or LED lights that are made for indoor plants.

Do Pothos like to be Watered?

Yes, pothos like to be watered. But make sure that you have good drainage in your pot so that any excess water can flow out of your pot. Then let the soil lightly dry out in between watering. This means that you will naturally water less in the winter months and more in the summer months. If you aren’t sure about watering, grab a Soil Water Meter!

Should I mist my Pothos?

Misting a pothos is generally unnecessary. However, in the winter months, indoor air can be dry and your plant can become dusty. These dry, dusty conditions can attract spider mites. If you see these insects, then definitely start misting (as well as treating with an insecticidal soap). This is because spider mites DO NOT like to be wet!

How do you tell if Pothos is Overwatered?

First, your soil will be wet. If you can press the top of the soil, and water appears, then there is too much water! Next, your pothos will be wilted, and there can possibly be brown spots on the leaves or stems that feel mushy to the touch. Your plant will also feel somewhat fat because the leaves are filled with water. Make sure your pot has drainage holes, and that your soil feels slightly dry to the touch every 5 days or so.

How do you Train a Pothos to Climb?

Pothos vines have aerial roots that will only grow into moist, natural materials. This is something like a moss pole, or in nature, a tree trunk. To get a pothos to climb indoors, however, simply use plant ties, command hooks, or even pieces of string to train your pothos up any vertical support.

Click here to subscribe

The 31 Best Indoor Houseplants of 2023

Houseplants. The trend that steadily rose with NASA’s clean air study, and has now led us to green walls, urban jungles, and a race for IKEA’s glass cabinets! But whether you’re new to the plant scene, or you’ve been here a while, it’s great to see what kinds of indoor plants are available, trending, and super hot right now. Whether you’re a green thumb or not, you’re sure to find a plant that’s right for you!

So here’s a list of the 31 BEST houseplants of 2023!

Click here to subscribe
  1. Scientific Name: Sansevieria trifasciata

Common Name: Snake Plant

Starting off strong for the year is the snake plant! Now, there is a reason why you’ve seen this guy everywhere. He comes in lots of different colors, but more importantly, he comes in lots of different SIZES! This means that he can jazz up a living room with his tall, compact vertical lines, or he can sit, totally happy in a small corner of your desk. Snake plants are also extremely low maintenance, hard to kill, drought-tolerant, and do well in low light. I mean, you really can’t ask for more. He’s definitely a teacher’s pet! Here’s all you need to know for Snake Plant Care!

2. Scientific Name: Aloe vera

Common Name: Aloe vera

This plant has always been a popular plant, but it has seen a huge rise in the interior space. This is in part from the popularity of succulents (Aloe vera plants are a relatively easy succulent to grow indoors). But its popularity has also recently stemmed from the essential oils and home remedies movement. Oh, and as a bonus, it also cleans your air. I mean, how more natural can you get?! This plant literally has healing benefits! And for a bonus, here’s my post on how to care for one of these guys – Aloe Plant Care!

3. Scientific Name: Rhaphidophora tetrasperma

Common Name: Mini Monstera

This “Mini Monstera” isn’t actually part of the Monstera family. Instead, this little guy is an “adopted” monstera due to its deeply veined leaves. But this origin story isn’t why people are raving about this plant… instead, it’s because this plant achieves a very similar look of the monstera, without the size. Which is huge!!! (Because it’s so small!!!) This means that people who don’t have a lot of space can now enjoy this tropical look as well!

4. Scientific Name: Zamioculcas zamiifolia

Common Name: ZZ Plant

The ZZ plant is the perfect plant for busy, beginner houseplant owners. This low-fuss personality isn’t the main reason why it rose in popularity, though. The biggest selling point of the ZZ plant is its ability to thrive in low light! So if you have a dark corner that most plants don’t like, then consider this guy for the job! Another added perk… it’s also a semi-succulent. So it doesn’t mind the neglect… it actually prefers to dry out a bit!

5. Scientific Name: Platycerium spp.

Common Name: Staghorn Fern

One plant that has risen in popularity pretty fast is the staghorn fern! This is in part because we stopped looking at houseplants as something you put in a pot on the windowsill. No, this fern is a living piece of art, perfect for any focal wall! So if you’re low on space, but still want to green things up, then think vertical with this stunning fern.

6. Scientific Name: Ficus lyrata

Common Name: Fiddle Leaf Fig

It’s no wonder that the fiddle leaf fig is still one of our most-used houseplants. It seems every modern interior design has at least one of these included. We, in turn, are trained to see this indoor tree as a symbol of style and design. And you know what? I’m okay with that. This big guy deserves it! I do predict, though, that this ficus might see a bit of a drop in popularity. That’s because once everyone has one (or several), then stores will stop being able to sell them. Which less demand = seeing fewer in stores. So make sure to stock up now! For information on how to keep your fiddle leaf alive, check out my post, Fiddle Leaf Fig Plant Care!

7. Scientific Name: Tillandsia, sp.

Common Name: Air Plants

I’m going to admit… the majority of air plants themselves aren’t the most beautiful plant ever. I mean, when was the last time you saw one of these lying on a shelf? No, what makes these plants special is the choice of holder you place it in. By personally selecting a holder, you have the chance to add a personal 3-D sculpture to your space that is a majestic blend of inorganic and living elements. And to top it all off, you won’t have to sacrifice much living space to do it either! Here’s How to Care for Air Plants, as well as a bonus post I created on How to Water Air Plants… the right way!

8. Scientific Name: Epipremnum aureum ‘Golden’

Common Name: Golden Pothos

The Golden Pothos has been a popular houseplant for many years and I don’t think it’s going to go down in popularity any time soon. This is because this GORGEOUS vine is also good at boosting indoor oxygen levels, can do well in low light, and can tolerate a good amount of inconsistent moisture! So if you’re looking for an amazing, easy-to-grow indoor plant, then grab one of these! And, here’s everything you need to know to care for this plant in my post Pothos Vine Care… which includes free printable care pages!

9. Scientific Name: Epipremnum aureum ‘Marble Queen’

Common Name: Marble Queen Pothos

The Marble Queen pothos used to be overshadowed by its “Golden” big brother. But not anymore! With some modern design trends focusing on clean, white lines, (or lighter shades of just about everything), this white variety of pothos has re-emerged in a big way! Just remember, though, that it needs plenty of bright, indirect light in order to keep its white variegation! And if you missed it in the previous clip, here’s everything you need to know about Pothos Vine Care!

10. Scientific Name: Euphorbia trigona

Common Name: Royal Red Cathedral Cactus

The Royal Red Cathedral Cactus definitely lives up to its elegant name! This cactus blends deep purples and reds, giving it a soft, almost tropical look that can be successfully paired with desert plants, as well as tropicals! Either way, this cactus is definitely on my wishlist this year!

11. Scientific Name: Varies

Common Name: Ferns (Multiple species)

Aside from the Staghorn fern, I thought it was important to mention ferns as a general category. That’s because we’ve seen a HUGE increase in both popularity, as well as the number of different species that are widely available today. Some common ones are the Boston fern, Kimberly Queen, Maidenhair, Rabbit’s Foot, and Kangaroo Paw… just to name a few! If you have high humidity levels, then you should definitely add one of these ferns to your space!

Common Name: Jade Plant

Jade plants have always been popular houseplants, but with the rise of succulents, jade plants are now even more common in our homes. This is as plant parents have wanted plants that require less watering. But it has also come as the Portulacara “jade” plants have become better known. This new type of jade plant has brought more colors and shapes to the previously boring, green Crassula variety. Because who doesn’t want a “Rainbow Jade”?!

13. Scientific Name: Beaucarnea recurvata

   Common Name: Ponytail Palm

This lesser-known palm tree has become one of the favorites of the bohemian decorating style. With long, curvy leaves that know how to make a statement, the ponytail palm is definitely the free spirit of the family! Just make sure that if you’re displaying this plant in your boho space, that you pair it with an equally fab and trend-setting pot. Do this, and you’ll be sure to have tons of envious friends! (Oh, and be sure to keep your cat away! They love this edible palm!)

14. Scientific Name: Ficus elastica

Common Name: Rubber Tree

Rubber trees are one of those plants that I can see go either way for popularity. I believe it’s because most people don’t trim their trees, leaving it looking like a tall, spindly stalk of leaves. But if done right, (with pruning and turning), then this guy can actually be a stunning houseplant! Then, add in its super easy care routine to its gorgeous leaf colors, and I could see this guy taking off! Check out how to easily keep it alive in my post, Rubber Tree Plant Care!

15. Scientific Name: Philodendron xanadu

Common Name: Xanadu Philodendron

You know, I’m not really sure why the Xanadu philodendron has become so hugely popular lately. It’s similar to the re-emergence of high-waisted jeans… I just don’t get it. But if you’re a fan of the crinkled leaves, then by all means, go for it! Although it’s not my favorite, I can’t argue with its ability to quickly make any space feel like a chic, urban jungle!

16. Scientific Name: Saintpaulia ionantha

Common Name: African Violets

African violets have been seen everywhere lately, but I’m not sure if it’s the actual appearance of this plant that has caused the popularity, or if it’s just widely sold as one of the few flowering houseplants. Either way, the biggest thing to watch out for with African violets is that you NEED to purchase a healthy plant. If there are any signs of mold or a mushy stem or leaves, then don’t buy it. These plants aren’t always the easiest to keep alive, especially if you buy a sick plant to begin with. But if you do manage to keep this guy alive, then enjoy your flowers for years to come! Here’s exactly how to care for it… African Violet Plant Care!

17. Scientific Name: Aglaonema sp.

Common Name: Chinese Evergreen

Chinese evergreens are one of my favorite houseplants to grow, and it’s not surprising that it’s made the list of the best houseplants! This is because Chinese evergreens come in all different leaf patterns and colors like green, white, red, and even pink! Needless to say, if you want to add a splash of color to your interiors, then this easy, low-maintenance plant is the one to choose!

18. Scientific Name: Zamioculcas zamiifolia

Common Name: Raven ZZ Plant

The Raven ZZ is the newly-introduced black-leaf variety of the regular ZZ plant. Not only is it a beautifully dark shade, but it’s also a bit more compact and shorter than its also a bit more compact and shorter than its green brother. This, combined with its low light and little water requirements makes it perfect for those small desks or shelves that just need a little extra something!

19. Scientific Name: Spathiphyllum

Common Name: Peace Lily

This plant is extremely popular, and has always been extremely popular. This is because its large, dense leaves can really green up a space fast! And, this plant is very forgiving if you forget to water for a bit. If you see it start to droop, add water, and watch as it springs back to life in no time!

20. Scientific Name: Tradescantia albiflora

Common Name: Tradescantia Nanouk

Tradescantias were fading in most indoor plant scenes. Until the Nanouk came along. This pink and cream variety has caused a re-birth for the “Wandering Jew” plant. Now you can see both the pink and purple varieties draping down their hanging baskets along several storefronts. Though, with its difficulty in staying alive, we’ll see if this picky houseplant will maintain its current fame. *Hint: If you have one, give it tons of bright, indirect light, and let it dry out between watering. Don’t keep it too wet, and it will thank you!!!*

21. Scientific Name: Hedera helix

Common Name: English Ivy

English Ivy has been a popular houseplant for years! That’s because it’s relatively easy to grow, it does well in low light, and it looks good in hanging baskets, up moss poles, or pretty much anywhere else! Then throw in the several variegated varieties that have been coming out, and there’s just no way to beat this classic houseplant!

22. Scientific Name: Dracaena marginata

Common Name: Madagascar Dragon Tree

The Madagascar Dragon Tree is another classic houseplant that is still found in many homes. However, I’m not sure if this one will continue in popularity for too much longer. It can sometimes be difficult to water (as it is easily over-watered). This is making it be quickly being upstaged by its relatives, the corn plant, the Janet Craig Dracaena, and the Warneckii. Only time will tell if one of these dracaenas will become like the Fiddle Leaf Fig of the Ficus family…

23. Scientific Name: Haworthia, spp.

Common Name: Transparent Haworthia

Another houseplant that has been popular lately is the Transparent Haworthia, also called Windows Haworthia, or simply just Haworthia. Many social media images have shown off these translucent succulent leaves, causing the succulent community to go green with desire! And, although these leaves aren’t always as see-through in person, these Haworthias are still a stunning piece of nature that every plant lover can show off with pride! And remember, this little guy doesn’t NEED the bright light that it’s brother, the zebra plant loves. The windows haworthia can settle for only morning or evening sunlight. Its leaves are made to optimize light after all!

24. Scientific Name: Philodendron ‘Birkin’

Common Name: Philodendron Birkin

Philodendron covers a very large group of houseplants, but the Birkin variety has become extremely popular the last few years. This is in part because it has started to be widely sold throughout the United States as part of the Costa Farms Tropicals collection. But availability isn’t the only reason why people bought this plant. It is also because this plant’s beautiful striped leaves has everyone falling in love at first sight!

25. Scientific Name: Maranta spp.

Common Name: Prayer Plant

Prayer plants have also seen a resurgence in popularity over the past couple of years. The Kerchoveana Minima in particular can be found in most garden centers as it’s large leaves and dark spots make it look stunning and full, even in a small 3 inch pot!

26. Scientific Name: Monstera Deliciosa var.

Common Name: Variegated Monstera

There are several different types of variegated Monstera plants, but regardless of the type of variegation, they are all highly sought after… (almost comparable to toilet paper at the start of the COVID lockdown!) Fortunately, growers have caught on to this fad and have been producing even more of these gorgeous monsteras. Which means that you can now find some varieties for just a couple hundred dollars… (talk about the rare diamonds of the houseplant world!!!)

27. Scientific Name: Begonia spp.

Common Name: Begonia

While Begonias aren’t new to the popular plant scene, begonias as houseplants has really been coming back hot! Ranging in colors from reds to purples to whites (and don’t get me started on the spotted begonias!), these leaves look like they belong on a set from The Mandalorian! So if you’re looking for something unique, then definitely check out this year’s begonias!

28. Scientific Name: Calathea spp.

Common Name: Peacock plant

Calathea plants encompass many different varieties and styles that are often called peacock plants, prayer plants, and even rattlesnake plants. But it’s the beautiful markings on these leaves that people just can’t resist! Calathea can be difficult to grow (since it requires lots of humidity) but if you have the right conditions, this plant will be a show-stopper!

29. Scientific Name: Monstera adansonii

Common Name: Swiss Cheese Vine

This Monstera is the vine version of the Monstera deliciosa. The Swiss Cheese vine has risen in popularity as it has a similar look to the Swiss Cheese plant, but it has smaller leaves and an upright or hanging form that is a much better option if you don’t have the space for it’s bigger brother. Talk about houseplants that can fit into small spaces!

30. Scientific Name: Stromanthe sanguinea 

Common Name: Tricolor Stromanthe

This is another houseplant that plant lovers just have to add to their collection! With each leaf a different pattern of creams, pinks, and greens, it’s hard to believe that this plant is real! But just be careful, because this little girl is definitely a diva… so I would only recommend it to people who are at least at an intermediate level in houseplant care. For care instructions for this plant, check out this post on Stromanthe Plant Care.

31. Scientific Name: Cordyline spp.

Common Name: Ti Plant

Ti plants are usually grown outdoors, but they have been recently building in popularity as indoor plants. This is because of their bright colors and the tropical vibes they bring to any space. Just keep them in a sunny window and give them plenty of water (in a well-draining pot of course), and these leaves will stay bright and colorful. So if you want some beachy vibes, then ditch the driftwood, and bring your space to life with a few Ti plants!

This is it for my list of the 31 best indoor houseplants of 2022! If you liked this post, then feel free to share it to your favorite social media platform, or join the Facebook group Houseplants for Plant Killers to get personalized plant care tips and help! Then, for more houseplant ideas, check out my post, 10 Hard-to-Kill Houseplants, to find a list of plants that are perfect for any beginner houseplant parents!

Happy Digging!

Click here to subscribe

The 5 Signs your Plants Need Filtered Water

Do you REALLY need filtered water for your plants? I know there is a huge controversy about benefits vs costs, but after doing some research (… a LOT of research…), I’ve found that yes, effects can be small. But small things add up. 

A favorite podcaster of mine always stresses this when he points out that if you had a penny that doubled every day for only 30 days, by the end of the month you would have over 5 MILLION dollars! Just from a single penny! (Rob Dial, The Mindset Mentor)

So when I think about watering my plants, I think about how many drops I am giving them every day, every week, every year. It really adds up! And that’s why I use filtered water.

But the decision is ultimately up to you. I’m just here to point out the 5 signs that your plants might need filtered water. 

*Note: This post contains affiliate links, which if purchased, I will receive a small portion of the profits. This helps me keep providing this information to all of you. But, I only promote products that I have personally tried and love!*

Click here to subscribe

Sign #1 – Brown leaf tips, or brown, dying spots

Brown leaf tips and brown, dying (necrotic) spots can be caused by a few different factors, but they have both been linked to problems with water contamination. Now, this isn’t saying that your tap water is dangerous to drink… instead, it’s just dangerous to some of your more sensitive plants.

These two contaminants are chlorine, a chemical used to kill harmful bacteria in water, and flouride, a chemical that is actually added to water as it helps people have healthier teeth.

An excess of chlorine is what contributes to brown leaf tips in sensitive plants. These plants include: palms, spider plants, dracaena, azaleas, camellias, gardenias, etc.

An excess of fluoride, however, causes necrotic spots along leaf edges. These fluoride-sensitive plants include those listed above as well as ti plants, prayer plants, and calatheas.

So if your plants are showing either of these symptoms, then it’s a sign you need filtered water.

Sign #2 – It’s hot outside

You might not know this, but the concentration of chemicals in your drinking water will actually change with the weather. This is because most water treatment plants are outdoors, and the variation in temperatures can cause different levels of bacterial and microbial growth.

It has been seen that as it gets hotter, water treatment plants need to use more chlorine than usual to kill these microbes. So if it’s getting hot outside, then not only will your plants need more water, but they will also have a higher chance of absorbing too much chlorine.

https://medium.com/@HomeWaterPros/chlorine-levels-in-drinking-water-reach-their-peak-during-the-end-of-summer-77e4f8b72358

Sign #3 – Your Soil is Turning White

A common question that a lot of people ask me is… “What is that white stuff on my soil? And how do I get rid of it?” The short answer is, this is a mineral build-up, and you need to leach it from the soil.

The problem with this short answer, though, is that this mineral build-up is most commonly caused by sodium carbonate… a chemical used to “soften” water (which usually makes it taste better when we drink it). 

These salts, while they might not be too harmful to us, can eventually lead to some major problems for our plants, especially if the soil is never replaced or leached. (After all, there’s a reason why the Salt Flats don’t have a lot of vegetation y’all!)

So, I recommend that people leach out their pots… (running a bunch of water through the soil to flush out any harmful chemicals or built-up minerals). This will be harder for those of you with garden plants, but even with indoor plants, it can take a lot of time and a warm location where the soil can dry.

The one problem, though, is how useful is leaching if you’re using the same water that contains the same amounts of sodium as before? So you see how it really is a short-term solution that doesn’t change the root of the problem.

Sign #4 – Your Plant isn’t Growing as Big

This sign is mainly for outdoor and garden plants, but it can also apply to indoor plants.

To dive into the “why” of this sign, we need to remember that water treatment plants have the goal to kill microbes that are living in our water. In fact, it is the water treatment plants that help keep us safe from cholera, E. coli, and Giardia. So they add chlorine, trihalomethanes (TTHM), and haloacetic acids (HAA5) to our water to kill any living microbes.

The problem with this, though, is that it kills beneficial microbes as well.

These beneficial microbes (like mycorrhizae) help break down nutrients in the soil so they can be absorbed by the plant roots. This is one reason why most quality fertilizers contain beneficial microbes.

So if your plants aren’t growing as fast, it could be because the chemicals in your water are killing these beneficial microbes, leaving your plants on their own.

https://extension.umd.edu/resource/chlorine-toxicity

Sign #5 – You’re Not on Well Water

Well water can actually be better for plants than city water because it usually has fewer disinfecting chemicals, less or no fluoride, and higher mineral (a.k.a. nutrient) concentrations. But if you’re on “city” water, then you might like it more, but your plants will get the short end of the stick!

Those are the 5 signs that your plants need filtered water.

And if you’re now thinking you need a filter, I personally use and love this water filter system from GrowMax Water. I chose this one because I can use it for my indoor plants all winter (when it’s cold outside!), and then I can bring it outdoors in the summer to use for my garden!

It’s super light and connects to both under my sink, and onto my spigot! I just love this little guy!

filter option if your plants need filtered water

If you have any more plant-related questions, feel free to comment below or shoot me an email. You can also join my Facebook group, “Houseplants for Plant Killers” to receive personalized help and plant tips whenever you need!

Happy Digging!

Click here to subscribe

Are African Violet Houseplants Safe for Cats?

Being a cat owner myself, I know that it’s extremely important to keep your pets safe. But does that mean you have to sacrifice your plant collection? Nope! Even if your feline friend likes to try a few bites every now and again, there are quite a few popular houseplants that are non-toxic and safe for cats!

But here’s the real reason why you’re reading my post…

You want to know… Are African Violets safe for my cat?

Click here to subscribe

Scientific Name: Saintpaulia 

Common Name: African Violet

Toxicity Level: Non-Toxic

According to the American Society for the Prevention of Cruelty to Animals (aka the ASPCA), African Violets are non-toxic. They are specifically labelled as safe for cats, dogs, and even horses!

This means that this plant will not cause any major problems if your cat decides to try a few bites. 

Good news, right?!

But before you go, here are a few ESSENTIAL tips that all cat owners need to know to keep their pets safe…

There’s Still a Chance for Poisoning…

While African Violets aren’t poisonous plants, there are still a few ways your curious cats can get into trouble. 

This is if you, or the person you bought your plant from (usually a commercial greenhouse), have been using strong fertilizers or a systemic insecticide on your plant.

Strong fertilizers (different from what you buy at your local garden center) have the possibility of causing gastrointestinal issues. However, this is only if your pet has been ingesting large amounts of the plant over a long period of time. If your plant is relatively new, or you plan on busting out the super, high-intense, extra-strength, commercial-grade fertilizers, then you should probably keep your plant away from your cat.

A more harmful substance is a systemic insecticide. These are insecticides that are absorbed by the plant (usually through the root system), so that when an insect eats any part of the plant, it will die.

Now, your cat probably won’t die due to the fact that he or she won’t be eating their entire body weight’s worth of poisonous leaves like the insects do, but this still isn’t good for your pet and can cause MAJOR harm… (anyone else thinking of Snow White and the Poisoned Apple?!?!)

Symptoms of Poisoning

Cats Protection lists the following as symptoms of poisoning:

  • Vomiting
  • Excess Salivation
  • Diarrhea
  • Body Spasms/Twitching
  • Difficulty Breathing
  • Shock
  • Inflammation of the Skin
  • Sudden Changes in Eating, Drinking, or Urination
  • Sudden Depression or Coma

If your cat is experiencing any of these symptoms, then immediately call either your veterinarian, or the pet poison helpline at 1-888-426-4435.

Pet Poison Helpline: 1-888-426-4435

When to Not Worry…

You shouldn’t worry if your cat has only ingested a small amount of your African Violet and is only showing signs of slight gastrointestinal discomfort (or stomach upset). This is normal when your little fur baby has eaten something that is new to them… (trust me… I used to get the same gut feeling when I ate sushi for the first time, haha!)

These signs of discomfort should be mild and should only last a short duration of time. If, however, symptoms persist, or if they get worse, then immediately seek help from your veterinarian or call the pet poison helpline.

Safe Houseplants for Pet Owners

That’s all you need to know about African Violets and your cats! If you’re looking for more indoor plants that will be safe for your cats, then check out my list of Non-Toxic Plants for Cats and Dogs!

And to be extra cautious, you should probably also check out my list of Poisonous Indoor Plants as well.

Here’s to keeping safe with your precious, (taste-testing) fur baby!

Happy Digging!

*Note: I am not a veterinarian, and hold no liability for any damage or loss of life that occurs. To be safe, I suggest you consult with a professional, such as your veterinarian.*

Click here to subscribe

3 Steps to Quickly Save your Overwatered Succulents

Overwatered. The one word that every succulent owner comes to know and fear at least once during their plant journey. But don’t worry. An overwatered succulent is on the path to dying, but by immediately doing these three steps, you might be able to preserve at least a part of your beloved plant! So here are the three things you need to do as soon as you notice that your succulent has been overwatered.

*Note: For those of you who want to watch all of the steps, here is my video where I go through exactly what you need to do to save your over-watered succulents!*

Click here to subscribe

Step #1: Prepare the Roots

Take your succulent out of its current pot and remove as much of the soil as possible from its roots. This can be done by holding your succulent above a bowl or a tray and gently massage the root system to allow the soil to fall into the tray. If your soil is very wet, then you might have to support some of the roots to keep the wet soil from ripping the roots off when it falls.

Another way to gently remove soil from the roots is to use water to wash off the soil. This is best done outdoors with a hose to avoid getting soil down an indoor drain system.

Overwatered Succulent Roots

Depending on how much root rot has occurred, some of you might still have a root system to work with, while others of you might not have any root system left. This is seen when the stem of the plant is mushy and separates from the root system easily. However, if you do have a root system remaining, then let any roots lightly air dry in a warm location for about 20 minutes to an hour. Make sure that this succulent (and its roots!) stay out of direct sunlight!

Step #2: Remove Dead Portions

If you have a root system that is still attached to your plant, then simply trim off and remove any black or mushy roots. Then pour hydrogen peroxide over the roots that remain. The hydrogen peroxide will help kill any bacteria rot in the roots!

Hydrogen Peroxide on Succulent Roots

If you don’t have a root system left, then assess the stem of your succulent. Trim off any portion of the stem that is discolored. This should leave you with only a top portion of the plant remaining. If the majority of the stem is discolored, try to take off a few of the best-looking leaves to prepare for the third and final step. Try to take leaves from the top of the plant as these are always the last to become affected by overwatering. Just keep in mind that you will want to try to choose any fully-formed leaves as leaves that are just starting to grow from the top won’t be as easy to propagate.

Step #3: Repot or Propagate

If your root system is still intact, then let it lightly dry out before repotting. When placing it back into soil, you will want to correct any issues that were causing it to be overwatered. Three things that you can adjust is to either repot your succulent into a smaller pot, repot it into a pot with better drainage (either switch to a clay pot, a pot with larger drainage holes, or both!), or repot it using a lighter soil (such as a cactus and succulent mix, or a perlite mix).

For those of you who only have a stem or leaves left, then you will need to start by drying your cuttings out for a few days (1-2 days away from direct sunlight). Then propagate them by using the instructions found in my post How to Propagate Succulents.

Another great tool to help you avoid overwatering in the future is to use a soil moisture meter. I have personally never overwatered a single plant since purchasing this soil moisture meter! It really is a game-changer!

Well I hope that this process goes well for you and your succulent. It can be a very delicate process as you save your succulent from being overwatered. I hope that this 3-step process has helped you to have success. And once again, be sure to buy a soil moisture meter to prevent this from ever happening again!

Please leave any additional comments or questions below and sign up for my email list to receive even more tips and tricks to help keep your houseplants alive!

Happy Digging!

Click here to subscribe

How to Stop Over Watering your Succulents

I get it. You buy a succulent, you lovingly water it, and then three days later it has died… What went wrong?! Then you discover the ugly truth. You’ve been over watering your succulents! Don’t worry. We’ve all been there. But how exactly do you stop? And how do you keep your little guys alive?! Keep reading, cause I’ll show you exactly how to stop over watering your succulents!

There are a couple of different reasons why your succulent is being over watered. First, it could be because you are simply adding too much water to its pot.

Click here to subscribe

Reason #1: Using Too Much Water

To fix this, only add small amounts of water each time you are watering.

Sounds simple, right?!

Well, it can actually be super difficult if you’re using a regular watering can to water those tiny little pots.

This is why it’s BEST to water your succulents with one of these!

These succulent watering bottles are designed to give you the ultimate control over how much your succulent is watered. It also has a small nozzle, which positions the water stream to exactly where you want it! No more wet succulent leaves, and no more wet plant shelves!

Reason #2: Not Enough Drainage

The next thing to consider with over watering succulents is how fast your water is draining out of its pot.

In a succulent’s native habitat, water will move quickly into, then out of a plant’s reach. This is done either through the water quickly sinking down through the sandy or rocky soil, or water will escape through evaporation due to the sun’s heat. Either way, the soil does not stay wet for long.

Which means… succulents are not accustomed to having their roots constantly wet. In fact, they’re used to having moderately dry roots.

Because of this, we need to allow the water in our own pots to move down and out of the soil.

To do this, we will need:

  1. Soil that drains well
  2. Pots that drain well

Well-Draining Soil

For well-draining soil, either amend regular soil with sand and perlite (at a rate of 1/3 soil, 1/3 sand, and 1/3 perlite), or consider purchasing a pre-mixed soil, such as this cactus and succulent soil!

Well-Draining Pots

To have well-draining pots, first make sure that your pot’s soil-to-root ratio is correct. (A.k.a., don’t use a large pot for a small succulent). This is extremely important!!!

If your succulent is small, use a small pot.

Also, look for shallow pots. Don’t purchase anything too deep.

Then, make sure that your pots have drainage holes!!!

I can’t stress this enough! Succulents NEED pots with drainage holes!

If you want to group your succulents together, get a pot that is specifically made for grouping succulents. These will be shallow, wide, and have drainage holes. Check out these pots for succulent groupings.

And for pot ideas, check out my post on Indoor Plant Pots. Just make sure you pick out pots that are proportionate to the size of your succulents!!!

So remember, add less water, and improve drainage of your soil and your pots! If you do all of these above steps, you will never over water your succulents again! Let me know if you have any more succulent-related questions in the comments below! And for more succulent tips, check out my post on Succulent Care, or my post, How Often should I Water my Succulent?!

Happy Digging!

Click here to subscribe

Common Problems with Christmas Cactus and How to Fix Them

Isn’t it frustrating when your plant (that looked so great at the store!) comes home and slowly starts looking like it’s about to die?! If this is the story of you and your Christmas cactus, just know that it’s okay.

You are not the only person who has a hard time keeping this tropical cactus alive…

And today, I’m going to show you the five most common problems people run into with their Christmas cactus. Knowing these problems and implementing their solutions will turn your dying Christmas cactus back into its glorious cactus self again soon!

Click here to subscribe

Problem #1: Your Christmas Cactus’ Leaves are Limp & Droopy

Cause #1: There are two different reasons why your Christmas cactus’ leaves are limp and droopy. The first reason is if it is currently flowering. Producing flowers takes a lot of energy away from the plant and many people have said that their plants become droopy during and just after flowering.

Care: If this is you, then simply wait until your plant has finished flowering, then make sure to let it rest for a few weeks with no fertilizer and only little water. Only water it when the soil is dry to the touch. After these few weeks, you can then resume your care as normal.

Cause #2: The second reason for limp or droopy leaves is because of improper watering. This is also a cause for wilted or shriveled leaves. So if your plant’s leaves are limp and droopy, and it isn’t currently flowering, then improper watering is the cause.

Care: Refer to the next section for shriveled or wilted leaf care.

Christmas Cactus Limp Leaves
Image courtesy of Garden.org

Problem #2: Your Christmas Cactus’ Leaves are Shriveled or Wilted

Cause: Christmas cactus leaves will wilt and shrivel up when the leaves aren’t getting enough water due to improper watering. This can be from either over-watering or under-watering. Feel the soil several inches below the soil surface, or use a soil moisture meter to determine if your soil has been kept too wet or too dry.

Care #1: If your soil is too wet, then you will most likely have damaged roots. You should immediately re-pot your Christmas cactus into fresh soil that is only lightly moist. While re-potting, trim off any black or mushy roots and pour hydrogen peroxide over the root system. This will kill any remaining bacteria before you place it into fresh soil. Also, take stem cuttings at this time to propagate, following the directions in Christmas Cactus Propagation. This will ensure that even if your plants’ roots die, you will still have cuttings to re-grow your Christmas cactus.

Care #2: On the flip side, if your plant is too dry, then you will need to slowly increase the moisture levels over a few days. Slowly bring it from bone dry back to lightly moist. You will know you’ve been successful when your plant’s leaves perk back up! Just be sure that you don’t end up over-watering your plant at this time. Remember, let it barely dry out before you water it again.

Also note that if your plant’s soil is hard and difficult to press your fingers into, then you will need to re-pot your plant into fresh, well-draining soil, such as a cactus and succulent soil or a regular soil mixed with additional sand or perlite.

Image courtesy of reddit.com

Problem #3: Your Plant’s Leaves are Pale or Red

Cause: Christmas cactus leaves begin to turn pale and then get a slight red tint if they are getting too much direct sunlight. The red tint can be pretty (and harmless in the right settings), but make sure that it isn’t getting burnt. Remember, these plants are tropical cacti, not desert cacti. So they are used to a very moist heat, not a dry heat like what you find in a home window. So if your leaves are turning a pale greenish-yellow color, or are excessively red, then it’s too much hot, direct sunlight.

Care: Move your Christmas cactus out of any direct sunlight. Indirect sunlight will be fine, but try to avoid any direct sunlight for at least a little while.

These plants can eventually become accustomed to higher light levels, but this would take a lot of acclimatizing. Instead, I would suggest you take the easier route and simply move it away from the hot sunlight.

Image courtesy of houzz.com

Problem #4: You Christmas Cactus’ Stems are Falling Off

Cause: The reason why your plant’s stems are falling off is because of root- or stem rot at the base of the plant. This always happens as a result of over-watering.

Care: Follow the care instructions for over-watering under the “Wilted or Shriveled Leaves” section (Problem #2, Care #1). This will tell you exactly how to care for a plant that has been over-watered.

Image courtesy of reddit.com

Problem #5: Flower Buds Fall off Before they Fully Bloom

Cause: Christmas cactus flower are notorious for being overly-sensitive. The reasons why your buds fell off could be because of your plant getting too dry, staying too wet, or because it recently moved locations.

Care: When your plant is in bud, make sure to keep your watering schedule consistent. But, if something comes up (or you’ve just recently brought your plant home) and all of its buds fall off, sit tight.

Let it rest for a few weeks, keeping it a bit more dry than usual, and give it a chance to set new buds. Sometimes if it is healthy enough, a Christmas cactus is able to produce a second set of blooms. So don’t get frustrated! Your little plant might just need a bit more time!

Image courtesy of gardeningknowhow.com

Those are the 5 most common Christmas cactus problems and how to fix them! Please let me know below if you have any questions or additional comments, and join my email list to get not only a special welcome gift, but to also receive all the latest tips and how-to’s straight to your inbox. Then, for more info on how to take care of your plant, check out my post, Christmas Cactus Plant Care!

Happy Digging!

Click here to subscribe
problems with christmas cactus pinterest image

Top 5 Worst Herbs to Grow Indoors

Worst Herbs to Grow Indoors

We’ve all been there… bought a new plant baby, lovingly watered and nurtured it, gave it the perfect spot,… then cried as it withered away and died despite all your hard work. Been there, done that. So let’s just get this out in the open. Not all plants like being indoors. Some like more sun, others like the temperature fluctuations that come with the outdoors, others just need better air circulation… So let me help you stay away from those sad plant deaths and tell you which indoor herbs are the hardest to grow indoors.

*Note: These herbs can still be successfully grown indoors, but they will have more indoor plant deaths than their easy-to-grow herb counterparts. If one of your favorite herbs is on this list, you might just need to do some extra research before purchasing one of these plants for growing indoors.*

Click here to subscribe

Worst Indoor Herbs #1: Basil

Basil is one of those herbs that everyone has because it’s so useful, but that dies in a lot of people’s care. This is because basil plants need a lot of sun to grow well, and a lot of water to keep it happy in the sun. When caring for my basil plant, I noticed that I had to water it at least once EVERY DAY during the summer to keep it happy. And with it being in the brightest spot in the house, it STILL produced small leaves. So that’s why it’s on my list of worst herbs to grow indoors… it needs a LOT of attention and is very difficult to produce those large, tasty leaves that are so much easier to grow outdoors.

Quick Tip: If you still want to grow basil indoors, try out one of the smaller-leaf basil such as a Thai basil. This will be easier to care for and will grow better indoors.

Worst Herbs to Grow Indoors - Basil

Worst Indoor Herbs #2: Cilantro

Cilantro makes the list of worst herbs to grow because it also needs a LOT of sunlight to grow. Most indoor cilantro plants that I see all have small leaves and are stretched because they aren’t getting enough sunlight. In order for cilantro plants to produce well, they need to have lots of sun and lots of space, which makes them one of the worst herbs to grow indoors.

Quick Tip: If you still want to grow cilantro indoors, then grow them in large flats and put in plenty of seeds. Then start another tray 4-6 weeks later, and maybe another tray after that. Then make sure that your cilantro has a dedicated grow light. This will help you feel okay about over-harvesting since you will have other trays growing. You will also be able to harvest each tray at once and before it begins to bolt (aka flower). This method of having different trays at different development stages (and each with their own light) is one way to successfully grow cilantro indoors.

Cilantro Plant

Worst Indoor Herbs #3: Italian Parsley

Just like cilantro, parsley makes this list of worst herbs to grow indoors based on the amount of light that it needs to produce large, harvest-worthy leaves. Indoors, parsley needs to be placed in a sunny window, and will need to be turned every other time that you water it to ensure even growth. Even with this, it might still not produce large enough leaves. Then it will need a dedicated plant light to stimulate large leaf growth.

If you want to grow parsley indoors, then I would suggest you use a curly leaf parsley (as opposed to flat-leaf parsley, such as the common Italian parsley). Curly leaf parsley is usually a bit easier to grow and will give you a better harvest than the flat-leaf parsley.

Parsley Plant

Worst Indoor Herbs #4: Dill

Dill is actually pretty easy to grow, however, this plant gets huge! Unless you’ve got a spare 3-4 feet to give this herb, then you won’t be able to keep it in your windowsill herb garden!

To grow dill indoors, try a fern-leaf variety, which will only grow to about 1.5-2 feet in height. You’ll still need to give it some space, but at least this smaller size is more realistic for an indoor plant.

Worst Indoor Herbs #5: Fennel

Fennel is one of the worst herbs to grow indoors because, like dill, it is also huge! Most fennel plants can reach up to 6 feet in height! I don’t know about you, but I DEFINITELY don’t have this type of space in my home! So while you can grow it from a small plant indoors, you’ll eventually want to bring it outdoors. This will allow the plant to have enough space to grow its large, onion-like bulbs (that are also edible!).

There aren’t really any options to grow this herb indoors, but if you want to overwinter it, you can grow it in large, deep pots outdoors during the summer. Then in the fall, cut it back to a few feet in height and bring it indoors. This way, it can continue to stay warm and grow throughout the winter. You can continue to harvest the leaves all winter long as it grows, and then simply move it back out the following spring before it really begins its spring-time growth.

Fennel Plant

Those are the 5 worst herbs to grow indoors! These herbs have been selected based on personal experience, as well as selected based on many other comments and suggestions made by others who have had difficulty with these plants.

IF you have difficulty growing herbs indoors, then I would suggest you get one of these indoor herb kits! These are simple, table-top systems that make growing herbs as easy as pushing a button. Seriously… these kits are amazingly simple and effective!

If you have any other questions or comments to help with the indoor growing of these plants, please share! And feel free to sign up for my email list for even more amazing tips and tricks for your indoor plants!

Happy Digging!

Click here to subscribe
Worst Herbs to Grow Indoors Pinterest