Are you a plant parent with a busy schedule? Do you want to add some greenery to your low light space but don’t have the time to dedicate to high maintenance plants? Look no further. In this article, we’ve compiled a list of the 25 best low light succulents that are perfect for busy people like you. These succulent plants are not only easy to care for, but they also share a lot of the same benefits of other tropical houseplants, such as improving air quality and reducing stress levels. From snake plants to haworthias, this list is compiled to not only bring you some great options to choose from, but to also show you some unique varieties that will make your space stand out! So sit back, relax, and discover which low light succulent is perfect for your space and your lifestyle!
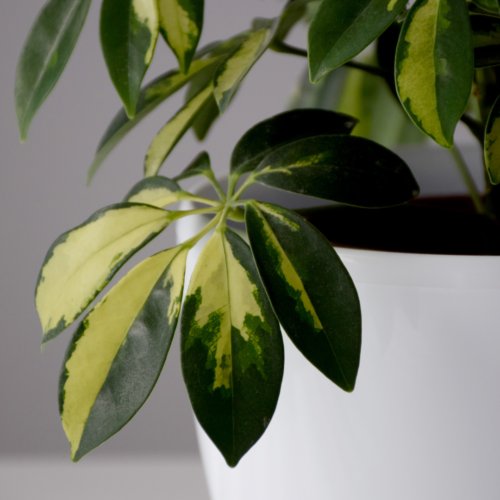
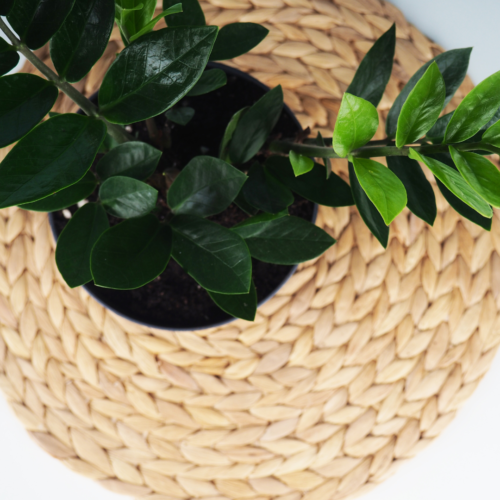
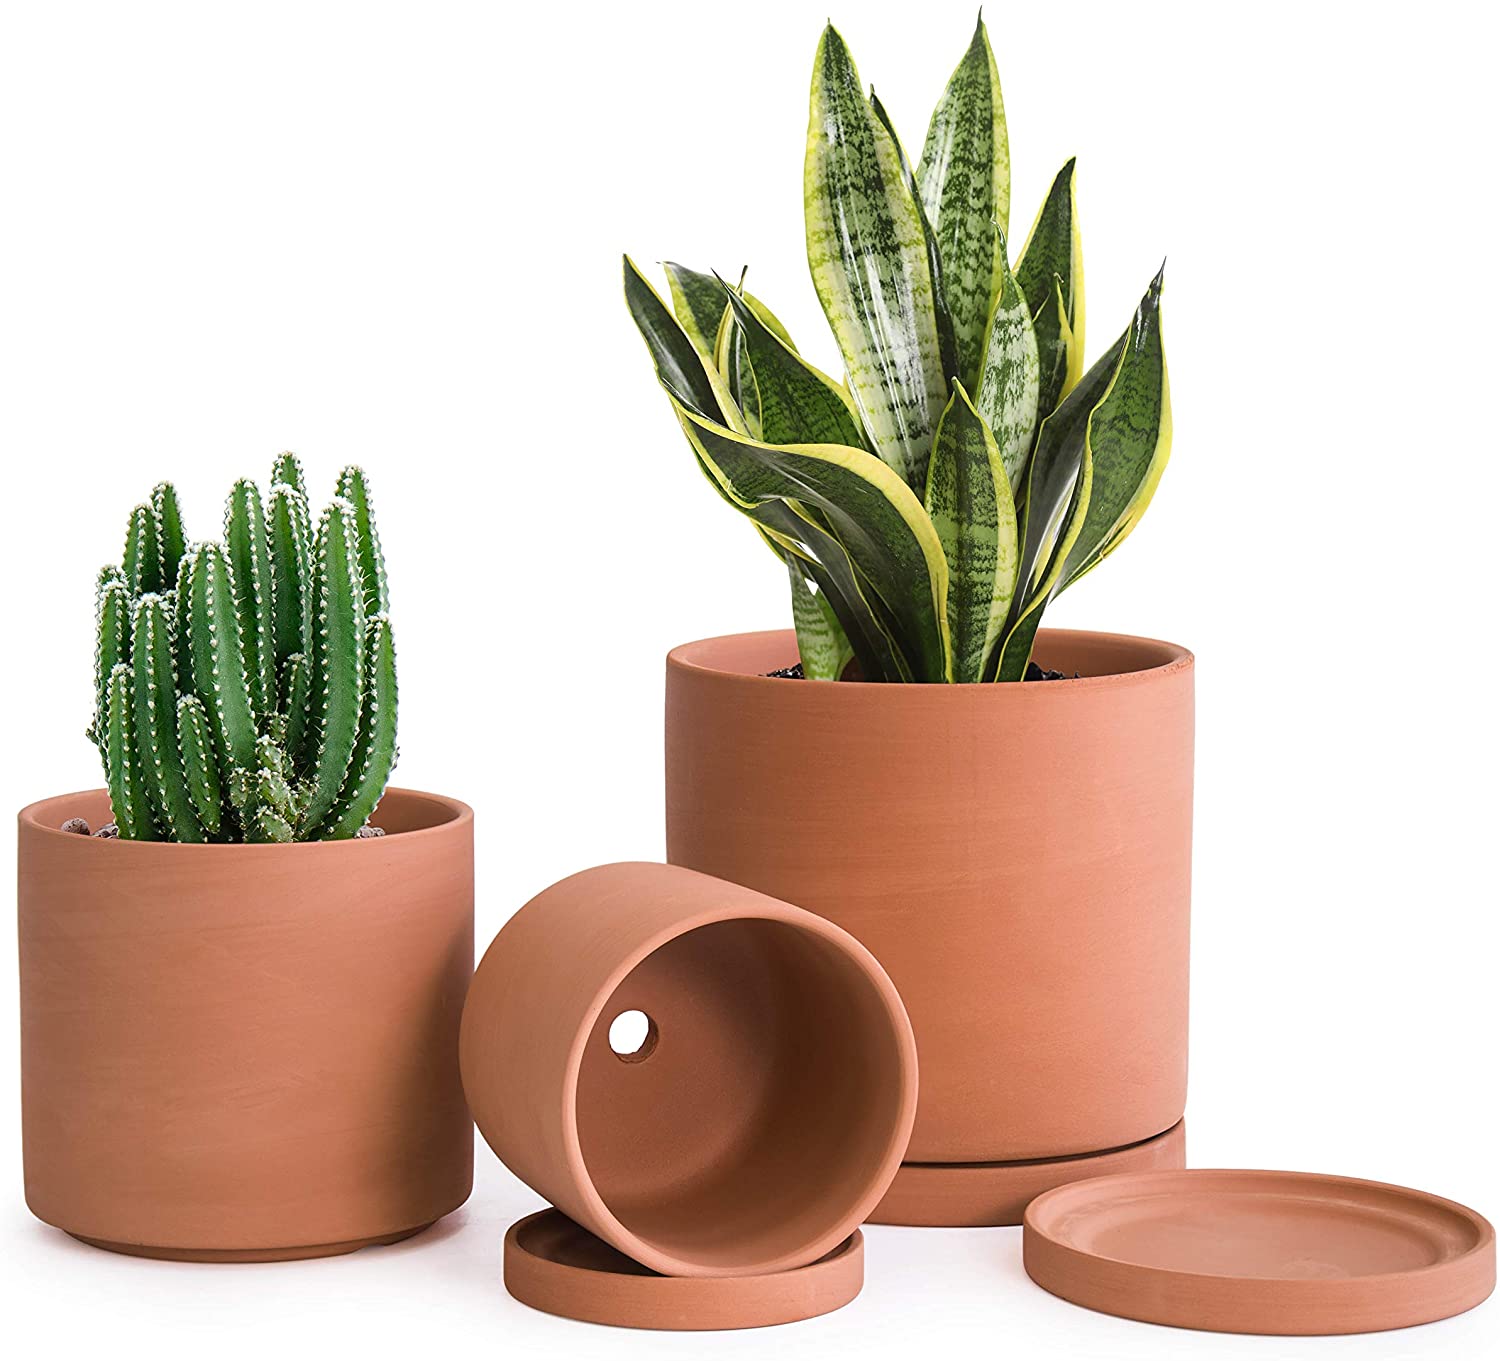
1. Snake Plant (Sansevieria trifasciata)
One of the most popular low light succulents for busy plant parents is the snake plant (aka the mother-in-law’s tongue). This high level of popularity is mainly due to the fact that this plant is incredibly resilient and adaptable, making it perfect for those who tend to forget to water. Its long, upright leaves come in a variety of shades and patterns, from dark green to variegated yellow and green, adding a touch of sophistication to any space. Most people use this plant as a type of living sculpture within their spaces due to its tall, vertical shape as well as because it can tolerate very low light levels (just be sure to add lots of well-draining soil and let it dry out a bit in between watering!)
Aside from its attractive appearance, the snake plant is also known for its air-purifying capabilities. It can remove toxins such as benzene, formaldehyde, and trichloroethylene from the air, making it a great addition to any home or office. Snake plant is also one of our unique indoor plants due to its ability to release oxygen at night, making it ideal for the bedroom. It has been shown to improve sleep quality and reduce stress levels, making it a perfect companion for busy, overworked individuals, or anyone else looking to de-stress their lives!
If you’re looking for a low maintenance, yet visually stunning plant, look no further than the snake plant. Its durability, air-purifying properties, and therapeutic benefits make it a top choice for any plant parent. Then, for care information about this plant, check out my post on Snake Plant Care!
Get one here!
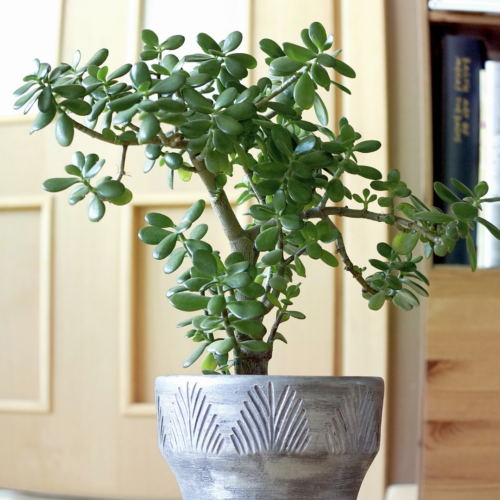
2. Baby Jade
Another great succulent option for busy plant parents is the Baby Jade. This small succulent, also known as the Crassula ovata ‘Baby Jade’, is easy to care for and can thrive in low light conditions. It is characterized by its small, round leaves that resemble the original jade plant. The main difference is the size of the plant. Like the Jade plant, the Baby Jade can be shaped into a bonsai tree, but its overall size will be much more compact and smaller than the regular Jade. This can be perfect if you’re working with small spaces, or you need something for your office.
Similar to the snake plant, Baby Jade also has air-purifying properties that can promote a healthier environment, as well as doesn’t need a lot of water. This makes it a perfect choice for those who want to enjoy the benefits of having a plant in their space, without having to worry about keeping to a demanding watering schedule.
Get one here!
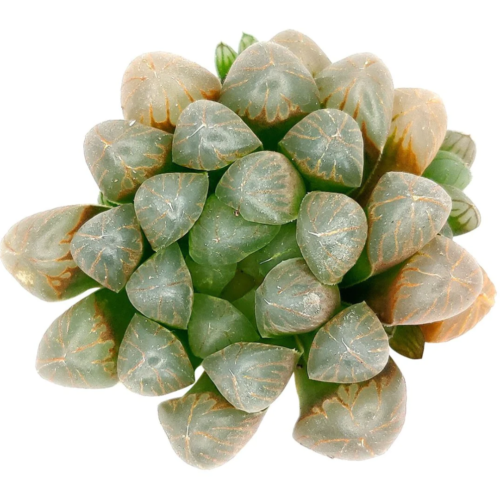
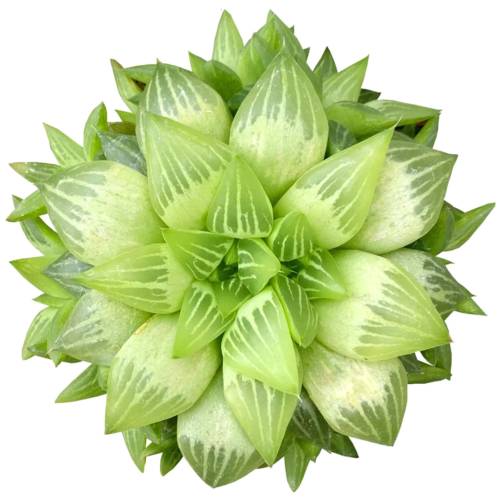
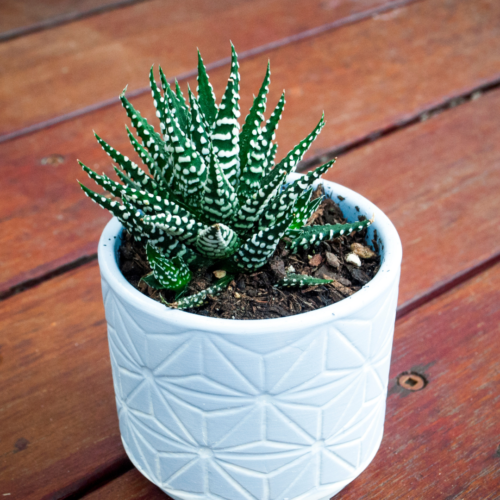
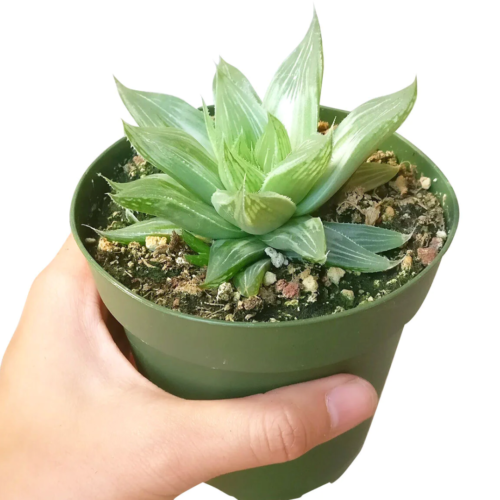
3. Haworthia cooperi var. Obtusa
If you’re interested in adding more variety to your succulent collection, the Haworthia Windows ‘Obtusa’ is another great option to consider. This unique succulent has translucent window-like areas on its leaves that allow sunlight to enter and reach its inner cells. It is different from other haworthia windows varieties as the leaf tips are more rounded and less angular. Then, when purposefully stressed (with too much light, or low water), then the leaves will turn a beautiful reddish color.
The Haworthia cooperi can also do well in a low light setting becuase its translucent window-like areas on its leaves allow sunlight to enter and reach its inner cells, making it more efficient at capturing light waves. This feature makes it a great option for those who don’t have a lot of natural light in their homes.
So, if you’re looking to add more variety to your succulent collection, Haworthia Windows var. Obtusa is definitely worth considering!
Get one here!
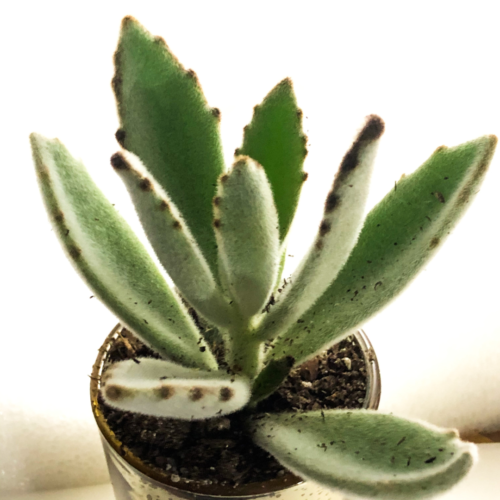
4. Panda Plant Kalanchoe
Another succulent to consider for a low-light house plant is the Panda Plant Kalanchoe, which has thick and fuzzy leaves that is said to resemble the coat of a panda. This Panda Plant, also known as Kalanchoe tomentosa, is native to Madagascar and is perfect for busy plant parents who want to add a touch of whimsy to their collection without high maintenance needs.
Similar to other succulents, the Panda Plant Kalanchoe does not require a lot of watering, and it thrives in either in bright, indirect light or low light environments. The panda plant can actually get leaf burn if it is in too much hot, direct sunlight. So if you’re looking to add some soft texture to your space, the Panda Plant is definitely worth considering.
Get one here!
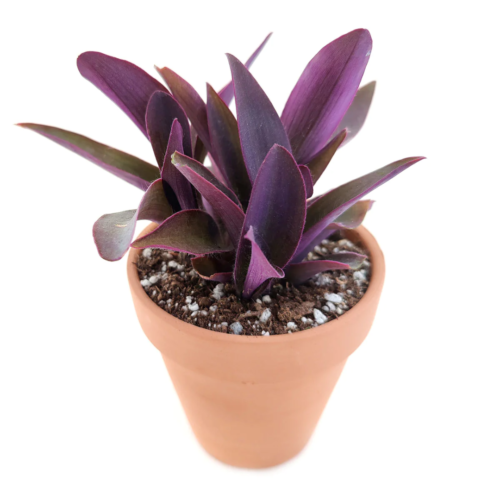
5. Purple Heart Tradescantia
Next, let’s take a look at another low light succulent, the Purple Heart Tradescantia.
Purple Heart Tradescantia is a low light succulent that many plant parents adore. Its stunning purple leaves add a pop of color to any indoor space and in time, its long, trailing vines will create an eye-catching effect, especially when planted with other vertical, green plants such as snake plants. This succulent also prefers to be left alone and it can do well in low to bright light conditions.
Just make sure that you do leave it alone. I’ve found that my tradescantia don’t like to be touched (or played with by my cat!) and being handled too much can cause the leaves to turn brown. So if you’re wanting these gorgeous purple leaves, make sure to give it a well-draining soil and pot, let it dry between watering, and then try not to touch it!
This plant also does extremely well with a grow light. So if you have no-light locations, you can have your tradescantia with a little grow light (like this one!) and it will be perfectly happy for you!
Get one here!
6. Ogre Ears aka Gollum Crassula
Moving on to another low light succulent, let’s take a look at Ogre Ears. This unique succulent has thick, fleshy leaves that are shaped like, as you can probably guess from its common name… ogre ears! Its scientific name is Crassula ovata ‘Gollum Jade’, and it doesn’t dissapoint!
Like many succulents, Ogre Ears is low maintenance and prefers well-draining soil and infrequent watering. This plant can thrive in a variety of light conditions, from bright, indirect light down to low light conditions. Ogre Ears is an excellent choice for those looking to add some quirky character to their succulent garden. Its interesting shape and texture make it a standout among other succulents. Plus, it’s a great conversation starter with guests! Oh, and my kids just absolutely love them too! There’s just something about Ogre Ears that always makes me smile 🙂
Get one here!
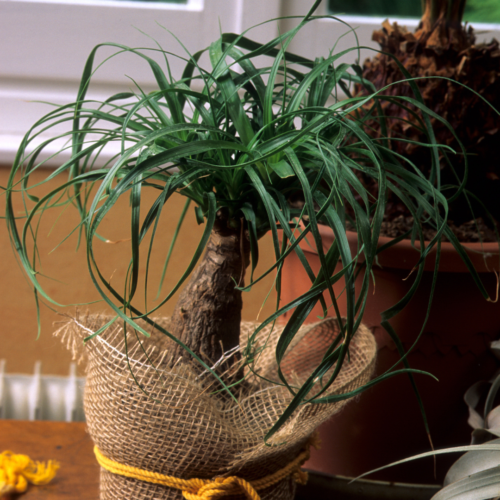
7. Ponytail Palm
Next up, the Ponytail Palm, (another one of our indoor succulents for low light) is a visually stunning indoor plant that looks fabulous as a specimen plant. The Beaucarnea recurvata, or Ponytail Palm, has leaves that grow in a long, curly pattern that resembles a ponytail, hence the name. The leaves are thick and leathery, which helps the plant retain moisture in dry conditions that have low humidity. The trunk of the Ponytail Palm is also quite unique, with a bulbous base that can store water to help the plant survive periods of drought. This also helps it to require very little attention as it thrives with thorough, infrequent watering.
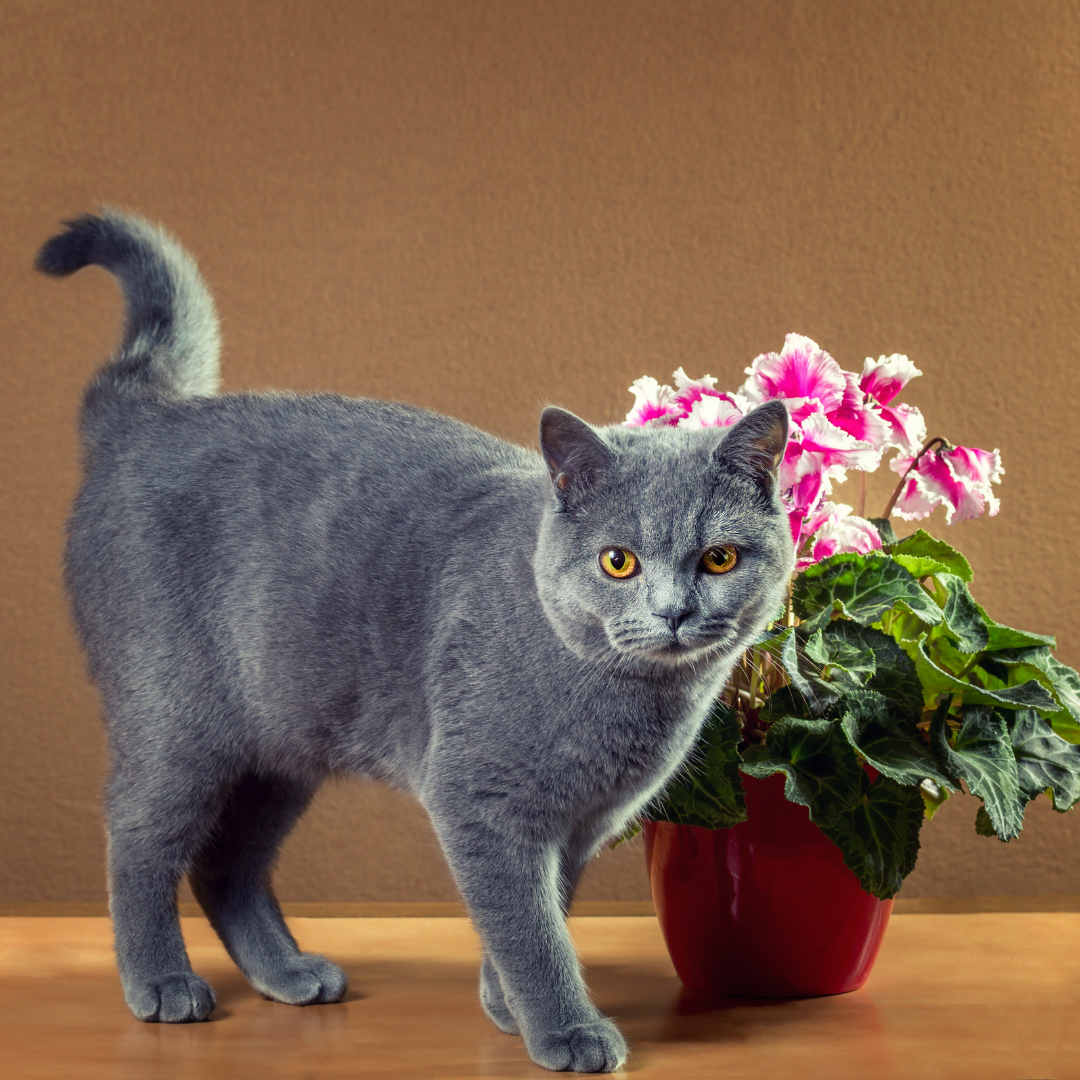
The only thing that I can add about this beautiful, fun plant, is that you should not get a ponytail palm if you have cats in your home. In my experience, cats LOVE to chew on this plant. This transforms it from a gorgeous curly head of leaves to a rather unsightly firecracker top. I actually had to re-home mine because of my cats (after several failed attempts at cat deterrents). But don’t worry, my aunt is loving her new ponytail palm tree, and she’s gotten it looking gorgeous again! Haha!
Get one here!
8. Window Haworthia
Like the Ponytail Palm, the Window Haworthia is a beautiful succulent that is also a relatively low maintenance plant. It can survive in a variety of soil conditions and requires infrequent watering. The Windows Haworthia species is also a type of haworthia that has translucent leaves. These “windows” on the leaves can capture more light than their solid-leaf haworthia siblings. This makes it the perfect choice for a location that has less light, and it can sometimes even prefer a bit of shade over a sunny spot. For more care information, check out my post, Haworthia plant care!
Get one here!
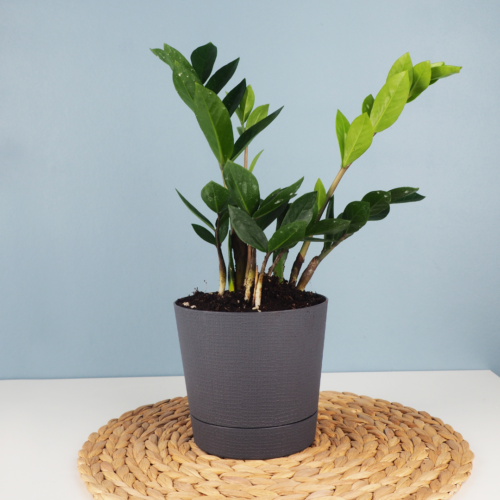
9. ZZ Plant
The ZZ plant is a versatile succulent that is perfect for busy plant parents. Not only can it tolerate low light conditions, but it’s also drought-tolerant and can go weeks without being watered, trust me. I seriously neglect mine. (Sorry little ZeeZee!) However, this just proves that it is a great choice for those who may forget to water their plants regularly, or those who have a busy schedule.
The reason the ZZ plant, or Zamioculcas zamiifolia, can do so well with little water is because of its root system that contains little bulbs that store water. So they can do well with thorough watering to replenish the bulbs’ water, then periods of drought.
This, plus the fact that ZZ plants are notoriously easy to propagate from leaf and stem cuttings, and you definitely have a winner on your hands!
Get one here!
10. Burro’s Tail
The Burro’s Tail succulent, also called a donkey’s tail, is a unique and beautiful plant that is perfect for busy plant parents. With its cascading stems that can grow up to three feet long, the Burro’s Tail is a favorite among succulent enthusiasts. This hardy little plant is incredibly low maintenance, requiring only occasional watering and minimal attention.
One thing to keep in mind with the Burro’s Tail is that it prefers bright indirect light to keep the short, stubby leaves. While it can handle some low light conditions, it won’t thrive in complete darkness and in a lower light level, it will tend to have some stretching between the leaf joints.
Another thing to note is that the leaves are delicate and can easily fall off if the plant is bumped or moved too much. This means that it needs to go in a place that has little traffic where it could be bumped or brushed.
So, even though this indoor succulent can be a bit of a diva, it’s definitely a succulent that looks incredible when it gets what it wants… (Is anyone else thinking of the song Prima Donna here?! :D)
Get one here!
11. Zebra Plant
The Zebra Plant, also known as Haworthia fasciata, is a charming succulent that is easy to care for and its striped leaves are absolutely stunning! Native to South Africa, the Zebra Plant prefers bright, indirect light but can also tolerate low light conditions. The only comment I can make here is that when given bright light, such as in a south-facing window, it will stay short and compact and will require more watering. But in low-light environments, slow down on the water, and also expect stretching. The leaves will start getting taller with fewer stripes, but even with the stretching, your zebra cactus will still look great.
For more information on how to care for this plant, check out my post on Zebra Plant Care.
Get one here!
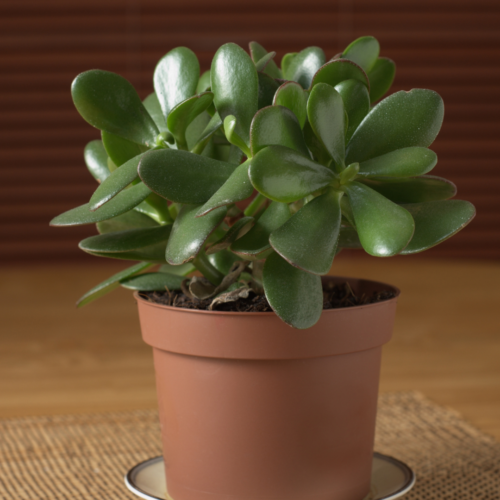
12. Jade Plant
The Jade Plant, also known as the Crassula Ovata, is a popular choice among succulent enthusiasts. With its small, shiny, round leaves, it adds a touch of elegance to any space. But what makes it truly remarkable is its resilience.
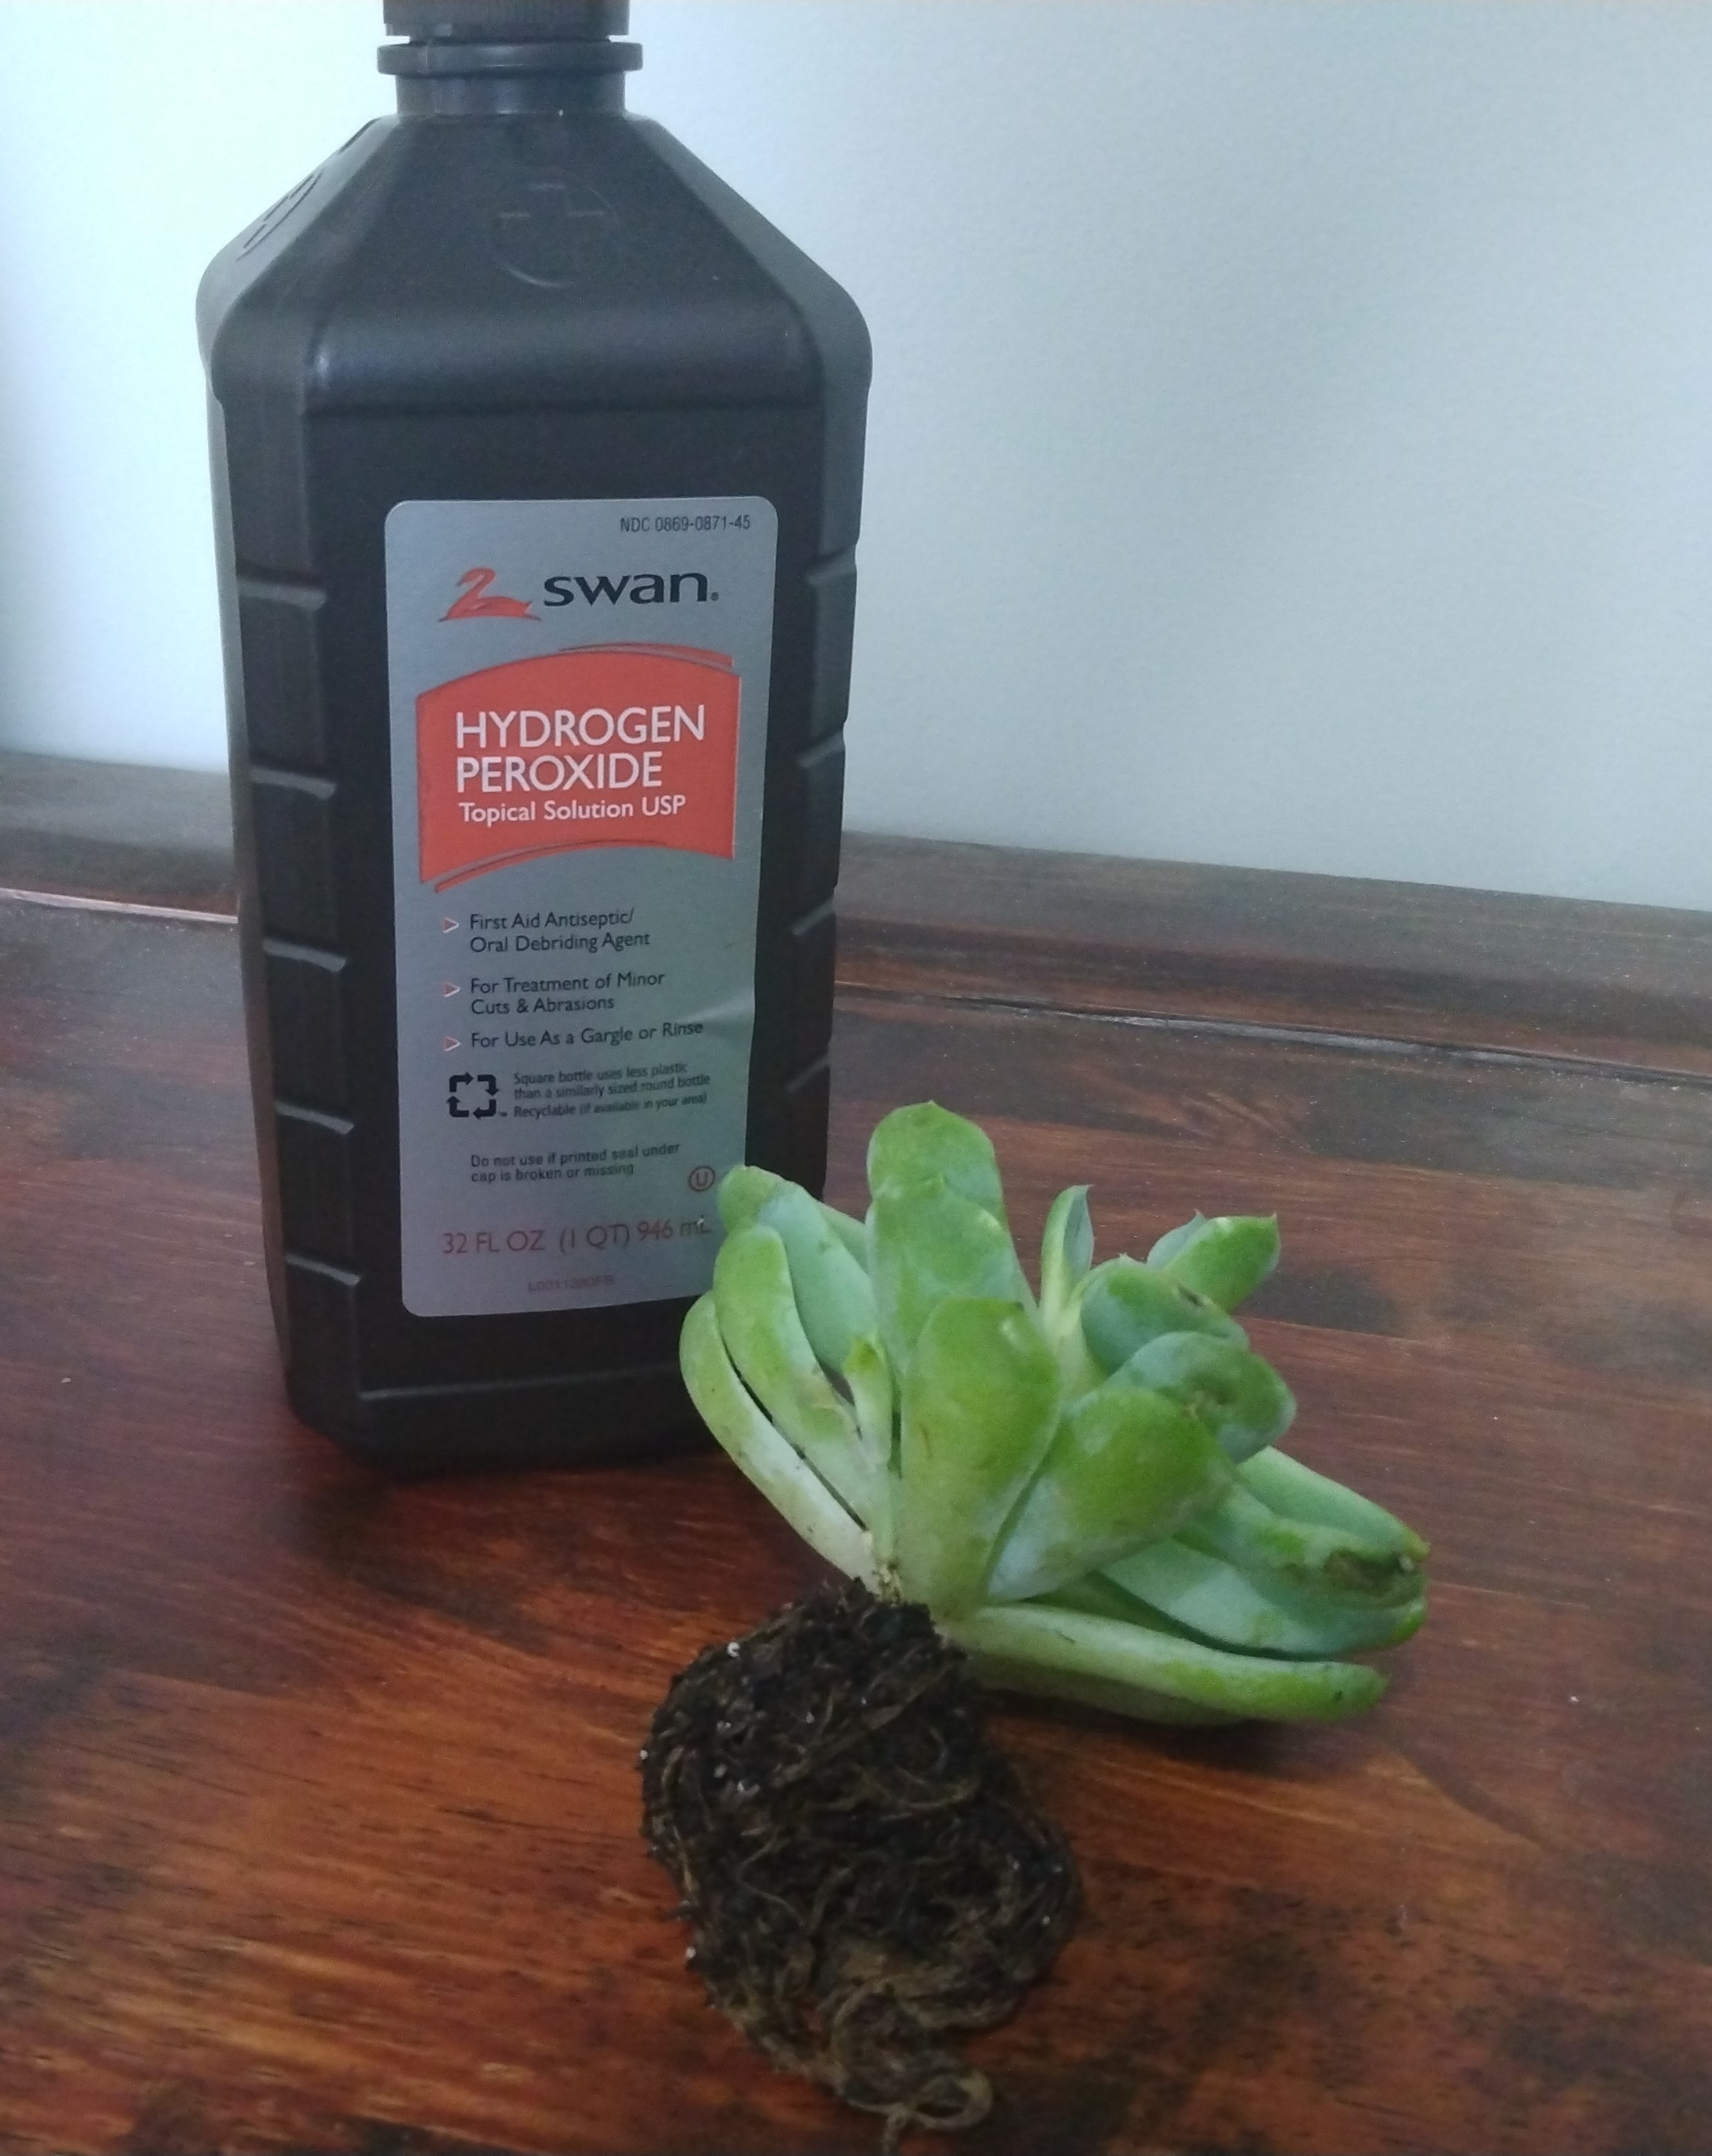
Like most other succulents, the Jade plant can do well with infrequent watering since it stores water in both its stem and leaves. Overwatering can lead to root rot, so it’s essential to let the soil dry out completely between watering sessions, especially when it is in lower light conditions. But with proper care, the Jade Plant can grow up to six feet tall and live for decades. This makes it one of the best succulents to bring home!
Get one here!
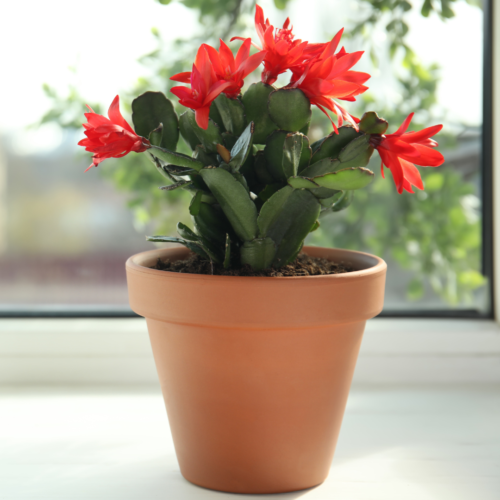
13. Christmas Cactus & Thanksgiving Cactus
Speaking of hardy succulents, the Christmas Cactus and Thanksgiving Cactus are must-haves for any busy plant parent. These flowering plants are perfect for those who want to add some color to their low-light space. While both plants belong to the same genus, they differ in their blooming season. The Christmas Cactus blooms in December, while the Thanksgiving Cactus blooms in November, although forced blooming can cause your cactus to have flowers at any time of the year. This is why some people simply refer to both of these species as holiday cacti.
These cacti do like a bit more moisture than other succulents, since they are originally from tropical regions that have a lot of humidity. This moisture is especially vital during blooming time, since the blooms can drop if the plant gets too dry. The best method here is to water them thoroughly and let the soil drain before putting them back in their saucer. For more information on caring for your cactus, check out my post on Christmas Cactus Plant Care, or if you’re having issues with your holiday cactus, check out my post on troubleshooting problems with Christmas Cactus.
Get one here!
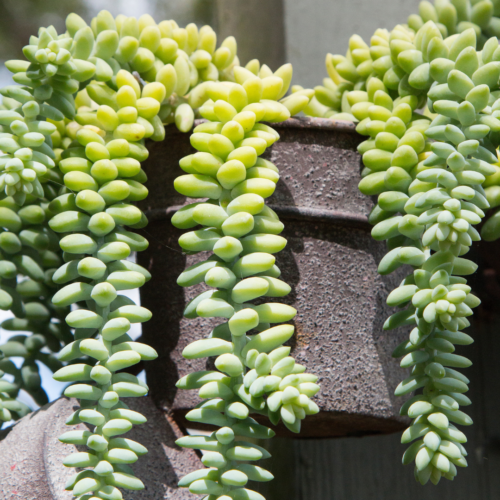
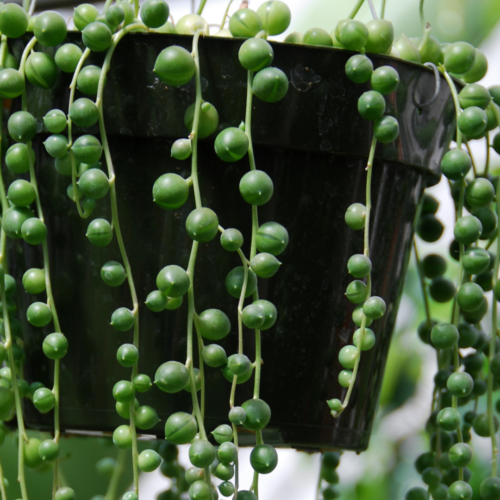
14. String of Pearls
The String of Pearls succulent is a unique and eye-catching plant that is perfect for those who love to add a touch of whimsy to their indoor garden. This low-light succulent is known for its slender, trailing stems that are adorned with small, round leaves that resemble pearls. This makes it perfect for hanging planters, with trailing stems that can grow up to three feet long.
Like many succulents, String of Pearls is relatively low-maintenance and prefers indirect light and well-draining soil. However, it does require a little more attention when it comes to watering. These cacti like to be kept moist, but not too wet. Be sure to water them thoroughly and let the soil drain before putting them back in their saucer. If you are worried about keeping the moisture consistent, then I would recommend buying a soil moisture meter. This will fix ALL of your watering issues!
Get one here!
15. Raven ZZ Plant
Raven ZZ Plant is an exceptional choice if you are looking for a houseplant that will thrive in low light conditions. Its dark purple-green leaves with waxy texture and smooth surface make it an intriguing addition to any corner of your home. This succulent is a natural air purifier, removing toxins from the air and creating a healthier environment.
Like the original green ZZ plant, the Raven ZZ Plant is also easy to care for and can survive with minimal watering. In low light it can grow pretty slowly, making it very low-maintenance. But when there is new growth, it comes as a beautiful bright green that contrasts starkly against the dark green mature leaves.
If you are a busy plant parent who struggles to find time for plant care, Raven ZZ Plant is the perfect choice for you. Its resilience and low maintenance needs make it a hassle-free addition to your indoor plant collection.
Get one here!
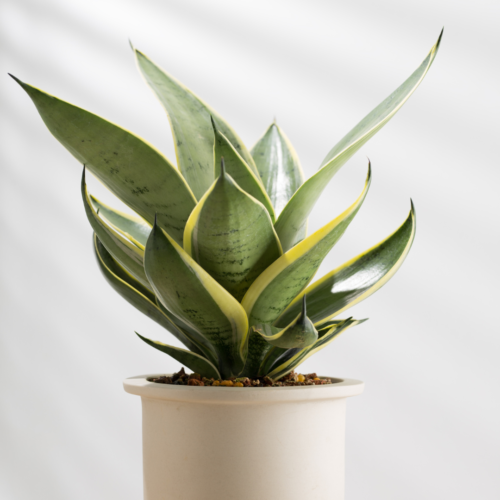
16. Moonshine Snake Plant
Next on our list is the Moonshine Snake Plant, a perfect choice for busy plant parents due to its resilience and unique features. This low-light succulent has striking silver-green leaves that have a silvery stripe down the center. The plant’s thin, upright leaves are slightly stiff, making it almost impossible to damage or break them. A Moonshine snake plant can grow up to three feet tall, and it doesn’t require much watering, making it perfect for people who are always on the go.
Apart from being easy to take care of, Moonshine snake plants also provide several benefits. They are known for their ability to purify the air, removing toxins such as formaldehyde, benzene, and xylene. Its air-purifying qualities make it an ideal choice for bedrooms and offices.
Get one here!
17. Hoya spp.
Hoya, also known as the wax plant, is a popular choice among plant parents because of its unique foliage and minimal care requirements. Its waxy leaves come in a variety of colors and shapes, from heart-shaped to circular, and can add visual interest to any room.
With enough light, Hoya can produce small, fragrant flowers that bloom intermittently throughout the year. Its flowers are star-shaped and come in shades of pink, white, and yellow.
Get one here!
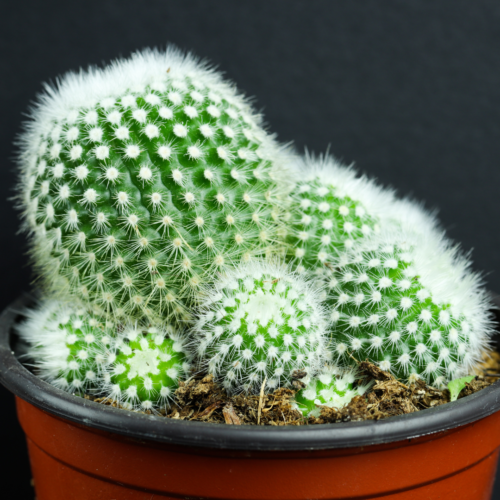
18. Pincushion Cactus
Pincushion Cactus, also known as Mammillaria, is a cactus that is perfect for busy plant parents. It requires minimal care and adds an unusual element to any collection. Pincushion Cactus prefers soil that drains well and should only be watered occasionally. Its unique appearance is due to the small white or yellow flowers that bloom from its spiky stems.
This small cactus also does well in low-light conditions but it won’t flower as often unless given more light. This doesn’t stop it though from being a cute little cactus to put on your shelf!
Get one here!
19. Haworthia ‘White Ghost’
Haworthia ‘White Ghost’ is a strikingly beautiful low-light succulent that is known for its ghostly appearance. This unique plant has fleshy, translucent leaves with white markings, making it look almost ethereal. It can be grown both indoors or outdoors, but it prefers bright indirect sunlight or low- to medium-light conditions. Like most succulents, Haworthia ‘White Ghost’ does not require frequent watering, and it needs well-draining soil, especially when it is in low light.
If you’re looking for a low-maintenance, visually stunning addition to your plant collection, Haworthia ‘White Ghost’ is definitely worth considering.
Get one here!
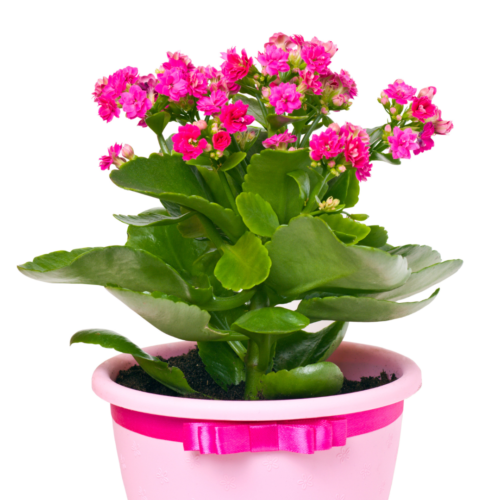
20. Kalanchoe spp.
Kalanchoe is a beautiful and versatile low-light succulent that comes in a variety of colors and shapes. This plant produces clusters of small, vibrant flowers that add a pop of color to any indoor or outdoor space. These flowers can range from whites to yellows, pinks, and even orange. It prefers bright, indirect light but can tolerate lower light conditions as well.
One of the great things about Kalanchoe is how easy it is to care for. It only needs to be watered once a week, and its soil should be well-draining to prevent overwatering. This succulent does well in a range of temperatures and can even thrive in drought-like conditions.
If you’re looking for a low-light succulent with colorful blooms and minimal maintenance, Kalanchoe is a great choice.
Get one here!
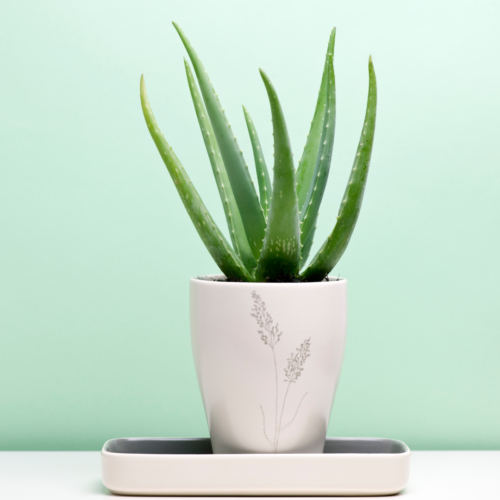
21. Aloe Vera
Aloe Vera is a popular succulent known for its medicinal properties. It’s easy to care for, making it an excellent choice for busy plant parents. Most people believe that aloe vera needs a lot of bright, full sun, but it actually does better in partial shade. If given too much light (especially when it is in a pot and doesn’t have the cooling effect of being planted in the ground), the leaves can turn a blue-ish color. When this happens, you know that your plant is stressed and it is best if you move it into a lower-light spot before the leaf tips turn brown. Don’t confuse this with a dark green color, though, which is a sign of overwatering!
In addition to its aesthetic appeal, the aloe vera plant has been used for centuries for its healing properties. The gel inside its leaves can be applied topically to soothe burns, reduce inflammation, and promote healing. It’s also known to purify the air of harmful pollutants, making it a great addition to any indoor space.
If you’re looking for a low-light succulent that’s not only beautiful but also has proven health benefits, Aloe Vera is an excellent choice.
Get one here!
22. String of Hearts
Another stunning low-light succulent option is the String of Hearts. This type of Hoya is a delicate and beautiful plant that features cascading vines of small heart-shaped leaves, creating a charming and whimsical look. It’s a great choice for hanging baskets or trailing over bookshelves or windowsills.
But the String of Hearts isn’t just pretty to look at – it also has air-purifying properties that make it a healthy addition to any space. Plus, it’s a low-maintenance plant that’s easy to care for, making it perfect for busy plant parents.
If you’re a fan of unique and eye-catching succulents, the String of Hearts is definitely worth considering. Just make sure that when you purchase a String of Hearts, you don’t start with a single heart leaf, since the plant needs a section of the stem in order to propagate and grow further. So make sure you get more than just a single leaf!
Get one here!
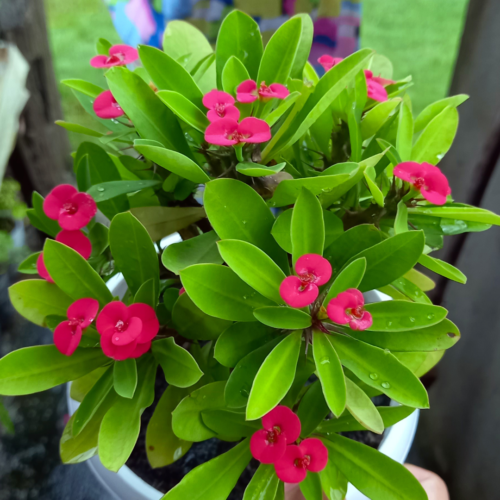
23. Crown of Thorns
The Crown of Thorns succulent is a unique and beautiful addition to any collection. With its thick stem and small green leaves, this plant is a showstopper. But what sets it apart from others is its small, bright flowers that bloom in clusters.
Be aware, though that this plant does have sharp thorns so it could be dangerous being placed in high-traffic areas or around small children. However, this plant could be good if you have pets that generally mess with your plants, since they will leave this tough little guy alone.
Get one here!
24. Baby Toes Fenestraria
The Baby Toes Fenestraria is a perfect choice for those who want a unique and fascinating plant that can thrive in low light conditions. Its plump and window-like leaves create a striking visual appeal that will capture anyone’s attention. To me, it reminds me of a mix between the windows haworthia and the ogre ears!
So if you’re looking for something that is extremely unique, then get yourself a Baby Toes!
Get one here!
25. Haworthia cooperi var. ‘retusa’
If you’re already a fan of succulents and are looking for a low light option, the Haworthia cooperi var. ‘retusa’ is an excellent choice to consider. This unique plant boasts a rosette of plump green leaves that have transparent tips, providing an eye-catching and mesmerizing appearance.
The Haworthia cooperi var. ‘retusa’ is easy to care for, making it an excellent option for busy plant parents who still want to add some personality to their living space. This succulent actually prefers medium to low light conditions, making it an ideal choice for those who don’t have access to bright, direct sunlight.
Adding the Haworthia cooperi var. ‘retusa’ to your plant collection allows you to enjoy the unique beauty of this plant and adds diversity to your space. Its distinct aesthetic adds an element of fascination that will surely capture the attention of anyone who enters your home.
Get one here!
In short, low-light succulents are the perfect addition to any busy plant parent’s home. With a variety of options, from the snake plant, to the aloe plant, to the haworthia cooperi var. ‘retusa’, there is a plant for every taste and style. Not only do these plants add a touch of green to your space, but they also have numerous benefits for your health and well-being. So why not add some low light succulents to your home and enjoy the benefits for years to come?!
If you need any care information, check out my post on Succulent Care!