Indoor Chive Plant Care

Growing chives indoors can be fun, easy, and tasty! The bright green, grassy look of this herb also makes it easy to decorate with! So now let’s talk about indoor chives plant care… cause you want to keep your plant healthy in order to keep your spice options open!

Don’t have a chive plant? Get one here!

**Note: This post contains affiliate links, which if purchased, I will receive a portion of the profits. This helps me to keep providing awesome information to all of you!**

Click here to subscribe

Indoor Chive Plant Care: Light Requirements

Chives like direct sunlight and can tolerate about 6 hours of direct sunlight each day. However, if your windowsill is full of other sun-loving herbs, this is your first herb to move away from the perfect spot. It does well with down to 4 hours of direct sunlight and also does well with artificial lighting. Just make sure that if it’s bending towards the light, that you consistently rotate your pot.

Indoor Chive Plant Care: Water Requirements

Chives like a little bit more water than most of your other Mediterranean drought-tolerant herbs. So make sure to water it slightly more than your other herbs. Also, make sure that you don’t over-water your plant. If the soil is spongy because it is so wet (the day after you water), then you should dry out the soil and try to add either more drainage to the pot, or a lighter soil (or both!).

indoor chive plant care

Indoor Chive Plant Care: Additional Requirements

Make sure that when you are harvesting your chives that you leave at least 2 inches (5 cm) at the bottom of the plant untouched. Also, if the tips of your plant is turning yellow, this is a sign of too little water and too little humidity. If you feel that you are watering it enough (you aren’t letting the soil fully dry out in between watering), then try misting your plant a few times a week. Or you can place it on a tray of pebbles and add a layer of water to the tray. This will naturally boost the humidity as the water in the tray evaporates in the sun.

I hope these indoor chive tips help! I personally love my chives and have had an easier time growing these than all my other herbs! So have fun, and enjoy this awesome herb! Then, for information on how to start chives from seed, check out this post, How to Star Chives from Seed! Or, for more information about simple indoor herb gardens, check out my post on 5 Effortless Indoor Herb Garden Kits! And as always, please leave any comments or questions below! I look forward to hearing your experiences!

Happy Digging!

Click here to subscribe

Indoor Oregano Plant Care

Oregano is an easy-to-grow plant with a myriad of medicinal and culinary uses. It’s no wonder that this Mediterranean plant has made is way around the globe. Anyone with an indoor herb garden needs to grow this fantastic herb! But only a healthy growing plant can give you your desired harvest, so today I’m going to give you all the plant care tips you need to grow oregano indoors!

Don’t have an oregano plant yet?! You can buy one here!

**Note: This post contains affiliate links, which if purchased, I will receive a portion of the profits. This helps me to keep providing awesome information to all of you!**

Click here to subscribe

Indoor Oregano Plant Care: Light Requirements

Oregano, like most herbs, likes to grow in partial to full sunlight outdoors. This means that indoors it needs to either be placed in a south-facing window or it should have plant lights to boost its indoor lighting. If it isn’t getting enough light, it will begin to stretch out and become “leggy”. Watch for this sign to increase light.

Indoor Oregano Plant Care: Water Requirements

Oregano is naturally drought tolerant which means that it would rather go dry than stay wet. Make sure that you only water your plant when the top inch of soil is dry. This keeps your plant safe from over-watering!

Indoor Oregano Plant Care: Additional Tips

Some things to keep in mind while growing oregano is first it’s dislike of staying wet. Make sure that you plant it in a pot that has good drainage, as well as use soil that is light and airy (such as cactus and succulent potting mix, or regular potting soil mixed with sand or perlite). Also, when your plant is several years old, it is a good idea to root some cuttings in water to make a new plant. This will keep your flavors strong with every leaf!

I hope you’ve enjoyed these plant care tips! Feel free to leave any questions or comments below! I love hearing from you! And let me know if you’d like any tips on how to harvest and store your oregano… good luck with it!

Happy Digging

Click here to subscribe

Indoor Thyme Plant Care

Thyme is a wonderful plant to add to your herb garden! It is generally easy to grow, but these plant care tips will help your indoor thyme stay healthy and happy, giving you years of harvesting this tasty herb!

Don’t have a thyme plant yet? You can buy one here!

**Note: This post contains affiliate links, which if purchased, I will receive a portion of the profits. This helps me to keep providing awesome information to all of you!**

Click here to subscribe

Indoor Thyme Plant Care: Light Requirements

Thyme likes to have full to partial sun outdoors, which means that indoors we need to put it in a south-facing window or give it additional light with plant lights. If your plant is declining during the winter months, this could be your plant going into dormancy because of a lack of sunlight or because of lower temperatures. If this happens, make sure to add plant lights to give your plant longer day-lengths, and keep it away from cold winter drafts. This will help the plant feel more like it’s summer!

Indoor Thyme Plant Care: Water Requirements

This plant is drought-resistant, meaning that it is used to going for short periods of time without any water. Because of this, the biggest cause of death for thyme is being over-watered. Make sure that you only water your plant when the top 1 inch (2.5 cm) of the soil has dried. And also make sure that your pot has good drainage. If your soil doesn’t drain well enough, the roots can rot due to to much moisture and not enough air around their roots. So make sure to never over-water this plant!

Indoor Thyme Plant Care: Additional Tips

As with most herbs, make sure to remove any flower stalks before the plant flowers. This will allow the plant to put more energy into leaf production instead of into seed production. Them, as thyme gets older, the lower stem will begin to get thick and woody. If too much of your plant is getting woody, you can either propagate a new, young stem (by rooting it in straight water), or you can prune back the woody stems hard to encourage lots of new, young, and non-woody growth.

I hope you’ve enjoyed these plant care tips! Please leave any questions or comments below… I personally read every one of them, and I love hearing from you! And for more indoor gardening, check out this list of 5 Effortless Indoor Herb Garden Kits!

Happy Digging!

Click here to subscribe

Indoor Rosemary Plant Care

Herbs are definitely the beginner’s step into indoor gardening. However, if our herbs die a sad, pitiful death, we can end up never wanting to grow edible plants again… fortunately for you, rosemary is one of the easier herbs to grow indoors. Simply follow these rosemary plant care instructions, and you’ll feel empowered to take on the entire herbal collection!

Don’t have a rosemary plant yet? You can purchase one here!

**Note: This post contains affiliate links, which if purchased, I will receive a portion of the profits. This helps me to keep providing awesome information to all of you!**

Click here to subscribe

Indoor Rosemary Plant Care: Light Requirements

Rosemary, just like most other herbs, likes plenty of direct sunlight. This means it would do well in your super-sunny south-facing window! Or, if you don’t have a lot of sun (or, like me, you already have your south-facing window full of succulents lol!) then you can give your plant supplemental light with plant lights. Here is my personal favorite! Just remember, rosemary likes to get around 5-7 hours of direct sunlight, so keep it around 8 hours with your plant light (since no light will ever be as bright as the sun…)

Indoor Rosemary Plant Care: Water Requirements

Rosemary likes to stay a little on the dry side. Make sure that you only water it when the top of the soil is dry. This plant is especially susceptible to root rot or to powdery mildew, both of which show up when you keep it too wet. Then, when watering, water the soil thoroughly in the summer months, but more sparingly in the winter. Your soil should be watered just enough to dry out every three days or so. This might mean that in the winter months you only add a fraction of the water that you would during the summer.

Indoor Rosemary Plant Care: Additional Tips

If your plant does get powdery mildew, it is important to IMMEDIATELY separate it from your other plants. One summer I didn’t separate mine fast enough and the majority of my indoor edibles got it too… I know… super sad… But from that, I found this awesome powdery mildew fungicide that works great for edibles. Just make sure that you don’t eat anything from the plant for 30 days, then wash everything before eating.

That’s all for my care tips! Leave any questions or comments below! And for some easy herb gardening, check out my list of 5 Effortless Indoor Herb Garden Kits!

Happy Digging!

Click here to subscribe

Indoor Mint Plant Care

Mint leaves are perfect for topping your favorite dessert, mixing into your summer drink, or even adding into your everyday meals! But for those of us with limited garden space, as well as those living in cold climates, growing mint can pose a problem. Not anymore! Learn how to care for your mint plant indoors to enjoy fresh mint leaves all year long!

This post is geared towards indoor mint plant care. To know how to grow your mint plant outdoors, check out my post Outdoor Mint Plant Care!

Don’t have a mint plant yet?!?! Get one here!!!

**Note: This post contains affiliate links, which if purchased, I will receive a portion of the profits. This helps me to keep providing awesome information to all of you!**

Click here to subscribe

Indoor Mint Plant Care: Light Requirements

Mint plants growing indoors need at least 4-6 hours of direct sunlight daily. It is best if placed on a south-facing window, however, if you don’t have a lot of natural indoor sunlight, then you can still grow your mint plant with the help of a plant light! Here is one of my personal favorites, a cheap, full-spectrum, and hidden plant light!

Indoor Mint Plant Care: Water Requirements

This plant can be grown in either soil, or in straight water. When grown in soil, only water your plant once the top 1 inch (2.5 cm) of the soil has become dry. If your plant is falling over, but is staying green or yellow, then your plant is being over-watered. However, if your plant is green or brown and wilting, this is a sign of too little water. Make sure to feel the soil to know if your plant is too wet or too dry.

Indoor Mint Plant Care: Additional Requirements

Indoor mint plants will never be as vigorous as outdoor mint plants. This could be good, however, as mint plants can become very invasive. To propagate this plant, you can root cuttings in straight water, then plant them into damp soil. Also, make sure to remove your plant’s flowers before they set seed, or else your plant will grow the seeds, then quickly decline. So make sure to prune off the flower well before this happens.

I hope you’ve enjoyed this post and that you will soon have plenty of fresh mint leaves for years to come! Feel free to leave any questions or comments below!

Happy Digging!

Click here to subscribe

How to Water your Air Plants the RIGHT Way!

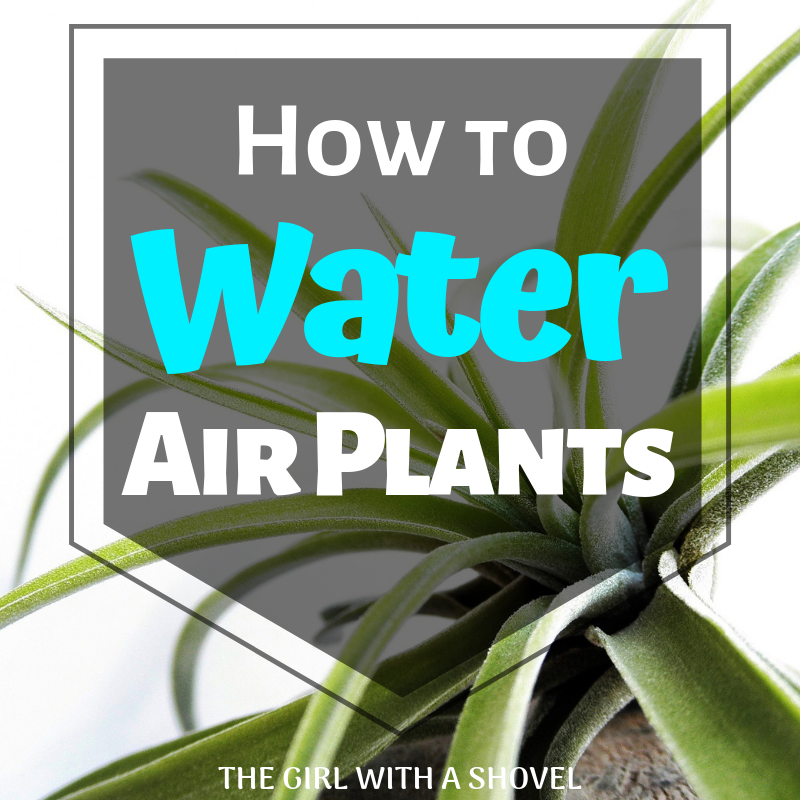
Hey everyone! I know that we all LOVE air plants, but how the heck do you water something without any roots or any soil?!?! Well today I’m going to tell you exactly how to water your air plants so they stay happy and thriving!

Now there are two different methods. First is if your air plant is mounted/hot glued/fixed in any way to it’s stand. The second method (which is the preferred method) is for if your air plant is separate and can be removed from its mount, or if the mount is waterproof. So keep reading and use whichever method applies to you! But first, before you learn HOW to water your air plants, you need to make sure you’re using the correct TYPE of water…

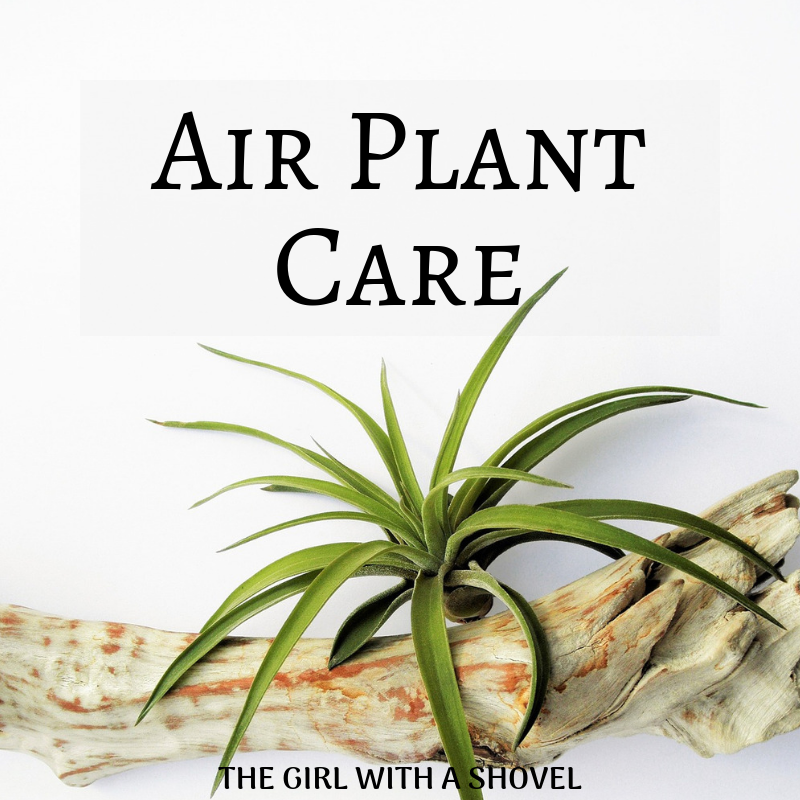
If you want overall care tips for your air plant, check out my post here on air plant care!

Want to boost your air plant collection?! You can get some awesome air plants here!

**Note: This post contains affiliate links, which if purchased, I will receive a portion of the profits at no extra cost to you. This helps me to keep providing you with such awesome information!**

Click here to subscribe

What Kind of Water to Use for Air Plants

Unlike most other houseplants, air plants DON’T like distilled water! If it’s a choice between distilled or tap water, go with tap water every time! The main harm with tap water is its chlorine. But for this, you can simply leave your water out for about 30 minutes to allow the chlorine to dissipate. This should be your easiest choice of water.

To go to the next level with your watering, choose a natural source, such as rain water, pond water, or lake water. While the rain water is what your plant is used to in its natural habitat, spring water, pond water, or lake water can also be extremely good for your air plants because it is usually rich in nutrients. Another alternative to these is if you have an aquarium. Aquarium water can also be highly beneficial to air plants as your air plant can get added nutrients from this water as well.

The only recommendation that I have, however, is if you use one of these water sources that already contains nutrients, then hold off on the fertilizer. If you use both, then it could potentially be too much for your little guy!

Now… on to the exact methods!

How to Water Air Plants Method 1: Fixed to a Mount

If your air plant is fixed to a mount or a stand, then the best way to water your plant will be through misting. This can be tricky though as most people who mist their air plants end up with rotted, dead plants. (Trust me! I know from personal experience!!!)

To correctly mist your air plant, the important thing is to think of it more like a shower than a misting. Spray it with a spray bottle or a misting bottle until the leaves are dripping with water. (I would recommend placing it in a sink or on a towel while you do this).

The next two tips are vital to avoid rotting your plant! These two tips are: turn your plant upside down, and give it good air circulation.

After you mist your plant you should place it upside down for 10-15 minutes to allow any excess water drain out of the plant. This is vital! Air plants aren’t like bromeliads that can keep water cupped in their leaves. If you do this to your air plant, it will most likely die on you. Instead, give it a good shake and place it in a position where all of the excess water can drain out.

This was my first big lesson with air plants. My first tillandsia was glued into a hanging glass globe. Little did I know that while I was spraying it down, all of the excess water was collecting in the bottom of those glued-in rocks, which was cradling the very center of my air plant… And let’s just say, it didn’t appreciate the long-term bath! So please remember to drain any excess water off of your air plant!!!

Next, make sure that your plant has good air circulation while it is drying. Normal indoor air circulation is fine, but if your plants are in glass terrariums, or in some of those glass globes (like my first air plant), then you’ll need to help it out a bit with a light fan. This will help to avoid any rotting from excess moisture.

Once it has finished soaking up all of the water and has completely dried, then you will be good to go! Simply follow this spray, shake, and circulate a couple times each week dependent on the temperature and the amount of indirect sunlight. Then watch your beautiful plant thrive!

How to Water Air Plants Method 2: Removable Air Plant

The soaking method, or the water bath method, is the preferred method of watering and I recommend purchasing your air plants separately from their container for this reason. It will be a lot easier for you and your plant in the long run. However, note that the xeric air plants, (most air plants with fuzzy leaves, such as the tillandsia tectorum, or the tillandsia xerographica) don’t like as much water and will do best with the misting method mentioned above.

So what you do for this situation is… once every 7-10 days, fill up a large bowl (or your sink or tub depending on how many air plants you own) with lukewarm water and place your air plants inside. Leave them to soak for several hours. Your goal here is to give your plants a good soak. Let them absorb as much water as they possibly can. I’ve heard of some people leaving their air plants to soak for up to twelve hours!

After they are done soaking, then you NEED to place them upside down on a towel or dish cloth to drain. Let them drain for about 4 hours, or until they are completely dry. If you live in a humid climate, you can also speed up the drying process by placing a fan nearby to increase air circulation.

After the plant is completely dry, then it is ready to place back on its stand and wait anther 7-10 days to water it again. If the tips begin to turn brown, lightly mist your plant a few times during the week, or increase your watering frequency.

How Often Do I Water my Air Plant?

To know how often to water your air plant, you will need to consider several different factors. First, it will help if you know the genus tillandsia that you have. This will help you know if it comes from a humid environment, like south america, or if it comes from a more arid climate, like found in central america. Then, factoring in how much indirect light it is receiving, you can start off with an estimate of whether it would like more frequent or less frequent waterings. A good rule of thumb is to give your air plant small amounts of water. Then, if the tips of the leaves begin to brown, you will know to slightly increase your watering.

I hope this helps! Let’s keep our air plants happy and well-watered (but not rotting!!!) And if you have any questions or comments, feel free to join the Facebook group, Houseplants for Plant Killers or follow me on Youtube! I love hearing from you!

Happy Digging!

Frequently Asked Questions:

How Often do Air Plants Need to be Watered?

The frequency of water will change with both the time of year, the indoor humidity levels, and how much light your plant is getting. As a general rule of thumb, however, you should expect to give your air plant a good soak every 7 to 10 days.

Can you Soak Air Plants in Tap Water?

Yes. You can use tap water to soak your air plants. The best practice, though is to fill your bucket of water, then leave it out for at least 15-30 minutes to let the chlorine evaporate out. This will be much healthier for your plant without you sacrificing too much of your time.

Do Air Plants Need Sun?

Yes. They need sunlight. But not all tillandsia species do well with DIRECT sunlight. Instead, they do much better with lots of indirect, bright light. In general, if your plant has a lighter, pale color, then it will do better with more sun. If your plant is more vibrant in color, then it will most likely be fine in lower light or fluorescent light conditions.

How do you Water an Air Plant without Soaking It?

To water an air plant without soaking it, you can use the spray/misting method mentioned above. This will require more frequent watering, but is necessary for plants that are secured to a non-waterproof base. If the spraying is still getting too much water on the plant stand, however, it would be better off to gently remove the air plant and soak once per week as recommended.

Click here to subscribe

Indoor Lavender Plant Care

Not all of us have outdoor space, and even if we do, bringing a lavender plant indoors can add color and fragrance to a space all summer long! But how exactly do we get our lavender plant to grow (and flower!!!) indoors?! It can sometimes be tricky with this plant, so be sure to follow this advice carefully!

Growing your lavender outdoors? Check out my post on Outdoor Lavender Plant Care!

Don’t have a gorgeous lavender plant yet? Get one here!

**Note: This post contains affiliate links, which if purchased, I will receive a portion of the profits at no extra cost to you. This helps me to keep providing awesome information to all of you!**

Click here to subscribe

Indoor Lavender Plant Care: Light Requirements

One of the biggest challenges with growing lavender indoors is providing it with enough sunlight that it can produce a good amount of flowers (instead of just a bunch of stretched out leaves). If you live in a region with mild winters, you might be able to get away with placing your lavender plant on a south- facing window ledge. However, for those of you in colder climates (that have shorter day lengths in the winter), you will need to purchase a plant light to shine over your lavender. This is because lavender plants need about 8 hours of sunlight a day to grow without stretching. You can find my favorite natural-looking and cheap plant light here!

Indoor Lavender Plant Care: Water Requirements

Lavender plants are used to being in hot, dry conditions… which means that the worst thing for them is to have their roots soaking in water. Keeping this in mind, only water your lavender plant when the top 1 inch (2.5 cm) of the soil is dry. Also make sure that your soil and pot has good drainage so that it dries out a couple of times each week. This is especially important in the winter as most people water their plants the same way throughout the year and end up drowning their plant in the winter when the plant uses only a fraction of their normal water.

Indoor Lavender Plant Care: Additional Tips

Another thing that helps lavender plants to grow is a slightly alkaline soil. To achieve this, you can dry and crush up eggshells. Then sprinkle these on the top of the soil. Next, remember to prune your plant in the fall or the spring in order to keep your plant from getting woody. I’ve included a video below to demonstrate exactly how to do this. Then as a final tip, be sure to harvest the flower stalks before the last flower has opened in order to get the scent and the oil at its most potent moment!

I hope you’ve enjoyed these care tips! And enjoy growing your own lavender indoors! Feel free to leave any comments and questions below. I love hearing from all of you! And once again, if you’re planning on growing your lavender outdoors (even if it’s only during the summer), be sure to check out my Outdoor Lavender Plant Care post!

Happy Digging!

Click here to subscribe

Low Light Plants for the Bathroom

Today I’m going to give you a list of 9 low light plants for the bathroom! Because, let’s face it, most of us don’t have large, beautiful windows that overlook the ocean from our luxurious bathtubs. Even though are bathrooms are dark, we can still make them feel luxurious with our plant choice! Now the only question is which plants will be able to survive my dark, humid bathroom? Well, here they are…

**Note: This post contains affiliate links, which if purchased, I will receive a portion of the profits. This helps me to keep providing awesome information to all of you!**

Click here to subscribe

Low Light Plants for the Bathroom #1: English Ivy – Hedera helix

This beautiful vine does great in low light situations. When you choose your English ivy, make sure to choose one with solid green leaves rather than white or yellow variegation. The green varieties do a lot better with low light conditions.

Buy one here!

Low Light Plants for the Bathroom #2: Nerve Plant – Fittonia spp.

This colorful plant not only looks stunning, but it also prefers indirect light over direct sunlight. But be aware that the lower the light levels, the less bright this plant’s colors will be.

Buy one here!

Low Light Plants for the Bathroom #3: Prayer Plant – Maranta leuconeura

The Prayer Plant does surprisingly well in low light conditions and it absolutely loves extra humidity.  Just be sure to place it in well-draining soil as this plant doesn’t like to stay wet.

Buy one here!

Low Light Plants for the Bathroom #4: Rabbit’s Foot Fern – Davallia denticulata

Rabbit’s foot fern is known for its thick, furry roots that make quite a bold statement! And, as all ferns, this plant does well with moist bathroom conditions.

Buy one here!

Low Light Plants for the Bathroom #5: Slipper Orchid – Paphiopedilum

The slipper orchid is the type of orchid that does the best in lower light conditions. Imagine having one of these beautiful orchids in your bathroom!

Buy one here!

Low Light Plants for the Bathroom #6: Bird’s Nest Fern – Asplenium nidus

This fern is a personal favorite! I love how the thick, wavy leaves are sure to make a bold, tropical statement wherever they are placed! And, for a fern, this little guy isn’t nearly as messy as some other ferns can be.

Buy one here!

Low Light Plants for the Bathroom #7: Bamboo Palm – Chamaedorea seifrizii

Bamboo Palm does better in low light than any of the other indoor palm trees. It also loves the added humidity found in most bathrooms. This extra humidity will also help keep the leaf tips from turning brown!

Buy one here!

Low Light Plants for the Bathroom #8: Guzmania Bromeliad – Guzmania spp.

Bromeliads are nice plants to own in that they are slow growing, so they require little maintenance other than watering. They will also look great for years before they have an approximate 6 month long flower, and then they will produce new offsets while the parent plant will decline. This makes them incredibly easy-going plants!

Buy one here!

Low Light Plants for the Bathroom #9: Fancy-leafed Begonia – Begonia spp.

Fancy-leafed begonia needs less light than flowering begonias. And it’s a good thing, too, because with their colorful foliage, these plants can really brighten up any dark space!

Buy one here!

That’s it for my list! Remember, you can get away with placing any plant in poor lighting if you get two identical plants. Simply place one plant in good lighting and the other in the poor lighting, then switch them once a week! This will give each one enough light to stay healthy and still look good. And feel free to leave any questions and comments below! I absolutely love hearing from you!

Happy Digging!

Click here to subscribe

Top 10 Trending Indoor Plant Pots

What is up again everyone?!?! So today we’re going to have some fun with the top trending indoor plant pots! Right now we’ve seen some awesome, sleek, simplistic designs becoming popular. I give credit to the huge minimalist living movement, which has inspired simple lines and basic colors that soothe the mind after a long day at work.

So pick your favorite of these super cute pots and add it to your collection today!

**Note: This post contains affiliate links, which if purchased, I will receive a portion of the profits. This helps me to keep providing awesome information to all of you!**

Click here to subscribe

Indoor Plant Pots #1: Coral Lemons

Kicking it off with the bright ‘Living Coral’ Color of the Year, we’ve got a cute set of pots that feature bright lemons on a background of coral. These pots remind me a bit of an Andy Warhol painting… sure to brighten up any space with these splashes of color!

Get it here!

Indoor Plant Pots #2: White Ceramic Plant Containers with Gold and Grey Detailing

This pot set combines a modern shape with cool, minimalist colors that are sure to look great in any design! These are perfect for any area you want a small, attractive grouping of plants.

Get it here!

Indoor Plant Pots #3: Dundee Bronze Floor Planter

The Dundee Bronze floor planter is actually made of 100% iron with a bronze finish. Absolutely stunning for a modern, minimalist style, this pot is sure to last for years with its durable build. And consider purchasing it together with a plant stand to show it off!

Get it here!

Indoor Plant Pots #4: A & B Home Terracotta Planters

Going back to vintage, this blue color goes perfectly with the ‘Living Coral’ Color of the Year! This four-pot set each has a unique, antique pattern that looks great indoors or out.

Get it here!

Indoor Plant Pots #5: Ferris Wheel Succulent Pot Holder

It’s no wonder this cute little plant stand has been trending. What plant lover doesn’t want a plant Ferris Wheel! This set includes the pots along with the rotating stand that is sure to help your succulents make a statement!

Get it here!

Indoor Plant Pots #6: Ceramic Succulent Planter with Bamboo Drainage Trays

This set of 3 round succulents is meant for creating a grouping of small succulents that add a variety of colors and textures. It includes bamboo drainage trays that not only add another natural element to your planter, but it is also extremely practical in saving your tabletops from water damage!

Get it here!

Indoor Plant Pots #7: Ceramic Succulent Magnetic Pots

Be sure to check out this awesome succulent pot that is magnetic! This makes it perfect to easily hang on any magnetic surface. There is the square, trapezoidal, and watering can shaped pots available!

Get it here!

Indoor Plant Pots #8: Unbreakable Resin Plant Containers

This set of two indoor/outdoor pots is extremely durable! Made out of resin, they are heavier than plastic pots, but much lighter than real stone. Just be aware of the raised drainage plug at the bottom of the pot. It makes the actual pot depth about 8″.

Get it here!

Indoor Plant Pots #9: Geometric Hanging Planter

With the trend of vertical gardening, it’s no wonder that these modern hanging planters are such a hot item right now! Either buy one to accent a small space, or get several to create stylish wall decor!

Get it here!

Indoor Plant Pots #10: Modern Plant Stand Pots

If you’ve been paying any attention to the indoor plant scene, then I’m sure you’ve seen these super sleek modern plant stands. But the hardest part of achieving this look is finding a pot that doesn’t have sloping walls. Well, here it is! Here are the amazing vertical plant pots that have been starring in the most current modern homes!

Get it here!

There’s the roundup of 2019’s top trending pots! I’m excited to see what next year brings! Let me know in the comments below what you think about these pots, as well as which ones you have and like the best! For some indoor plant recommendations, check out my post on Modern Indoor Plants, Low Light Houseplants, or Plants for a BOHO Bedroom!

Happy Digging!

Click here to subscribe

Air Plant Care

Air plants are some amazing plants! Undergoing thousands of years of evolution, they’ve found unique ways to compete for water and sunlight among an entire forest! But now the question is how do we get these highly specialized plants to survive in or extremely different home environments?! Well, that’s what we’re going to talk about today!

Don’t have any air plants yet?! You can get some here!

**Note: This post contains affiliate links, which if purchased, I will receive a portion of the profits. This helps me to keep providing awesome information to all of you!**

Click here to subscribe

Air Plant Care: Light Requirements

Air plants do best in bright, indirect light. The only time they can withstand direct sunlight is during the winter when temperatures are lower. If plants are in hot, direct sunlight, their leaves will burn and they could die.

Air Plant Care: Water Requirements

Incorrect watering is the main cause of air plant death. Because of this, and because of the unique way of watering, I’ve decided to create an entire post dedicated to show you how to water your air plant. You can check it out here!

Air Plant Care: Additional Tips

One of the craziest things about air plants is that they can absorb nutrients through their leaves! Fertilize your plant once every two weeks with a high-phosphorous fertilizer. This can be done by spraying the leaves with a liquid fertilizer and then shaking off any excess moisture. Only fertilize it during the spring and summer. Do not fertilize it during the fall or winter.

I hope you’ve enjoyed these tips about air plant care! And feel free to leave any further questions or comments about your own successes or failures below!

Happy Digging!

Click here to subscribe