Modern Indoor Plants

Hey everyone! If you’re a fan of modern interior design, then you’re going to love this list of modern indoor plants! Full of bold, sleek lines, these plants are sure to help update any room into a stylish, modern space!

**Note: This post contains affiliate links, which if purchased, I will receive a portion of the profits at no extra cost to you. This helps me to keep providing you with this awesome information!**

Click here to subscribe

Modern Indoor Plants #1: Air plants – Tillandsia spp. 

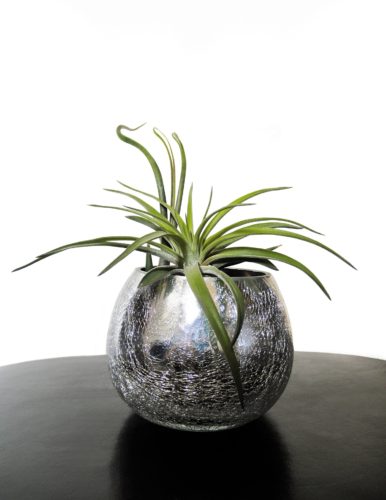
These small plants are perfect to place on shelves, accent tables, or even as wall decor. The most modern pieces are the ones that use metal, glass frames to perch these amazing, rootless plants! Regardless of where you place them, air plants will show that you are stylish and chic!

Buy an air plant!

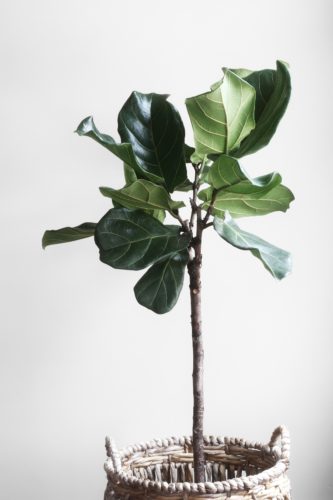
Modern Indoor Plants #2: Fiddle-leaf Fig – Ficus lyrata

These ficus trees used to be only grown in groups of at least three to form a bushy, soft indoor tree. However, now they are praised for their bold, minimalist look and are sold individually to show off their true form. So upgrade your space today with a single, bold fiddle-leaf fig!

Buy a Fiddle-leaf Fig!

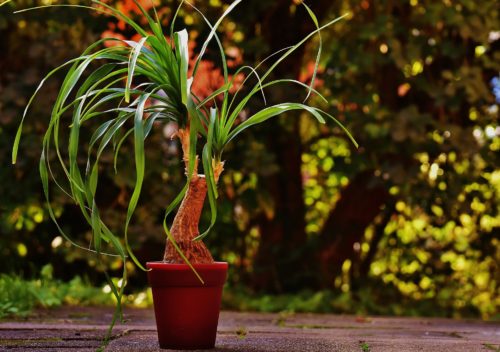
Modern Indoor Plants #3: Ponytail Palm – Beaucarnea recurvata

This plant has also been sold as a group of palms. But when planted alone, the ponytail palm really shines. With thin, curly strands of leaves, this palm looks like an impressionist work of art! Style with a raised, square pot to emphasize this plant’s twisted, cascading foliage.

Buy a Ponytail Palm!

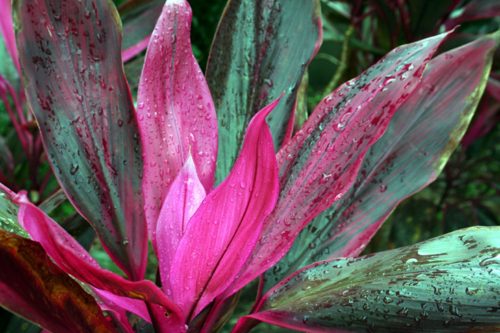
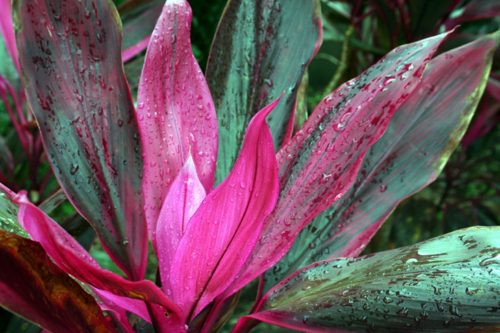
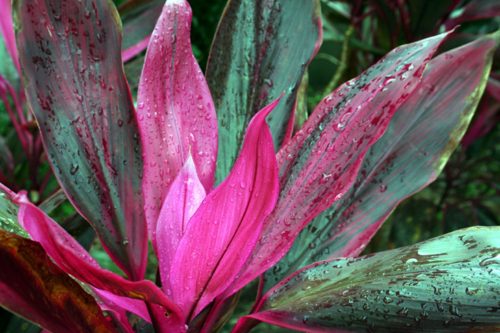
Modern Indoor Plants #4: Ti Plant – Cordyline fruticosa

The Ti plant adds a modern touch through its eye-catching, colorful leaves paired with thick, straight stalks that are an architect’s gold mine! So if you’re looking for a modern indoor plant, but you don’t want to sacrifice the color scheme, then the Ti plant would be your top pick!

Buy a Ti plant!

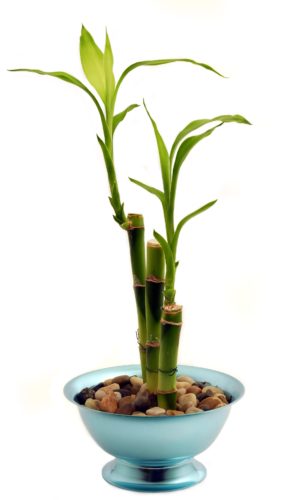
Modern Indoor Plants #5: Lucky Bamboo – Dracaena braunii

This plant is all about bold lines. Trained into different forms as it grows, this plant can be sold in either straight or curved lines and can be shaped to form centerpieces that appear almost sculpted. Also, its ability to grow in straight water makes container choices for this plant endless! So get one of these living sculptures for your home!

Buy a Lucky Bamboo!

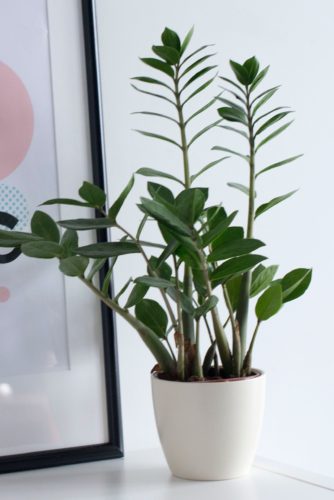
Modern Indoor Plants #6: ZZ Plant – Zamioculcas zamiifolia

Coming back into popularity is the awesome ZZ plant! Its arching fronds are enough to soften up a sharp corner, while its dark green leaves connect at hard angles that maintains this semi-succulent’s modern look. It is also very low maintenance and does well in low light levels!

Buy a ZZ plant!

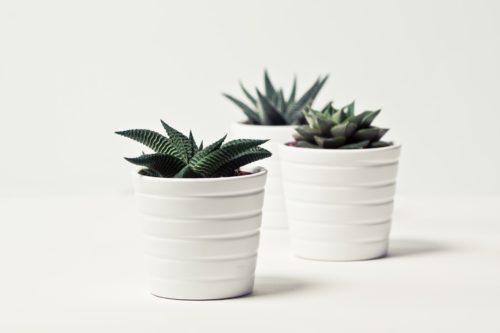
Modern Indoor Plants #7: Haworthias

This little plant packs quite the punch for its small size! There are tons of different varieties available with plants ranging from striped leaves to translucent, and in colors from red to green to blue! There are also just as many different pot designs for you to choose from. So get a Haworthia if you’re looking for something unique, but also modern.

Buy a Haworthia!

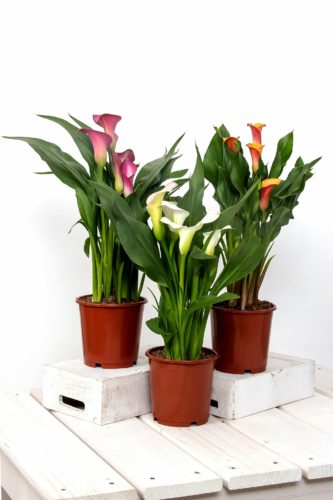
Modern Indoor Plants #8: Calla Lily – Zantedeschia aethiopica

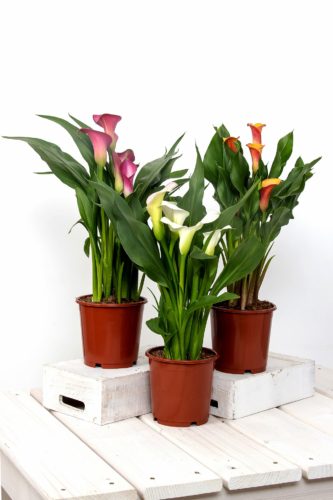
Though normally an outdoor plant, Calla lilies have been brought indoors lately. Their tall, straight form mixed with their ever-popular calla lily flowers makes this plant fit in with any modern home decor.

Buy a Calla Lily!

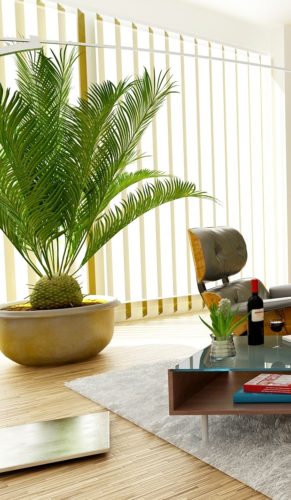
Modern Indoor Plants #9: Sago Palm – Cycas revoluta

This palm is very different from its feathery relatives. Short and compact, this palm needs to be placed in a low-traffic area to avoid its sharp fronds. But despite its rough edges, it is sure to bring in a light, tropical feel to the design!

Buy a Sago Palm!

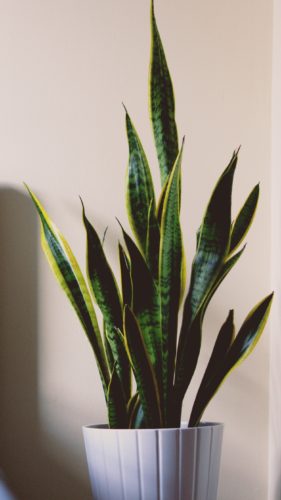
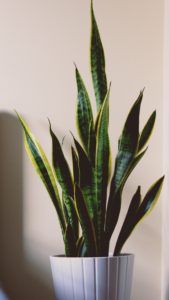
Modern Indoor Plants #10: Snake Plant – Sansevieria trifasciata

Last, but definitely not least, is the modern snake plant! This plant’s bold, upright form, along with its different color options available, makes the snake plant one of the modern home designer’s go-to plant!

Buy a Snake Plant!

I hope this list has given you some ideas for adding the right greenery into your modern space! Feel free to leave any questions or comments below, and for more indoor plant inspiration, check out my post Low Light Plants for the Bathroom!

Happy Digging!

Click here to subscribe

Low Light Plants for the Bedroom

Hey y’all! So we all know that some of our home’s bedrooms (or our dorm room, or tiny apartment room…) can sometimes not have the best lighting for plants. Because of this, I came up with a list of 11 awesome low light plants for the bedroom! If your room doesn’t have much natural light, try out one of these!

**Note: This post contains affiliate links, which if purchased, I will receive a portion of the profits at no extra cost to you. This helps me to keep providing you with this awesome information!**

Click here to subscribe
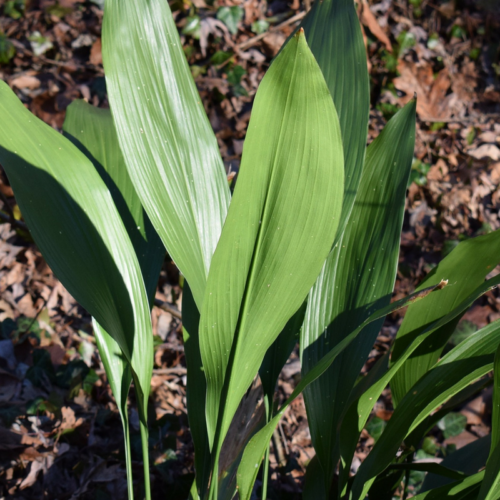
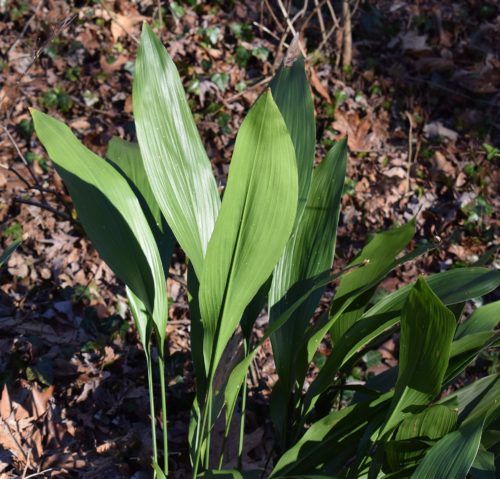
Low Light Plants for the Bedroom #1: Cast Iron Plant – Aspidistra elatior

This plant is amazing for several different reasons! Not only does it do well in low light levels, but it can also tolerate a lot of neglect and is on my list of hard-to-kill houseplants! Seriously, this guy can take it all! You won’t regret having a Cast Iron Plant in your bedroom!

Buy a Cast Iron Plant!

Low Light Plants for the Bedroom Aspidistra
Low Light Plants for the Bedroom #2: English Ivy – Hedera helix

There’s a reason why this plant is sold in so many garden centers! It does well in low light situations, as well as in cold basements and drafty hallways. It’s also one of those classic indoor plants that will never go out of style!

Buy an English Ivy!

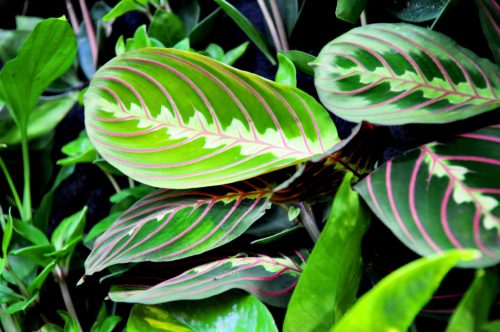
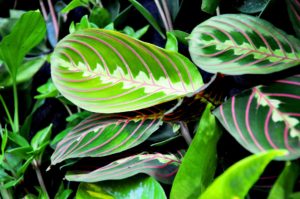
Low Light Plants for the Bedroom #3: Prayer Plant – Maranta leuconeura

This plant brings a splash of color into a dark bedroom! It is low-growing and can even be used in a hanging planter and its leaves will begin to cascade down the sides of the pot. This plant is a wonderful addition to any low light bedroom!

Buy a Prayer Plant!

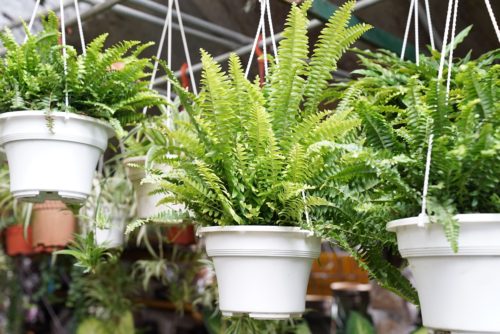
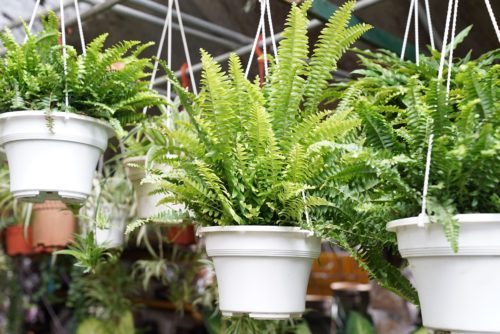
Low Light Plants for the Bedroom #4: Boston Fern – Nephrolepis exaltata

Boston ferns are one of the easiest ferns to care for. Not only do they enjoy low-light conditions, but they also prefer cooler temperatures. So this is a must-have for any dark and cold basement bedrooms (or any cool, low light location in the house!) Just make sure to mist it daily to keep the fronds from turning brown.

Buy a Boston Fern!

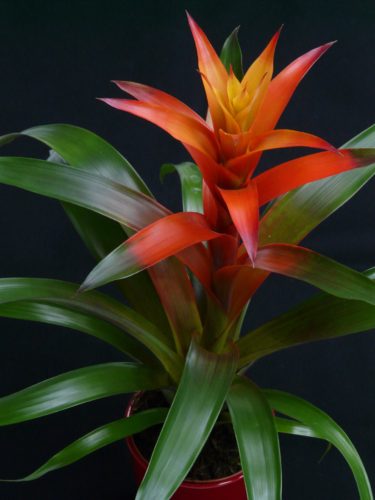
Low Light Plants for the Bedroom #5: Guzmania Bromeliad – Guzmania lingulata

This bromeliad does great in low light bedrooms and is a relatively easy plant to care for. Make sure that it is lightly misted once per day in order to keep it healthy and to encourage the plant to bloom! Once Guzmania is done blooming, it will grow new plants to the side, while the central bromeliad dies. In this way, with the purchase of one plant, you can get many more bromeliads that will last you forever!

Buy a Guzmania Bromeliad!

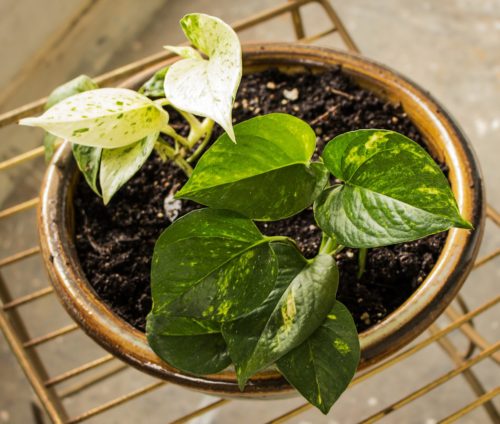
Low Light Plants for the Bedroom #6: Pothos – Epipremnum aureum

Pothos is one plant that I believe every beginner should own! It can tolerate a variety of light levels (including low light levels), and it is very tolerant of neglect. Pothos also looks great in a variety of planters and can be trained as either an upright, vine, a full and bushy plant, or a hanging vine. Make sure to check out my post on Pothos Vine Care!

Buy a Pothos!

Low Light Plants for the Bedroom #7: Snake Plant – Sensevieria trifasciata

Snake plant is also one of my absolute favorite plants! It does well in low-light conditions, as well as can tolerate quite a bit of neglect. It is also a very popular plant for modern home design! Make sure to check out all of the different variations!

Buy a Snake Plant!

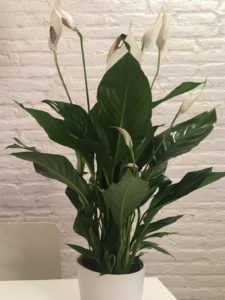
Low Light Plants for the Bedroom #8: Peace Lily – Spathiphyllum wallisii

Peace lily is definitely a gorgeous plant for a bedroom! Even without the white flower bracts, just the leaves alone make for a beautiful foliage plant! And the best part?! It’s a low-light plant!

Buy a Peace Lily!

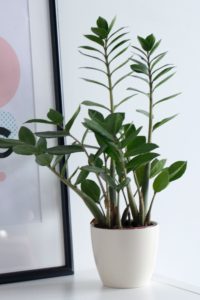
Low Light Plants for the Bedroom #9: ZZ Plant – Zamioculcas zamiifolia

This semi-succulent has been making a comeback in houseplant popularity! With its zany, arching branches, this little plant is sure to make a statement wherever it is placed! But don’t worry, this little guy is also extremely low maintenance!

Buy a ZZ plant!

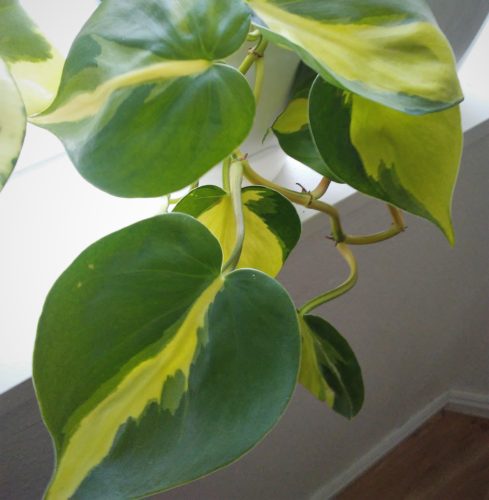
Low Light Plants for the Bedroom #10: Heartleaf Philodendron – Philodendron cordatum

Heartleaf philodendron needs less light than its larger-leafed brothers. This, along with its cute, heart-shaped leaves makes it perfect for a bedside table or hanging basket! It is also available in several different varieties to match your personal style!

Buy a Heartleaf Philodendron!

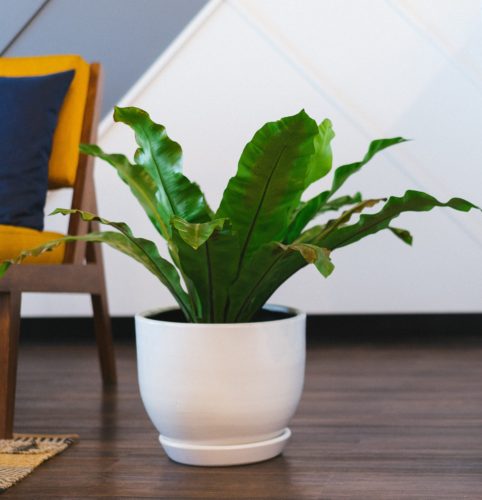
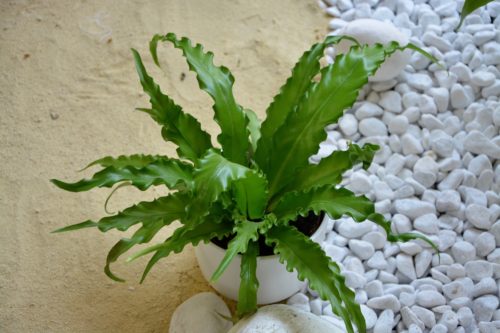
Low Light Plants for the Bedroom #11: Bird’s Nest Fern – Asplenium nidus

This awesome fern does great in low-light situations, but it prefers to be a little warmer than the Boston fern. It also sheds less than other ferns due to its sword-shaped leaves. But make sure to mist this fern daily to avoid brown leaf tips!

Buy a Bird’s Nest Fern!

Well there you have it! I hope you have a fun time adding some greenery into your low light bedroom! Because every place could use a little more green!

Happy Digging!

Click here to subscribe

Awesome Self Watering Pots!

Self-Watering Pots Image

So, as I’ve been getting busier in my life (with two young kids and my husband still in school…) I’ve been trying to find some short-cuts for my days. And one thing that would always take a ton of time every morning was watering all of my houseplants (of course, I have quite a few of them lol!). So looking at one of my favorite purchasing websites (Amazon!) I decided to try out these proclaimed ‘self-watering’ pots. Why not try them out, and let ya’ll know how it went?! Well, I am sure glad that I did! Now I want 10 more!!!

**Note: This post contains affiliate links, which if purchased, I will receive a portion of the profits at no extra cost to you. This helps me to keep providing you with this awesome information!**

Click here to subscribe

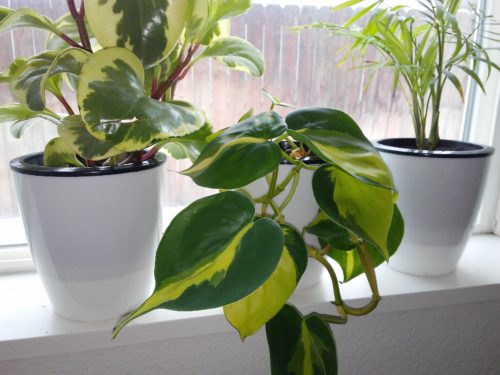
I ended up purchasing the Medium-sized Mkono 3-pack Self Watering Planter Pots. I really liked the modern look of them and thought they’d fit well with my home decor.

When they arrived and I was so excited! I waited until the kids were in bed, then I recorded an awesome video opening the package, putting the pots together, and potting up all three of my plants!

Once I finished, I hit save… and my computer froze!!! 

So that’s why I don’t have an amazing video to show y’all… 🙁

So now I’ll just have to tell you all how it went… and show you the pictures. But I promise I’ll get this video thing figured out soon though!

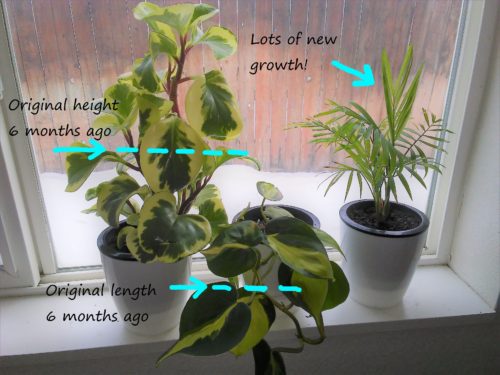
So here’s what I’ve thought about the self-watering pots (now that I’ve had them for about 6 months…)

I was definitely a bit skeptical at first about the whole “self-watering” concept. I thought for sure that it would be too wet for my plants. So to test out my theory, I used plants of different watering preferences to see which plants would die because of over-watering…

I used…

Heartleaf Philodendron ‘Brazil’

HIGH WATERING

This plant loves water and can even be grown in a soilless media!

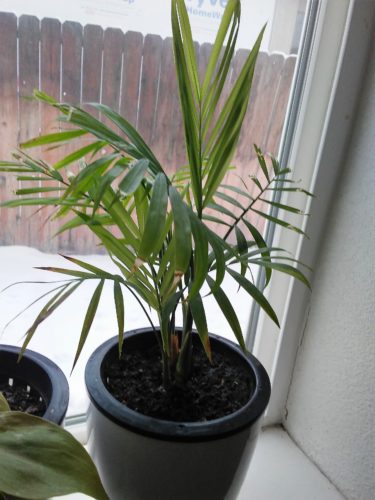
Parlor Palm

MEDIUM WATERING

This palm does well being lightly moist, but being allowed to dry out in between watering during the winter.

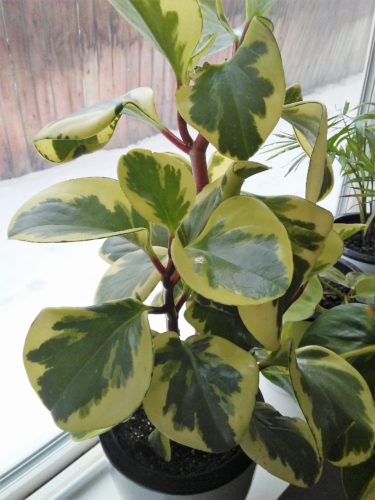
Peperomia

LOW WATERING

Peperomia is a semi-succulent, so it stores some water in its thick leaves. Because of this, it doesn’t need as much water and likes to be dry in between waterings.

I totally expected my Peperomia to rot… (I was willing to sacrifice it for y’all!)… However, what I found was surprising…

All of my plants loved it!

I was so shocked! The suction power of the strings directly corresponded with how fast the plant as taking up water. And guys, not only did my plants not rot, but they grew like crazy!!! (Even in the winter!)

self-watering pots

I was amazed! I guess I didn’t have super high expectations going in, but these pots totally blew my mind!

Here are the Pro’s and Con’s that I found with these pots:

Pro’s:
  • Decreased my watering from once a day to once or twice a week!
  • Great pots that look great in my modern home design!
  • My plants LOVED the consistently light moisture!
Con’s:
  • Because half the pot is filled with water, the actual pot size is rather small
  • If the water was filled too high and touched the soil, then the plant/soil would get too wet…
  • My Peperomia grew so much that it started tipping over the light-weight, plastic pot!

There you have it! Make sure that your plant isn’t too big and you’re set! So stop having to water your plants every day, and instead, watch them grow like crazy!

I don’t know about you, but I’m definitely going to be getting more of these awesome self-watering pots!

Happy Digging!

**Note: Do not use this pot for succulents or cacti.**

Click here to subscribe

Propagating Pothos Vine

Today I wanted to demonstrate how to grow one of my favorite indoor plants! Yep, that’s propagating Pothos vine! Also called Devil’s Ivy, this plant is one of the easiest plants to grow, earning it a spot on my hard to kill houseplants post, as well as my plants for dark apartments post. But for this post I wanted to tell you all how to grow your own Pothos vine. Trust me, it’s incredibly easy and you’ll have a beautiful, thriving plant in no time!

**For info on how to take care of your Pothos vine, check out my post Pothos Vine Care!**

Basically, there are two ways to propagate Pothos (aka, grow a new Pothos)…. with water, or with soil. But because most of you here are plant beginners, lets talk about water first (which is much easier), and then we’ll move on to the more advanced soil.

**Note: This post contains affiliate links, which if purchased, I will receive a portion of the profits at no extra cost to you. This helps me to keep providing you with this awesome information!**

Click here to subscribe

Propagating Pothos in Water: Step 1 – Get your cutting

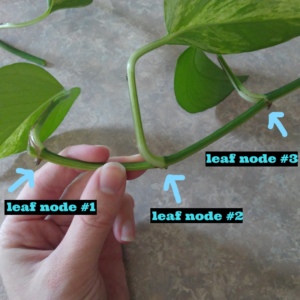
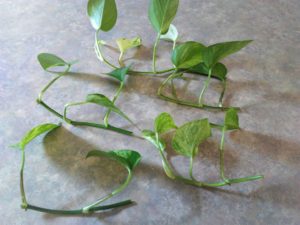
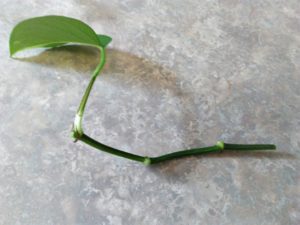
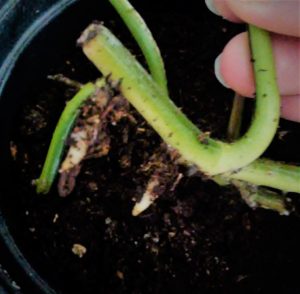
A good plant needs a good start. Select a healthy plant to trim from with leaves that aren’t diseased or yellowing. Cut about 3″ of stem length, making sure that there is at least one leaf node (where the leaf attaches to the stem). Personally, I like to take longer cuttings (they usually root faster) that have about 3-4 leaf nodes. This also makes it easier to keep upright.

Propagating Pothos in Water: Step 2 – Place in water

Now this step is pretty self-explanatory. Just make sure that if there are lower leaves that would be submerged in the container, make sure to remove them. If the leaves are left submerged, they may rot. Which doesn’t look that great. Believe me.

Propagating Pothos in Water: Step 3 – Plant

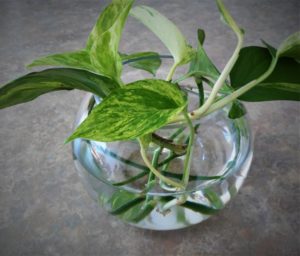
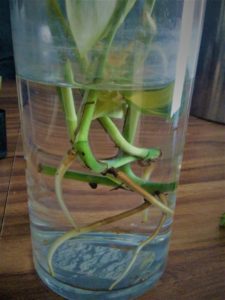
After a couple of weeks your Pothos vine will have rooted. So easy! I know! Now at this point, you can either plant your Pothos in soil, or you can keep it in water for life. Pothos does well in both water and soil, but make sure that once it is established that you don’t switch the growing media. Switching from water to soil (or vice versa) later in this plant’s life will cause it to decline in health. It might recover, but it might not. Those are the risks. But if you want to switch media later, you can always grab another cutting!

*This image is of some pothos cuttings I rooted last year. These can be planted at this point of development, or they can wait another week or two and planted then (if planting in soil).*

Propagating Pothos in Soil: Step 1 – Get your Cutting

For a soil cutting, follow the exact same directions as for the water cutting. This one is also important to remove any leaves that will be covered in soil, as they will rot. And remember, family members/roommates/friends don’t like to see rotting plants!

Propagating Pothos in Soil: Step 2 – Rooting Hormone

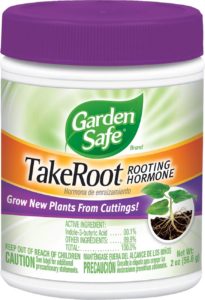
One thing that always helps you have success with cuttings is rooting hormone. Here’s a link to the one that I use! Simply dip the cutting into the hormone and shake off any excess powder. Make sure that you have at least one leaf node (the section of the stem where the leaf attaches) covered with the rooting hormone. I usually have two or three nodes on my cutting (stripped of the leaf) just to make sure that one of them roots successfully.

Propagating Pothos in Soil: Step 3 – Plant

The last step is to plant your cutting in soil. Do not skip this step!!! (Lol.) Make sure that at least one leaf node is submerged into the soil. As for pots, try to use a shallow container that drains well. I also prefer to use a well-draining potting mix in order to limit the chances of the cutting rotting. (I suggest the cactus & succulent potting mix, or regular potting soil mixed with coconut coir). The trick to watering your cutting is keeping it consistently lightly moist. Don’t overwater. If your pot/container doesn’t dry out within 2 days, then you’ve added too much water. You want to have to water it every day or two. This will prevent rotting of the cutting while it still doesn’t have any roots to take up the water. If you aren’t successful with your cuttings, try one of the soil options I listed above, as well as switch to a smaller container with plenty of drainage.

That’s it! It’s an easy, 3-step process, whether you choose soil or water. And like I said, if you are new to this, try the water option. It has a much higher success rate! So have fun growing this awesome, easy vine, and for tips on how to take care of your Pothos, check out my post on Pothos vine care!

Happy Digging!
Click here to subscribe

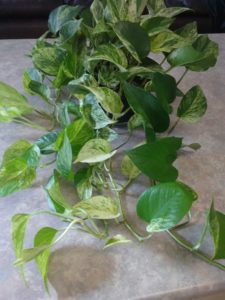
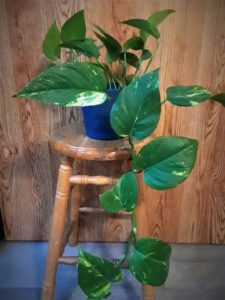
*Here’s a Pothos that I grew from a cutting less than a year ago!*

Top Sites for Indoor Plant Identification

Hey everyone! So… starting out knowing nothing about plants, it has taken me years to learn the names of all of them. Even today I sometimes have to look up the name of an awesome new plant that I saw. That’s why good indoor plant identification sites are a great tool to use. And it is important to know which plant you own. 

Knowing your plant is the first crucial step towards keeping it alive and healthy! So check out some of these indoor plant identification sites today!

Click here to subscribe

The first site that I recommend for plant identification is called Houseplant 411. This site has great images that can be selected and enlarged for correct plant identification! The picture guide also includes growing information and frequently asked questions about each unique plant. I found this to be very helpful, especially for anyone who needs specific information on how to care for their plant.

Check out Houseplant 411!

My next top site for indoor plant identification is called Houseplant Experts. This website not only has a comprehensive A-Z list of houseplants, but it also has a forum that you can join! 

By creating a free account, you can post a picture of your plant, as well as questions about names, care tips, etc. This way you can get the help that you need, as well as join an awesome community of plant lovers!

Check out Houseplant Experts!

My next site is Tropicopia online. This site is actually an indoor plant database for interior designers, which makes it incredibly thorough. Tropicopia  has many different varieties of each plant, so the database is rather large. 

I’d recommend finding out the general type of plant (plant genus) through a different site first, then go here if you want to find out the specific plant variety.

Check out Tropicopia online!

This next site is surprisingly awesome for plant identification! Facebook (specifically Facebook groups) can really help you to identify and get tips on how to care for your indoor plants. I’m part of several groups myself and am always amazed at how fast people respond to posts asking to identify their houseplants! 

There is also always a lot of people showing off their new, unique plants that can give you plenty of inspiration for your own home!

Below are a few of the great Facebook Groups that I love!

House Plant Lovers
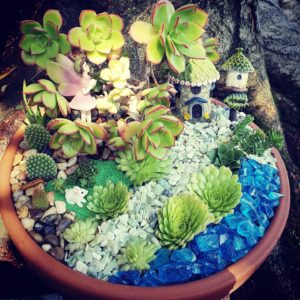
Succulents, Tiny Gardens, & Terrariums
House Plant Hobbyist
Houseplant Hoarders

I hope these sites help you to correctly identify your plants! If you have any other questions, or comments, feel free to leave a comment below!

Happy digging!

Click here to subscribe

Rubber Tree Plant Care

The Rubber Plant, Ficus elastica, is one awesome plant for the indoors. Not only is it super popular and can be found at many of the mainstream gardening centers, but it has also gained this popularity for being showy and relatively easy to care for! But the big question is, how do you take care of it? No one wants to spend money on a beautiful plant, just to see it die within a month. That’s just sad. So here are some tips to keep your rubber plant green and healthy!

*If you don’t yet have one of these cool plants, you can get one here!*

**Note: This post contains affiliate links, which if purchased, I will receive a portion of the profits at no extra cost to you. This helps me to keep providing you with this awesome information!**

Click here to subscribe

Rubber Plant Light Requirements

Rubber plants are a bit more precise when it comes to light. They like bright, but indirect light. That means a nice sunny room, without being right in front of the window. If it has to be in some direct sunlight, it would prefer morning light, when the sun still isn’t too harsh. Some signs to look for are if the plant starts stretching out and the lower leaves drop, then your plant needs more light. If the leaves are full, but are drooping downwards, then you need to decrease the amount of light.

Rubber Plant Water Requirements

Rubber plants have two different seasons. Growing season and dormant season. Growing season occurs during the summer and this is when it needs the most water and likes to be fertilized. During the dormant season, your plant needs much less water (sometimes needing water as little as once a month!) Just make sure that your plant is in well-draining soil, as well as in a well-draining pot. This little guy hates to be sitting in water. Here’s a rule of thumb for your watering… if the leaves turn yellow or brown and fall off, then it is getting too much water. If the leaves are drooping, but don’t fall off, then your plant needs more water. For more tips on how to water your houseplants, click on the link here!

Additional Tips

If you’re worried about killing your plant as soon as it gets home, then try starting small. A smaller plant will acclimate much easier to a new environment than a larger plant will. Then if you want it to grow faster, you can put it outside during the summer (but still make sure it isn’t in direct sunlight, it receives plenty of time to acclimatize, and it receives plenty of water). In contrast, if you want your rubber plant to stay smaller, keep it in a smaller pot and trim the ends once it reaches the preferred heightThis will stop its upward growth and will instead encourage further branching.

A few more things to look out for… Don’t place your rubber tree where there are cold drafts. This is sure to kill your tree. And if you’re living in a cold, drafty basement, then believe me when I say from experience that none of your ficus plants will survive! You’ll be much better off with a non-tropical plant.

Also, make sure that you clean the foliage often so that the leaves stay shiny and will be as healthy as possible.

*Note: Rubber plants are toxic to dogs and cats. For a list of plants that are toxic to pets, check out my post here. Or, for a list of non-toxic houseplants, check out my post here!*

That’s all for growing tips for Ficus elastica! If you have any more tips or fun stories about your own rubber plants, feel free to leave a comment! And if you don’t have one of these amazing plants yet, grab one from the link below!

Happy Digging!
Click here to subscribe

Common Flowers that are Toxic to Pets

Hey y’all! So I know that everyone is looking for just the right gift for the Mom in their life, and being a Mom myself, I’d say you can never go wrong with a bouquet of flowers! There’s just something cheery about flowers that makes everyone smile. So go ahead and get your Mom, wife, or just someone special in your life (why not!) a gift of flowers! Just make sure that if they have pets, try to avoid some of these flowers. After all, you wouldn’t want to spend Mother’s Day, (or any other day) at the vet because your precious little ball of fur got his fill of the flowers too. So scroll down for the list of flowers to avoid, and check out this awesome post about safe flowers to use instead!

Click here to subscribe

Flowers Toxic to Pets #1 – Bulbs

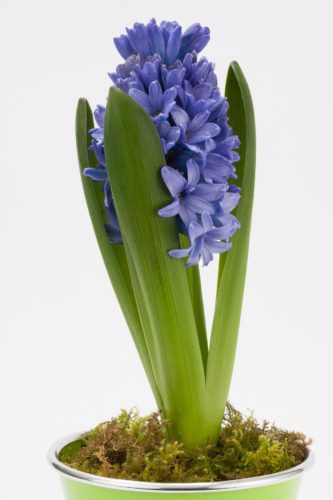
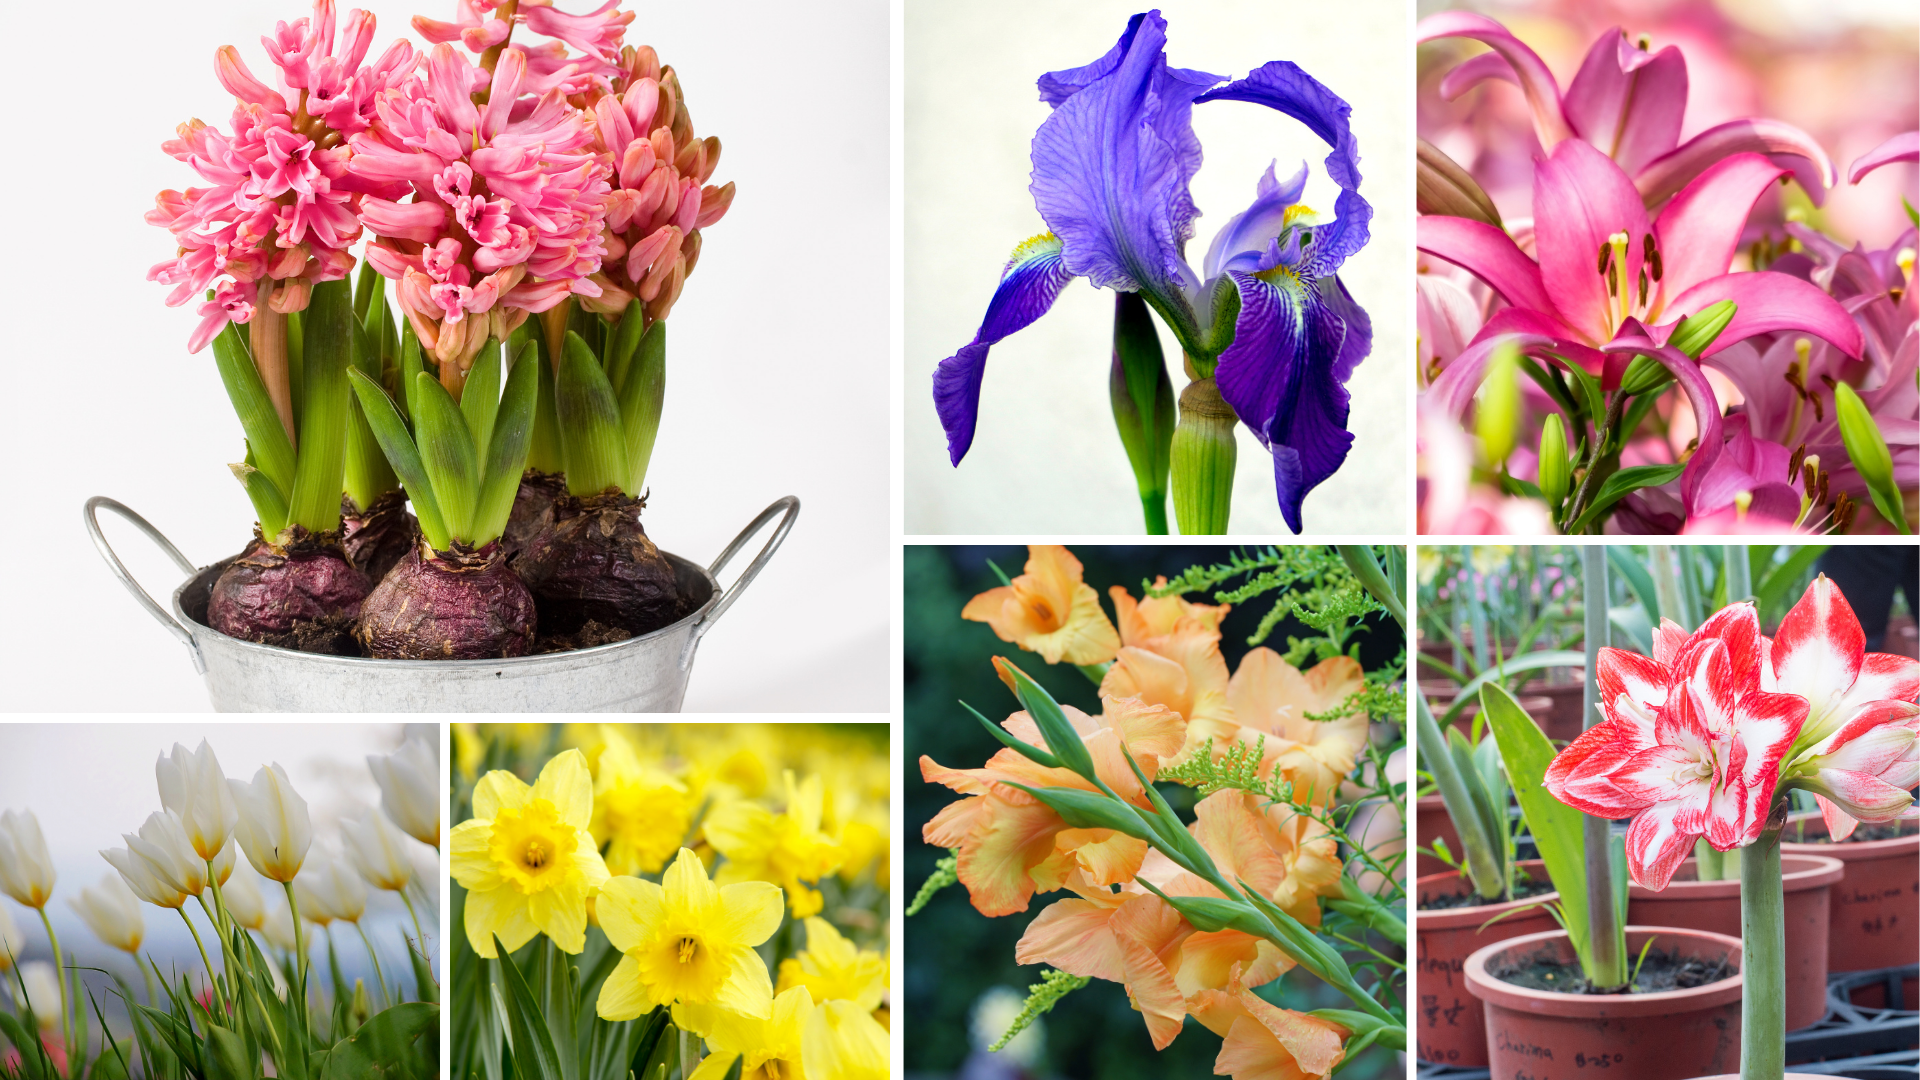
Heads up… most bulbs are toxic to pets. Especially the actual bulb part of the plant. In cut flowers, this includes hyacinths, iris, tulips, daffodils, amaryllis, lilies, and gladiolas. And because a picture is worth a thousand words, here are the main ones you should avoid in your bouquet…

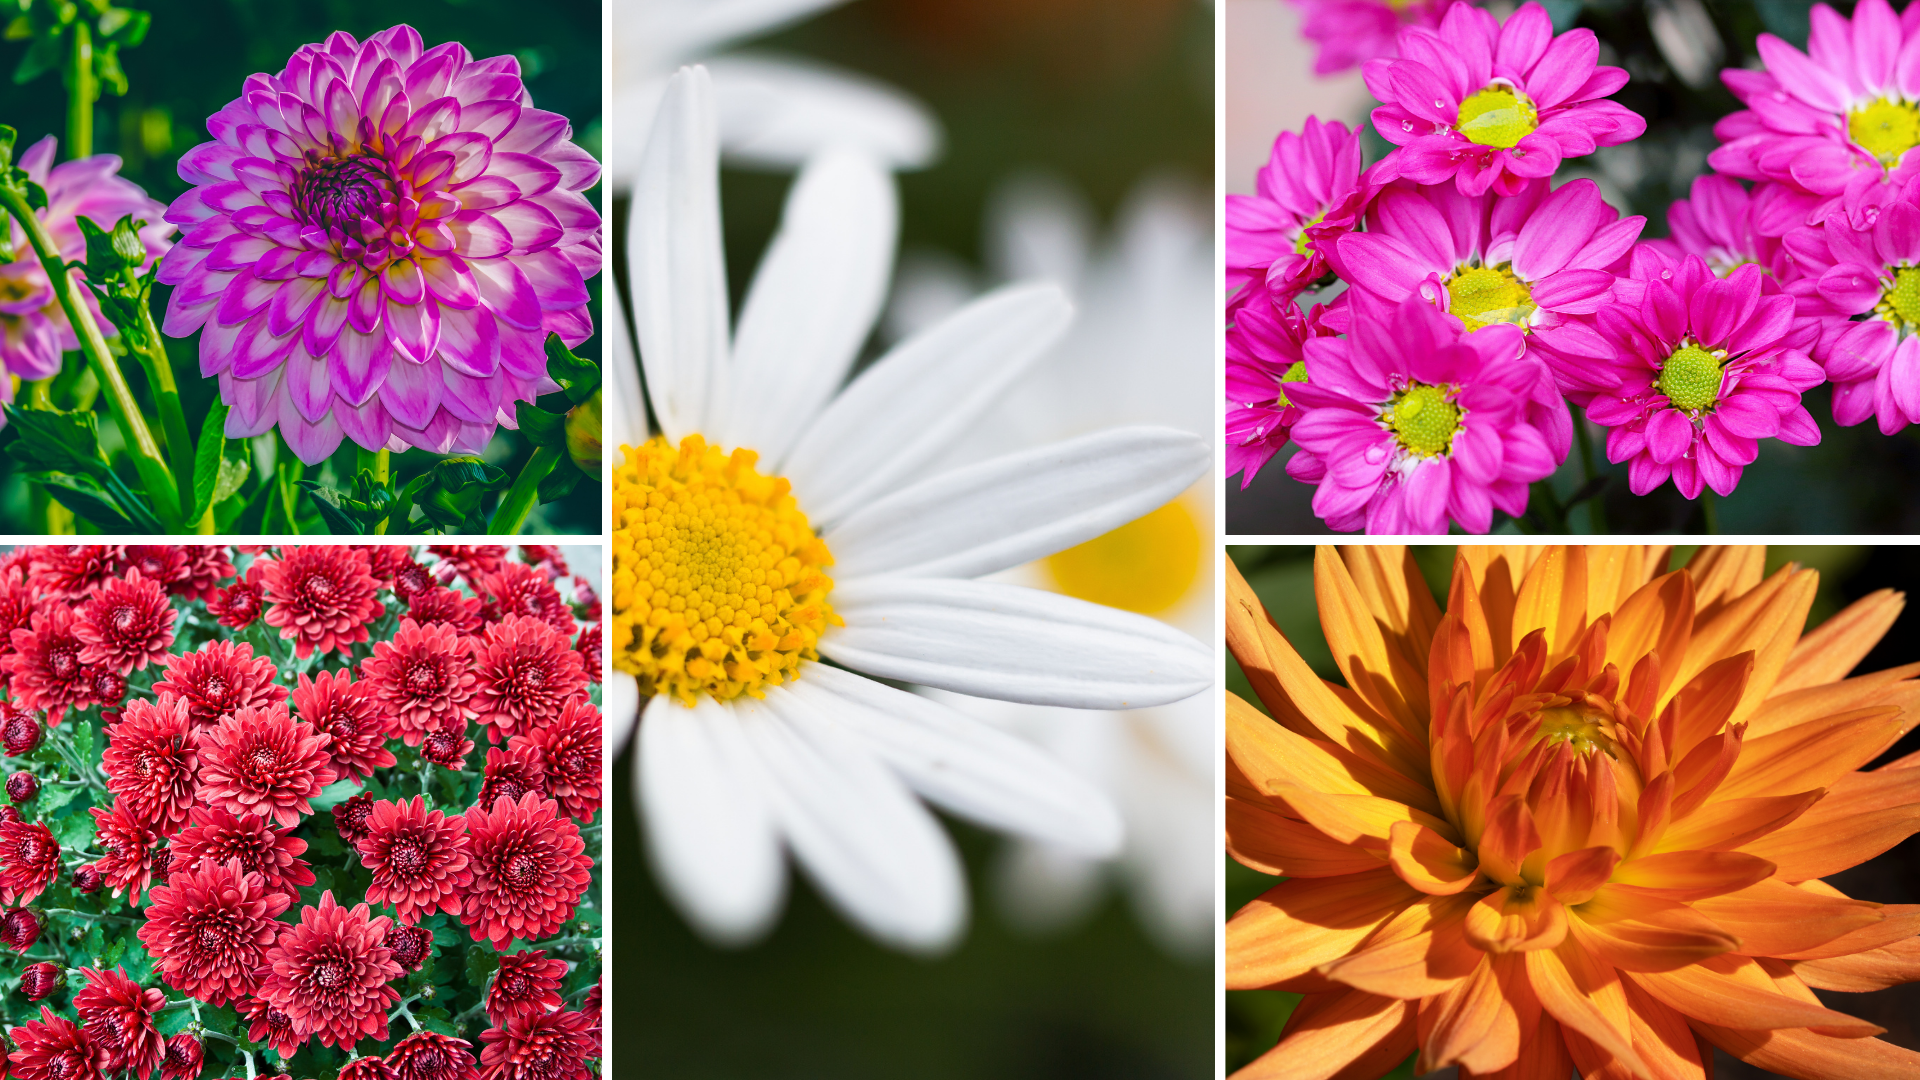
#2 – Mums and Dahlias

I know that these are some of the most common flowers found in bouquets. But yes, they are indeed toxic to pets. And remember that these flowers can look quite different depending on the variety, so if you’re unsure, don’t hesitate to ask the florist for proper identification! *Mums are short for chrysanthemums… florists will call them by both names…

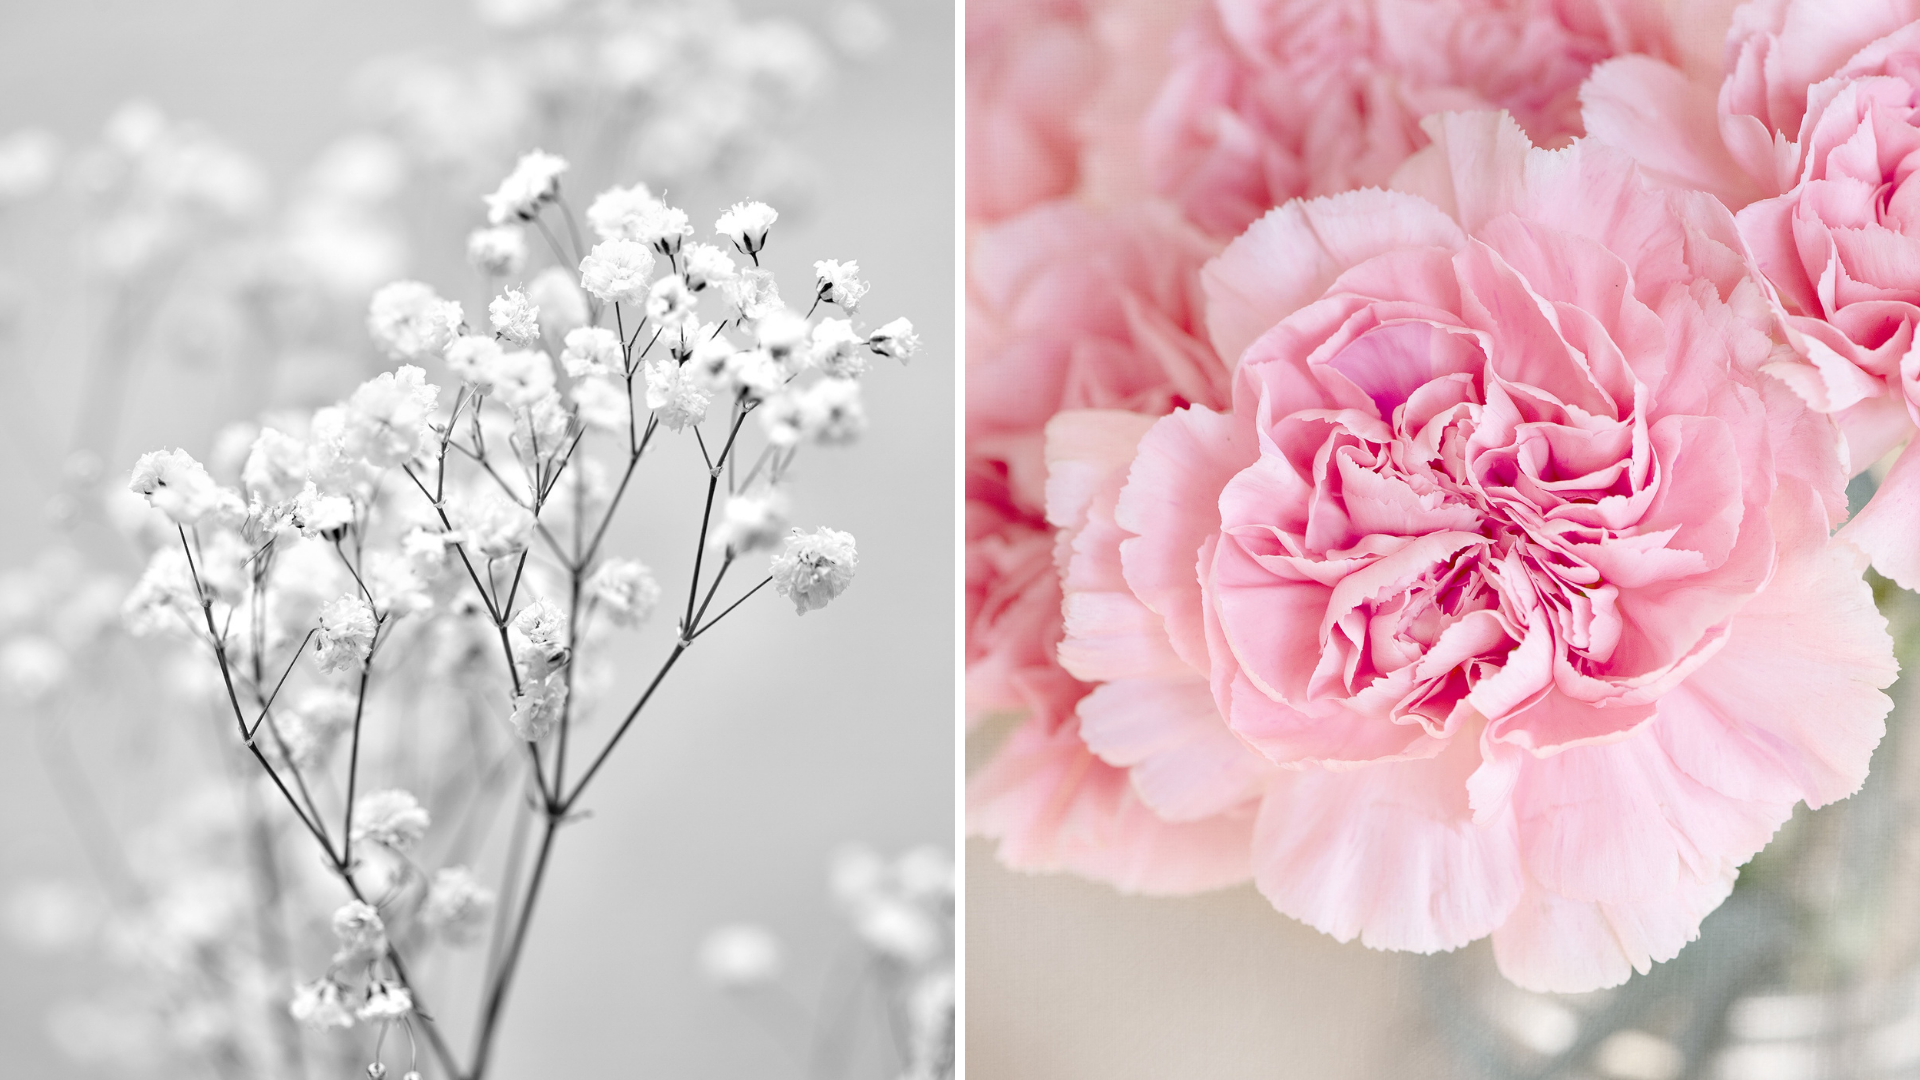
#3 – Low Toxicity Flowers

These two flowers may not be deadly, but they are still worth avoiding if your pet likes to nibble on your plants. These are baby’s breath and carnations. I know, I know… Two more insanely common bouquet flowers…

#4 – Potted Plants

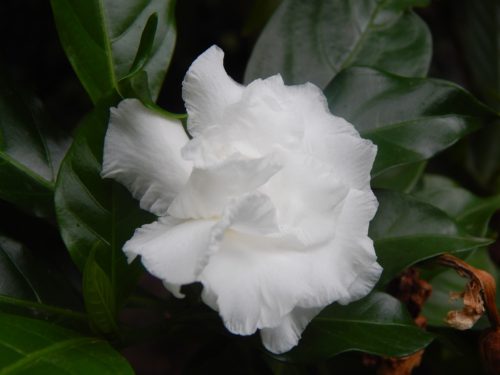
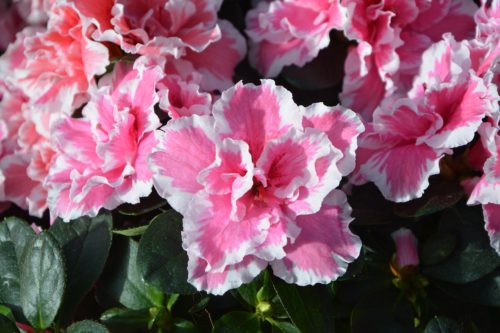
Though not technically cut flowers, I thought I should throw these two flowering plants in just to be safe. Some of the most common potted plants that are sold for Mother’s Day (and for several other holidays) are azaleas and gardenias. Though they are extremely beautiful, they are also toxic to pets and should be kept out of reach of curious pets, or should only be kept indoors (or outdoors, depending on your pet’s situation). An added tip, however, is that azaleas and gardenias are extremely difficult to keep as an indoor plant. For other options in plant-giving, check out my post on non-toxic houseplants for pets. The plants in this post are generally easier to keep alive and your pet-owner will thank you!

So that’s my list of cut flowers that are toxic to pets! Make sure to check out this helpful post that will tell you which flowers you should buy for pet-owners! It also includes a FREE Printout that you can use as a handy reminder when purchasing flowers! So enjoy this little freebie and please leave any further questions or comments below!

Happy Digging!
Click here to subscribe

Why is my Plant Dying?

We’ve all been there. We’ve all looked down at our sad little plant and asked ourselves this question… Why is my plant dying? Believe me. I’ve had my issues with dead plants too. But the key is to figure out what is wrong, change it, and nurse your little guy back to full health! So what are the main reasons our plants die? 

**Note: This post contains affiliate links, which if purchased, I will receive a portion of the profits at no extra cost to you. This helps me to keep providing you with this awesome information!**

Click here to subscribe

#1 – Improper Watering

Let’s just get this one out of the way. Overwatering is the #1 reason for plants dying. People just have this feeling like if their favorite vine doesn’t look to great, well, maybe I should water it more. No. Stop. Don’t water it more.

Then there are those of us who just get so busy with life that we come home one day, look over, and the plant has collapsed. We look in the pot and see the Sahara desert staring back at us. Yep. Been there too. Oops. These are the times when you should water it more. Try setting an alarm on your phone, or marking it on your calendar. That way it will be easier for everyone.

If you think your problem is incorrect watering, then check out my post on How to Water your Houseplant. This will give you some great watering tips!

#2 – Light Issues

So for many of us living in apartments, one of our biggest problems is either not enough light, or too much light. My little succulents are just not thriving thanks to this problem of having too little light. (That, and it’s hard to keep them away from my one-year-old!). If you need more light, try a grow light. I know Amazon has several options available for those just needing a light or two.

Also, make sure that you aren’t giving a plant too much light. Most of our interior plants are tropical plants, taken from the wild understory of the jungle. Now, a lot of these plants are used to either low light or medium light. Only a very few need bright light. But regardless… most of these plants aren’t used to direct sunlight. That means my poor little dieffenbachia that I had back in college didn’t enjoy my enthusiastic placement of it in my windowsill. Basically, it got scorched. Leaf scorch to be technical. So know which of your plants want to be in that sunny windowsill and which ones would rather have a little protection… which leads me to my next problem…

#3 – Unknown Plants

Let’s face it. Not many people can tell me the common name as well as light- and water-requirements for their favorite houseplant. If you can, then you’re doing great! But for the rest of us, it helps to know exactly what type of plant you have. This will help you place it better in your house, as well as to know what it wants from you!

#4 – Drafts

Whether it’s a warm draft or a cold draft, most plants don’t like them. Right now in the winter, I need to take special precautions for any of my plants that are near the front door. They don’t appreciate the cold air gushing in every time I take the trash out. So, if it’s the change of a season (causing different temperatures in the house, as well as switching from heating to cooling or vice versa), then the decline of your plant is probably due to the changing temperatures caused by a draft.

#5 – Change in Location

If you recently changed a plant’s location, then it could easily be declining in health because it simply doesn’t like the new spot. This can be caused by one of the previous mentioned problems (like too much or too little light, or encountering drafts), but some plants can also just be picky and not like change. The biggest culprit of having tropophobia (the fear of moving… yes I had to look that one up), is the Weeping Fig. This ficus is the most stubborn plant as it likes to stay where it’s at. If you move it to a less-favorable spot, a common side-effect is that it will drop all of its leaves and die. Yep. Dramatic. I know. So be aware, and if you need to move your plant… give it some TLC the first couple of days.

So these are the most common reasons why indoor plants die. Some other problems such as insect or disease infestation, improper potting mix, or too little or too much humidity, can also cause problems in plants. However, these are usually less common indoors. Just make sure that you have a well-draining pot and that you know the requirements of your plants. For more information, check out my post, 10 Quick Tips to Keep your Houseplant Alive. Feel free to leave any comments or questions below!

Happy digging!

Click here to subscribe

10 More Hard to Kill Houseplants!

For those of you who missed my original post, 10 Hard to Kill Houseplants , there was a lot of interest in these easy, low maintenance plants. So I decided, why not give everyone a few more to choose from?! Here’s a list of some of the less common indoor plants that are still easy, low maintenance, and hard to kill houseplants!

**Note: This post contains affiliate links, which if purchased, I will receive a portion of the profits at no extra cost to you. This helps me to keep providing you with this awesome information!**

Click here to subscribe

#1: Chinese Evergreen – Aglaonema

Starting off with one of the more vibrant plants, this low maintenance thriller also does well in low light conditions. Keep away from direct sunlight and let it dry out a little (not too much) in between waterings. Also, keep away from drafts, as this can cause the leaves to brown. Other than that, this plant is easy to care for, very forgiving, and cut leaves will propagate easily in water, leaving you with plenty of plants for your indoor space!

#2: Peperomia – Peperomia

Also called the Radiator plant, Peperomia is definitely on the easy to grow list. These plants prefer medium to brighter sunlight, but can also do well in low light conditions. This will produce a leggier (less bushy) plant and may reduce the vibrant colors in some variegated varieties, but they will tolerate it. They also store water in their fleshy leaves, so make sure to let it dry out a little between watering, as this plant can also handle a bit of neglectful care.

#3: Ponytail Palm – Beaucarnea recurvata

Ponytail palm is one of my favorite indoor plants! I just love the little tuft of leaves sprouting out the top that gives this little guy a very unique and soft look. Another name for this plant is Elephant’s foot, due to the large bulge at the base of the trunk. These plants are actually part of the succulent family, so make sure that the soil remains dry between waterings. Too much water and there can be some serious root damage. Ponytail palms also like bright light, but can do well without it during the winter months as long as it gets plenty of sun in the summer. In warmer climates it can actually be moved outdoors during the warmer months.

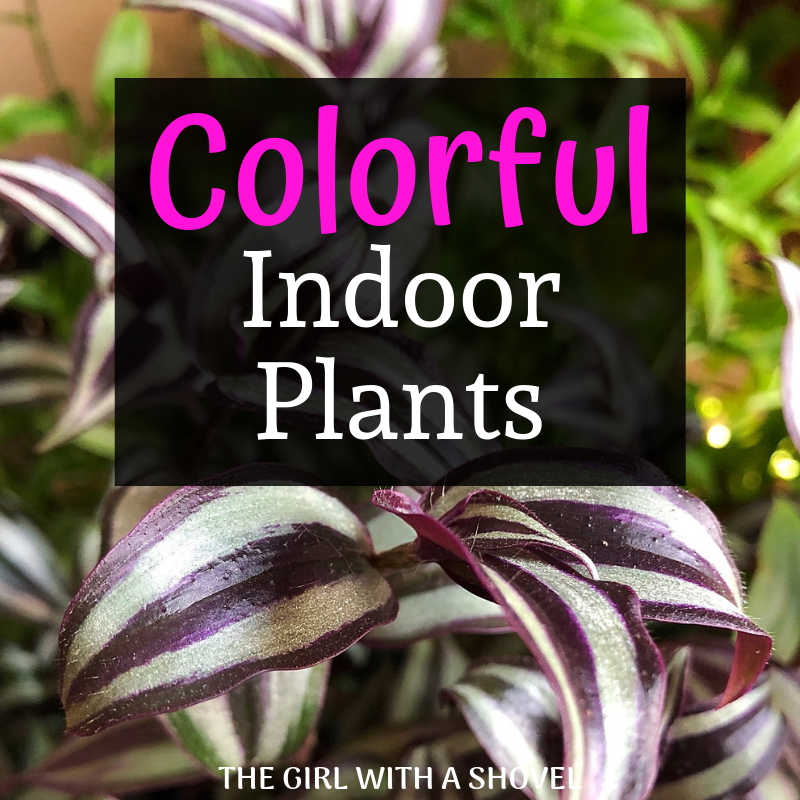
#4: Wandering Jew – Tradescantia pallida

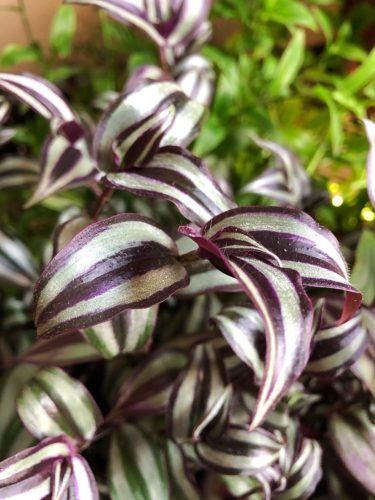
Wandering Jew, often confused with Purple Heart, has deep purple and silver leaves and is a somewhat less common indoor vine (as the more common Pothos vine has been bigger in popularity lately). Don’t rule this one out, however, as it still looks and does great in the indoors! To keep Wandering Jew happy, give it bright light in the mornings, but avoid intense afternoon sunlight. It can also do well in low light conditions, but will become more leggy (less leaves on longer vines). Let it dry out a little between watering and make sure the base of the plant doesn’t stay wet as it will rot if too moist. Also pinch back the vines several times a year in order to get a more bushy vine.

#5: Rubber Plant – Ficus elastica

This ficus is one of the easiest of its relatives to grow! Keep it in bright but indirect sunlight and let it dry out between watering. Rubber plants come in a variety of sizes and can be either a small counter-top plant, or as big as a large tree. Also check out the variegated rubber plant for something pleasantly different for your space!

#6: Ti Plant – Cordyline terminalis

Ti plant is another very colorful indoor plant with varieties in a mix of purples, pinks, creams, and greens. Very slow growing, this low maintenance plant does well in bright light and can handle getting a bit dry. Just watch for the leaves getting brown on the edges. This is a sign that it’s been too dry, so step up the watering just a notch. This plant also does well with humidity, so it is the perfect plant for a bright shower area!

#7: Jade Plant – Crassula ovata

Though a bit more water-loving than its succulent cousins, the jade plant is still an easy-to-care-for plant! Make sure that it gets a medium amount of sunlight and let the soil get slightly dry between watering and don’t let the leaves get wet. Jade plants will like a bit more water during the summer time and a little less during the winter. Keep the same water to sunlight hours ratio for a good estimate of watering needs. Also, if the leaves are starting to brown and fall off, it means that your little guy needs a bit more water. Just make sure that it never stays wet. Like all succulents, this will make your jade plant start to rot.

#8: Dumbcane – Dieffenbachia

Dumbcane is a common houseplant to find in local plant centers. Be warned, however, that ingestion of this plant can cause swelling of the throat and tongue, and if ingested in large amounts, can cause suffocation. So keep away from children and animals that would be curious to give this plant a taste. The leaves are a beautiful, spotted green and white, but will turn yellow if it is getting too much sun. Keep it in moderate to bright indirect light. Also, be careful to not overwater this little guy. Let it dry out just a touch between watering. Also, as the plant grows upward, the lower leaves will turn brown and drop. This is normal, just keep doing what you’re doing and trim off any unsightly lower leaves.

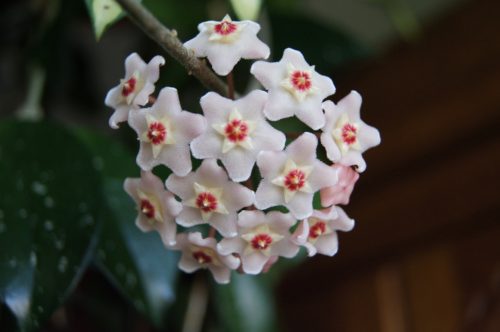
#9: Hoya Plant – Hoya

There are several different types of Hoya, differing in leaf shape and colors from green to cream and pink! All Hoyas enjoy medium to bright light, but don’t do well in direct sunlight. They also do well with a bit of neglect as they like to dry out a bit before watering. Just make sure that they don’t receive too much water! Keep in smaller pots, as these guys like to get a bit root bound and it can also stimulate flowering.

#10: Umbrella Tree – Schefflera 

Like several of the other plants in this list, Umbrella Tree, often called Schefflera, does best in bright, but indirect light. It also does not like to be overwatered. If your leaves are turning yellow and falling off, then it is either getting too much direct sunlight, or it is getting too much water. Make sure that all of these plants are in a well-draining pot that will allow your plant to dry out slightly between watering. For Schefflera plant care tips, check out this post by The Spruce, the Schefflera Plant Profile!

That’s it for my list of 10 More Hard to Kill Houseplants! Some of these can be found at local garden centers, but others may need to be specially ordered. And if you haven’t yet seen my original list of Top 10 Hard to Kill Houseplants, check it out here! Good luck, and feel free to comment below with any additional tips or questions!

Happy digging!

Click here to subscribe

10 Quick Tips to Keep your Indoor Plants Alive

Do you struggle to keep your indoor plants alive? Believe me, I’ve had my fair share of plants dying. But not anymore! It’s very difficult to know exactly what to do and how to keep indoor plants alive. Especially when you are in an apartment or home that is limited in light or in other favorable conditions. So here are 10 tips that I’ve studied and learned through the years that will help you to keep your plants green and healthy!

**Note: This post contains affiliate links, which if purchased, I will receive a portion of the profits at no extra cost to you. This helps me to keep providing you with this awesome information!**

Click here to subscribe

Tip #1: Choose Plants Wisely

When looking for interior plants, don’t just go to the store and pick one out that you like. First, think of where you are going to put it. Do you have a lot of space, or a little? Check out my posts for small interior plants and large interior plants. Also, consider if that space gets a lot of direct sunlight, a medium amount of direct sunlight, or hardly any sunlight at all. Here’s a post for plants that do well with low light conditions. Then, consider any interesting aspects of that spot. Does it get humid (placed in a bathroom for example), or is it near a door where there will be winter chills and summer heat? Try to consider all of these things, then decide which plants would fit that area. Then from that list, choose a plant that you like!

Tip #2: Know what you have Growing

Knowing what you have growing is similar to tip #1, but sometimes we can suddenly find ourselves with a mystery plant. Like when we’re given those beautiful plant baskets, but nothing is labelled! Well, my advice is to get to know what plants you have. Try Google, Pinterest, Facebook, or even just asking friends and neighbors. You can also check out my post on the top sites for indoor plant identification. It is important to know what you have growing in order to know how to best care for it.

Tip #3: Well-Draining is the Best!

Do you know why almost every plant says that it needs well-draining soil? It’s because unless you are growing a swamp plant, you will need good drainage. This goes for well-draining soil, as well as choosing a pot with good drainage. You’re looking for something that will be able to be moist for a day or two, but then dries out. This ensures that the plant doesn’t stay too wet for too long. For succulents and cacti, this means go ahead and grab some succulent and cactus potting soil. You won’t regret it!

Tip #4: Use the Right Lighting

Whether you have a plant that needs a lot of light, or hardly any light, make sure that you are following its requirements. If a low-light plant is placed in too much direct sunlight, it can kill it! And the same goes for high-light plants that are placed in low-light conditions. One way around this, though, is if you want to put a high-light plant in a low-light area, buy two of the same plant. Then you can place one in the low-light area and one in a high-light area and switch them every two weeks. This will ensure that they both will eventually get some time with the light conditions that they need.

Tip #5: Don’t Overwater!

Giving a plant too much water is one of the fastest ways to kill it. And how do you know? Stick your finger in the soil. If it feels moist, then don’t water it! Some plants like to stay a little moist, so once again, know what you’re growing. However, most indoor plants can’t survive for long being too wet. So, if you’re one of those people who water their plants to death, either try to tone it down, or only go with plants that love the water. For extra tips, check out my post on how to water your houseplant.

Tip #6: Set a Watering Schedule

This is a must-do for people living in our busy world today. Without a schedule, some days I would forget how long it had been since I had last watered. Then I would end up either over-watering, or under-watering my poor little guys. So I’ve found that it’s best to figure out about how often your plant needs water, then set a watering schedule. This can either be a Monday, Thursday, Saturday type schedule on your day planner, or maybe even a once-a-week reminder on your phone. Do what works best for you, then stay on schedule!

Tip #7: Watch the Drafts!

There are many different ways that plants can be in drafts of either warm or cold air. They can come from doors, windows, air conditioners, heaters, or even frequently used fans. Some plants can do well with warmer drafts in the winter, but the majority of indoor plants would rather be kept at a consistent temperature. So watch out for cold windowsills and drafty doorways if you want to keep your plants happy!

Tip #8: Remember to Transplant

People often buy a houseplant thinking that it will stay the same size as when they bought it. However, this is hardly the case. Most plants are sold while still young. Then they grow to their mature size in your home. So if your plant starts looking a little too big for its pot, it is time to transplant it. Moving it to a bigger pot will give it more room to spread its roots and will give it a burst of fresh growth.

Tip #9: Fertilize

Having a plant in the same soil for too long can cause it to use up a lot of the nutrients within that soil. That is why it is important to occasionally add a bit of fertilizer to give it the nutrients that it needs to keep on going. Just make sure to use an appropriate fertilizer for your plant and to apply at the recommended doses. Too much fertilizer can also quickly kill any plant. This is the fertilizer I personally use and love!

Tip #10: Try Easy Plants First

If you’re new to interior plants, or just haven’t had much luck with them in the past, then try out my list of hard-to-kill houseplants. Once you have a few of these successfully growing, then you can slowly try out more and more difficult plants. Remember, not all green thumbs are born that way. It can take years of knowledge and hands-on experience to come to understand what each plant needs. So do yourself a favor and buy one of these easy indoor plants first before you try to tackle the plant Olympics!

I hope that these tips will help you to grow beautiful interior plants! Feel free to comment with any further advice and/or stories of your own successes and not-so-successes! We’ve all had good and bad times with our plants and remember… a little knowledge about our plants can go a long way!

Happy Digging!
Click here to subscribe