For most people, designing their yard can seem like a daunting task. Where to begin? What to include? How much will it cost? These are all great questions that can leave homeowners scratching their heads and delaying their plans. But don’t worry. It’s easy to create a DIY yard design. Just follow these 10 steps, and you’ll have a basic yard design down in no time!
*Note: If these steps seem too complicated for you, then you can always hire a landscape designer to create a design for you. They are trained to create a functional, beautiful space that you will love. There is no real substitute for a professional!*
That being said… now it’s on to your design!!!
DIY Yard Design Step #1: Decide what is staying and what is going!
If you have a brand new house with a blank slate, consider yourself lucky and go on to the next step. If not (like most of us), we need to decide what features we like, and what features we want to change up. Check out my post on how to decide which plants to keep! Then also decide what hardscape (all non-plant) features you want to keep and which ones to trash.
DIY Yard Design Step #2: Make a list of what you want from your yard…
This is the time to really put the brain to work. What do you really want to do in your yard? Do you want to use it for entertaining? Would you use a play area for kids? Or would you simply want it to increase your home’s curb appeal? Do you want a space to sit and relax? Make a list of all the things that you want from your yard. Remember, this is your yard and you want to meet your needs.
DIY Yard Design Step #3: Time to draw…
Get out a sketchpad and draw up a basic sketch of your yard. Then add general areas of where you want everything. Things like Pool Area, Play Area, Sitting Area, and Garden. Put in what you want, but make sure it’s very general and loose.
Next, add in walkways. This makes sure that you have a good flow from one area to the next. Use lots of big arrows to indicate where people will be walking. Then maybe even walk it yourself a couple of times. Make sure that you don’t feel trapped by anything, or that you have to go around multiple things to get where you want. Add in entrances or exits as necessary.

DIY Yard Design Step #4: Add in plant areas!
Once again, keep this very general. Don’t add specific plants unless they are already existent. Draw in plant areas and designate places you might want trees, shrubs, vines, etc. This is more for what shapes you want, not for specific plants.
DIY Yard Design Step #5: Keep a budget in mind…
Think of how much you have to spend, then think of what you have planned. This might have you going back and changing up some things, but also try to think of more budget-friendly ways to achieve what you want. Maybe it’s in doing a couple DIY projects instead of hiring it out. (Note: Make sure that it’s something you feel comfortable with, as DIY projects, if done incorrectly, can cost you more in the long run…)
Also consider completing things in sections (like the play area this year, the pool area next year, etc). And try to get a realistic pricing for everything. Remember, hardscape can cost quite a bit, but purchasing hundreds of plants can also be very pricey. So be realistic and change things up if you have to, but make sure that what you plan is within your budget.

DIY Yard Design Step #6: Look for Inspiration!
Now that you have your general areas in mind, as well as a price range set, start looking around for ideas! My personal favorite is Pinterest, but there are plenty of ways to collect ideas, such as in magazines, local nurseries, or even a stroll around your own neighborhood. Make sure you get lots of different ideas together and decide on your overall style. This will help in the next steps…
DIY Yard Design Step #7: Think of water…
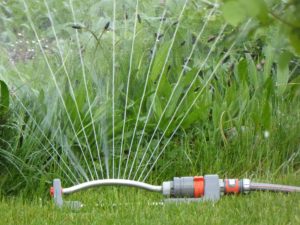
Water has become quite a hot topic over the last several years. Plan in what existing water lines you have and which ones you will need to change. Also designate water areas (low-water, medium-water, and high-water areas). This will help keep down water costs in the future.
DIY Yard Design Step #8: Plan out the hardscape…
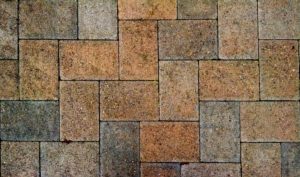
Keeping in mind your budget and your style, decide what materials you want to use, as well as the exact shapes. This is the time to define the overall lines in your yard, whether it is curvy and loose, or straight and modern. The hardscape is what will generally be the most permanent, so plan wisely.
For some hardscape inspiration, check out Belgard’s Inspiration Gallery!
DIY Yard Design Step #9: Plan out the softscape (the plants)…
Keep in mind the watering zones you set in step #7… Then consider sun requirements. You will have some sunny areas, some shady areas, and some in-between. Also check your hardiness zone to see what plants will survive your climate. Once you have it all looked up, choose specific plants that fit the requirements for each space.
Look around at what plants do well in your area. Check out local nurseries to see what they’re selling. Then make sure that the mature size fits the space, as well as keep in mind any maintenance requirements (to fit your time schedule).
Next, remember to choose fun colors and to mix up the textures of the foliage so you don’t end up with a very bland yard.
All of these things are important when selecting plants to use, so take your time and choose wisely!
DIY Yard Design Step #10: Install and enjoy!
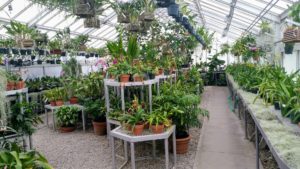
The installation period can take the longest, especially if you’re doing a lot on your own. But I know that in the end you will have a beautiful yard and a space you can truly enjoy!

There’s the list! And remember, if you get too overwhelmed or have any questions, feel free to contact me, or leave a comment below!
Happy digging!

