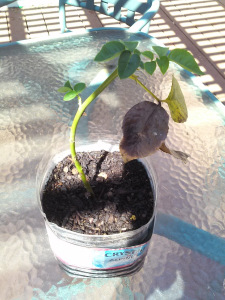
So here’s how this whole grow roses from cuttings thing came about…
My mom was talking the other day about a rose bush that her dad had planted in one of the cousin’s yards. See, he had passed away about 20 years prior and she always remembered this rose bush he had planted. She was hoping that they would take good care of it in order to make sure that it stayed alive. Every year or so she would visit the house and would always cross her fingers, hoping the bush was still healthy. She wanted to be able to remember her dad through this rose bush.
But I came up with the idea, “Well, why don’t you get some cuttings and grow the rose bush yourself?”
Good idea? Totally. Preserving family memories? Big time. Ever wonder how you can preserve your very own favorite rose? Here’s a great method that I used to grow my grandpa’s roses from cuttings. And believe me, it works!
What you need:
- 2 large plastic containers (preferably a large, clear container for the top, I used a 2 liter soda bottle)
- Potting Soil
- Rooting Hormone (you can find it at Walmart, Home Depot, or Lowe’s)
- Razor Blade
- Hand Pruners
- Rose Cuttings (see next section for instructions!)

Instructions:
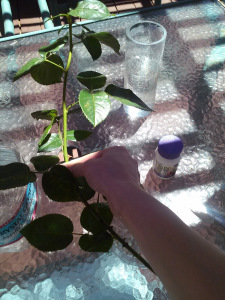
The rose cuttings should be 6-8″ long, trying to take a cutting from a stem that has a wilted rose on it already (this makes sure that the stem is in the growth mode and not the blooming mode). Try to make a cut close to the original stalk to get some of the growth collar on it. This is the brown ring around where the stem attaches to the original stalk. Your cuttings should look like this:
If transporting the cuttings, make sure that the cut ends do not dry out. This can be done by wrapping them in moist paper towels and then sealing the ends in a large plastic bag. I’ve also just put the longer cuttings in a vase full of water and they seemed to do just fine (though it’s harder to keep yourself dry on bumpy rides home!)
Planting your cuttings:
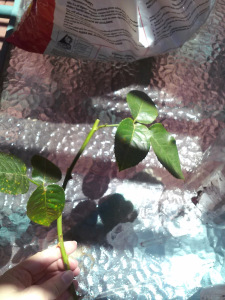
Now that you’ve got yourself a cutting (or two or three), take your plastic containers and cut off the top of the larger one, and the bottom of the smaller one. Then, cut drainage holes in the bottom of the plastic container. I usually just do a simple X in a couple of spots. Then fill the larger container with soil, leaving space in the middle to insert your cutting into. Next, take your cutting, and clip off the top that contains the wilted rose. Also cut off several of the leaves, leaving only two sets of mature leaves. Then, with the razor blade, carefully cut strips into the bottom of the cutting. These strips should be about 1/2″ long and should only cut through the soft, green layer of the stem. Be careful to not cut too deeply at this part.
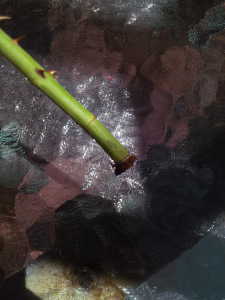
Once it’s cut, dip the end of the cutting in water (making sure to cover the whole length of the slit area), and then dip it into rooting hormone. Lightly shake off any extra powder. Then put it into your already prepped container. Make sure that you press the soil around the end of the cutting instead of pushing the end down into the soil. This will help keep the rooting hormone on the cutting and not just loose in your soil. Press the soil down firmly to hold cutting in place and to ensure good contact. Then place second plastic container over the entire cutting.
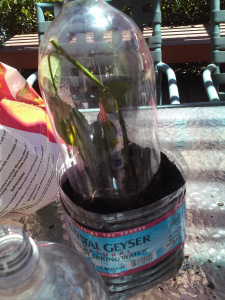
Keep the soil moist, but not soggy. Transplant once there are two sets of new leaves and when outside conditions are fair. Enjoy your new roses! And, if you want to learn another way to grow roses, check out my post How to Grow Roses from Cut Flowers!
Happy Digging!
*This photo is taken several weeks later. The new leaves show that this little guy is ready to be planted!*
