3 Simple Steps to Grow Roses from Cut Flowers

Hey everyone! And welcome again to another awesome post! Today I wanted to talk about how you can actually grow roses from cut flowers! Like actual rose bushes from your bouquets! Let’s get started!
So first, I have to admit, when I heard about this cut flower-to-plant idea, I was pretty skeptical. I did some research and saw that yes, some people were actually having success growing their roses into plants, and after several months of testing, I finally did as well. But you have to do it right, or you’ll just end up with a bunch of dead stems…
Here are the 3 steps:
- Prepare your Cutting
- Root in Water
- Transplant in Soil

Step 1: Prepare your Cutting
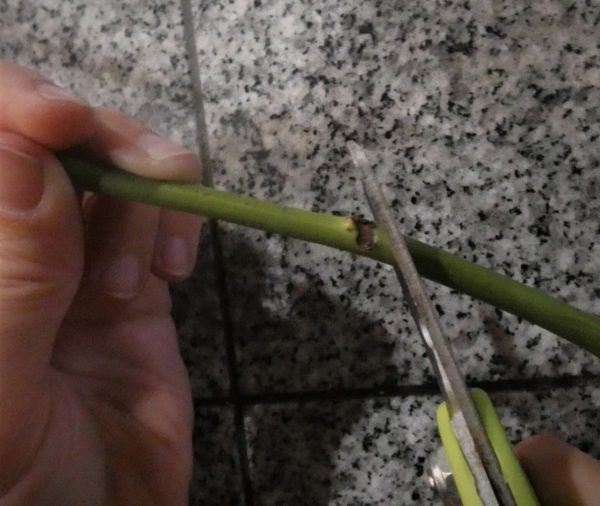
In order to be successful, you NEED to have a good, healthy cutting. Select a cut flower that hasn’t begun to wilt yet. Also, make sure that the stem doesn’t have any brown portions in the middle.
For this post, my cutting’s leaves had a bit of yellow in the veins. I normally prefer them to not have any yellow in the leaves, but they were the only cut flowers I had at the time… that being said, I only kept the best leaves on each stem…

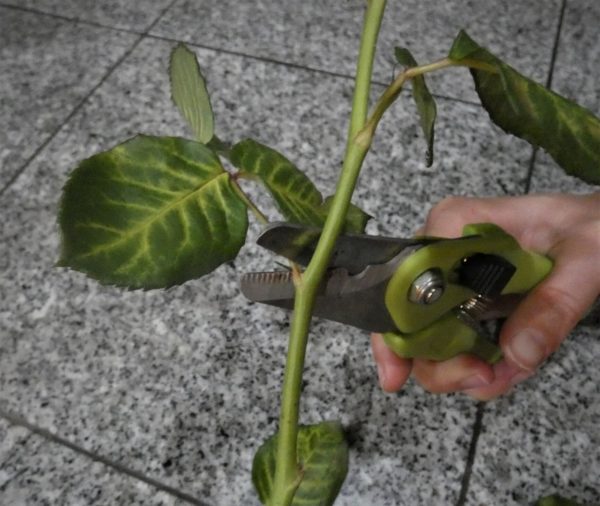
Next, cut off the main flower. I know this can be hard to do, but trust me… the cutting won’t have enough energy to continue to bloom and to grow a root system.
Also, try to cut just above a node on the stem. (A node is where there is a growing point… usually where a set of leaves connect to the stem…)


Once you’ve cut off the flower, find the section of the stem that is the older, more woody section. The section of young growth that connects to the actual flower WILL NOT root. So make sure that you use the older base of the stem and not the young, flexible stem at the top.
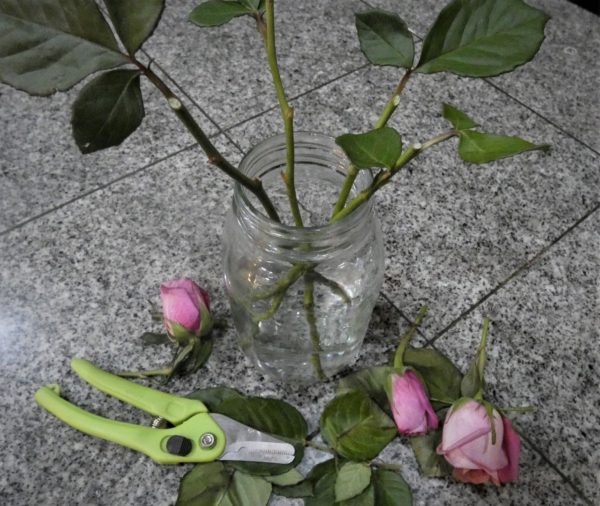
Remove the majority of the leaves from your stem. I like to leave 1-2 branches of leaves, but this should only contain about 2-3 leaves in total. If there are any large leaves, cut them off, or trim them to be smaller.
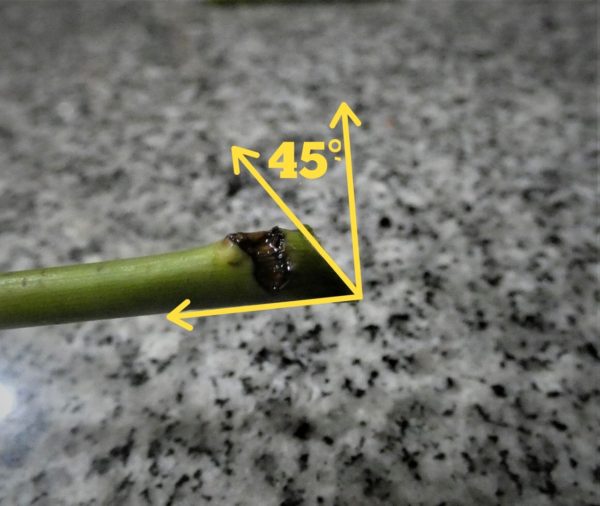
Then, cut the bottom of your stem at a 45 degree angle. This angle will maximize the area of stem that is in contact with your water and will maximize the area that is available to root!
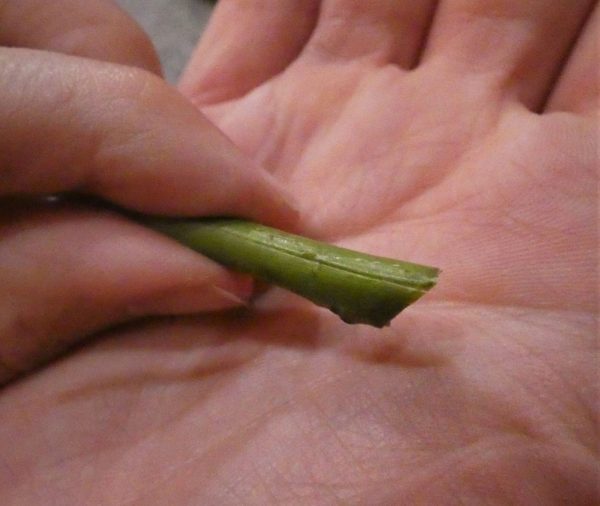
Last, cut light, superficial slits (just a scratch) up the sides of your stem. This will also increase the area that is available for more water to enter the plant and for more roots to form!
Step 2: Root the Cutting
Over the past year or so, I’ve experimented with several different types of rooting methods: in soil, in straight water, and in a hydroponic-style system. Rooting stems in soil proved to be difficult to keep the soil moisture levels evenly and lightly moist, so the BEST way to root stems was definitely in straight water or using a hydroponic system.
To root your cuttings in water, simply place it in a thin, tall container of water and make sure that all of your leaves stay dry. Switch out the water every few days to keep it aerated and free from bacterial growth. Then simply wait several weeks for either roots or scar tissue to form.
A hydroponic system also works well for rooting our cuttings. Watch the video below for an easy, effective way to root your cuttings using a plastic pot, perlite, and a large plastic bag. Just be sure to change out your water every few days with this system as well.
Step #3: Transplant in Soil
Once your cutting has rooted, transplant it into a pot with soil. To have a successful transition, keep the soil from completely drying out in between watering for the first few weeks. The longer it has been in the soil, the more dry it can stand to be between watering. Your final transition should be to let your soil dry down to the top 1 inch in between watering, but this should only be done once the cutting has fully rooted (from several weeks to months depending on how many roots your cutting had when it was placed in soil).
If you are planning on planting your cutting outdoors, then make sure that it has fully rooted and has some new growth before you move it outdoors. Then, place it outdoors for only a short period of time. Then slowly increase the time it is outdoors until it is used to being outdoors 24/7.
One more thing to consider is that your variety of rose might not do well in your particular climate. Try to keep it out of hot, direct sunlight if you live in hot climates. On the flip side, bring your plant indoors or wrap it to give it additional protection from freezing temperatures. If you want to know which rose varieties will do well in your area, check out this map that shows which roses do best in different regions of the USA! (For all my readers outside the USA, you can still compare the USA hardiness zone and climate to your own local conditions!)
That’s it! And remember, the success rate is going to be low because of the anti-rooting chemicals they use on roses before they are shipped. This is why rooting your cut roses will take a lot longer and will be less successful than if you were to simply root a cutting from a bush. If you’re lucky enough to have a cutting though, check out my post on the Easiest Method to Grow Rose Bushes from Cuttings! Good luck, and let me know in the comments how it goes! Then feel free to subscribe to my email list to receive even more awesome tips and instructions for your plants!
Happy Digging!

3 Easy Ways to Propagate Christmas Cactus
Hey everyone! Welcome back to The Girl with a Shovel! Today I wanted to tell you all about Christmas Cactus propagation: when and how to successfully propagate your Christmas cactus!
Note: This post is written for Christmas cactus, however, everything discussed can also be used for a Thanksgiving cactus as well. Propagation methods are the same for both.
The springtime is usually the best time to propagate your Christmas cactus! You want to make sure that it is several weeks after the bloom time and at least a month before the fall dormancy period (this is when you should be giving it light treatment to stimulate Christmas blooms).
There are 3 different ways to propagate a Christmas cactus. These are: upright in soil, flat in soil, and in water. But first I wanted to cover how to get a healthy cutting, and then we will get into these three different rooting methods.
Getting a Healthy Cutting
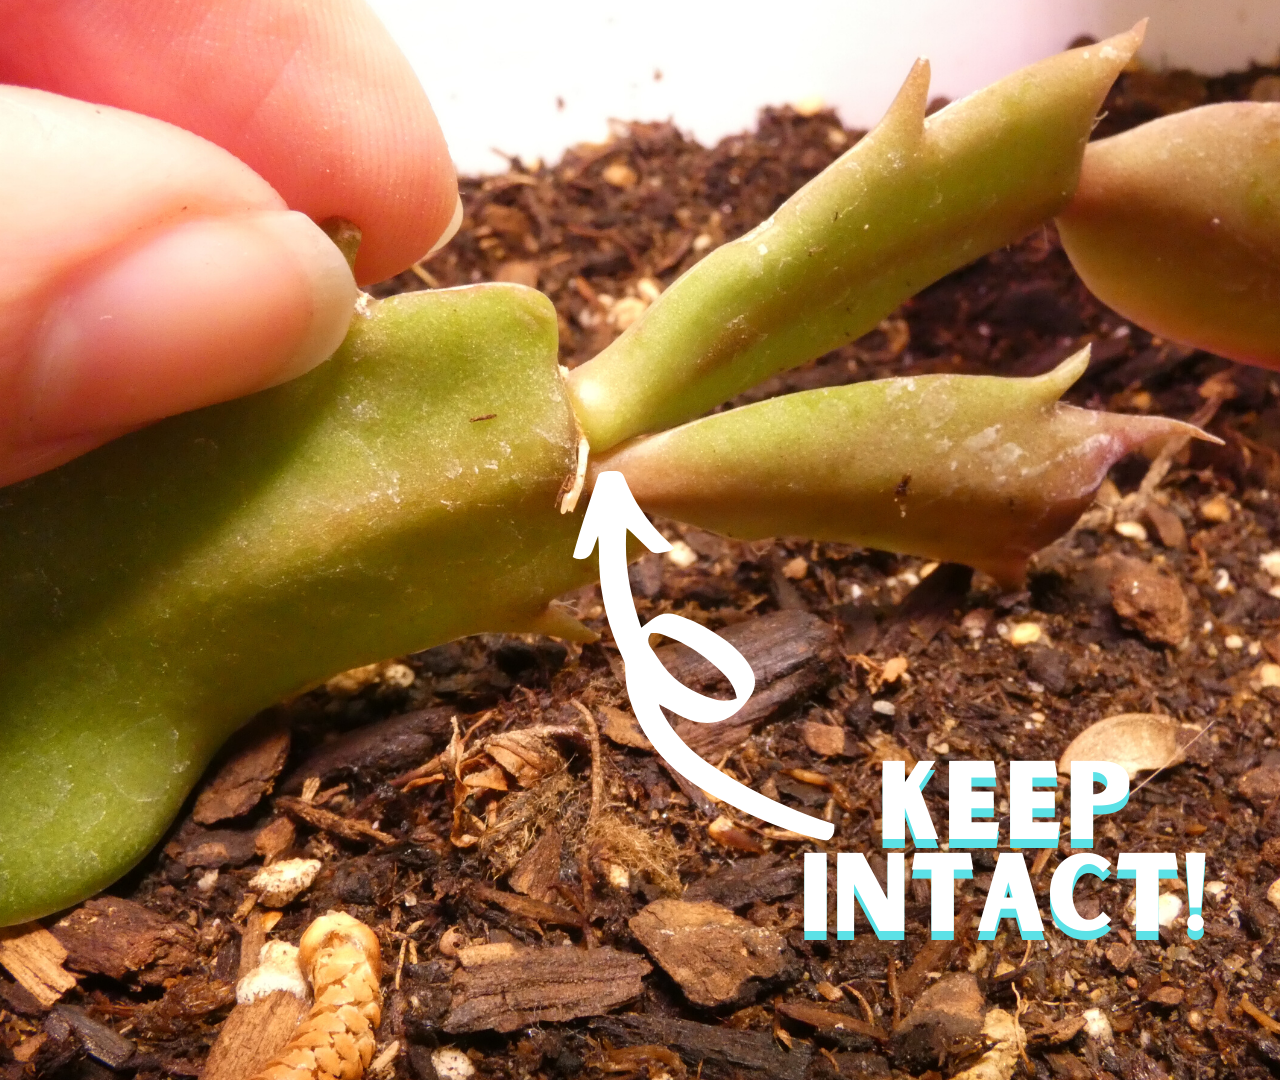
Each Christmas cactus branch is made up of several sections (or pads) linked together. At the very bottom of the pad (where it connects to another pad) is where you can get roots to grow. But the tricky part is that you need to separate the pads without tearing the bottom of the pad. If the bottom of the pad is damaged in any way, then the cutting will most likely fail.
If you’ve ever propagated succulent leaves, then you’ll notice the process of pulling off the leaves is very similar to pulling off the cactus pads. For a visual of good versus bad leaf cuttings, refer to my post Propagating Succulents.
The easiest way to ensure you get the complete, undamaged cactus pad is to gently twist it away from the bottom pad. By gently twisting the top pad, your cactus pads should easily come apart – no tearing involved. Got it?! Now let’s work on planting your cutting…
Method #1: Propagating Upright in Soil
This method is the best if you’ve got some large cuttings (around 4 pads each) and if you have good, whole ends on your cutting (aka you took good cuttings without tearing the bottom of the pad).
Take your cutting and lay it in dry location for 1-2 days. Be sure to keep them out of direct sunlight as well. This resting period is important as it helps the plant transition from growing shoots to thinking about growing roots.
After 1-2 days, place your cutting into fresh potting soil (cactus & succulent soil mix is best), and place the end far enough down that the soil covers the bottom pad. Then water it lightly, letting it just barely dry in between watering. Give it 2-3 weeks for roots to form.
Low on cactus and succulent soil? Here’s how to mix your own! DIY SUCCULENT SOIL RECIPE!
Method #1 Summary
- Used for large cuttings (4 pads each)
- Dry for 1-2 days
- NO direct sunlight
- Use light, well-draining soil
- Keep LIGHTLY moist
Method #2: Propagating Flat (On Top of Soil)
This method is best for you if you want to do soil propagation, but you have smaller cuttings (2-3 pads), or if your cutting’s bottom pad has been damaged in any way. I personally used this method for a section of 2 pads that were cut off my parent plant and was missing the bottom section of the lower pad. (I wasn’t the one who took the cutting, I swear! Haha!)
Simply dry out the cutting for 1-2 days (again avoiding direct sunlight). Then, instead of planting in the soil, you will place the cutting horizontally on top of the soil. This also needs a light soil, such as a cactus & succulent soil mix. Make sure that there is good contact between the soil and the point where the 2 cactus pads meet. This is where the new roots are going to come from. Then keep it lightly moist and your cutting should root within 2-3 weeks.
A special precaution for this type of rooting… because the cactus pads are laid horizontally against the soil, it increases the chances that your cactus pad gets too wet and begins to rot. To avoid this, try to only get the soil wet when you water your succulent. Try to keep the actual cutting dry. If you find this difficult, then I would suggest you use one of the other two propagation methods.
Method #2 Summary
- Use with shorter cuttings (2-3 pads)
- Let dry for 1-2 days
- NO direct sunlight
- Lay horizontally on top of the soil
- Use light, well-draining soil
- Keep LIGHTLY moist
- Get soil wet, but keep cutting relatively dry

Method #3: Christmas Cactus Propagation in Water
Christmas cactus propagation in water has been proven to be the fastest way to propagate cuttings. Watching the video below, you’ll see how Christmas cactus cuttings in water grow roots weeks before the Christmas cactus in soil. However, when you root your cuttings in water, you will still have the extra step of transferring your cuttings to soil, which can be a delicate process. So be aware of the advantages and disadvantages of each method and choose your propagation method accordingly.
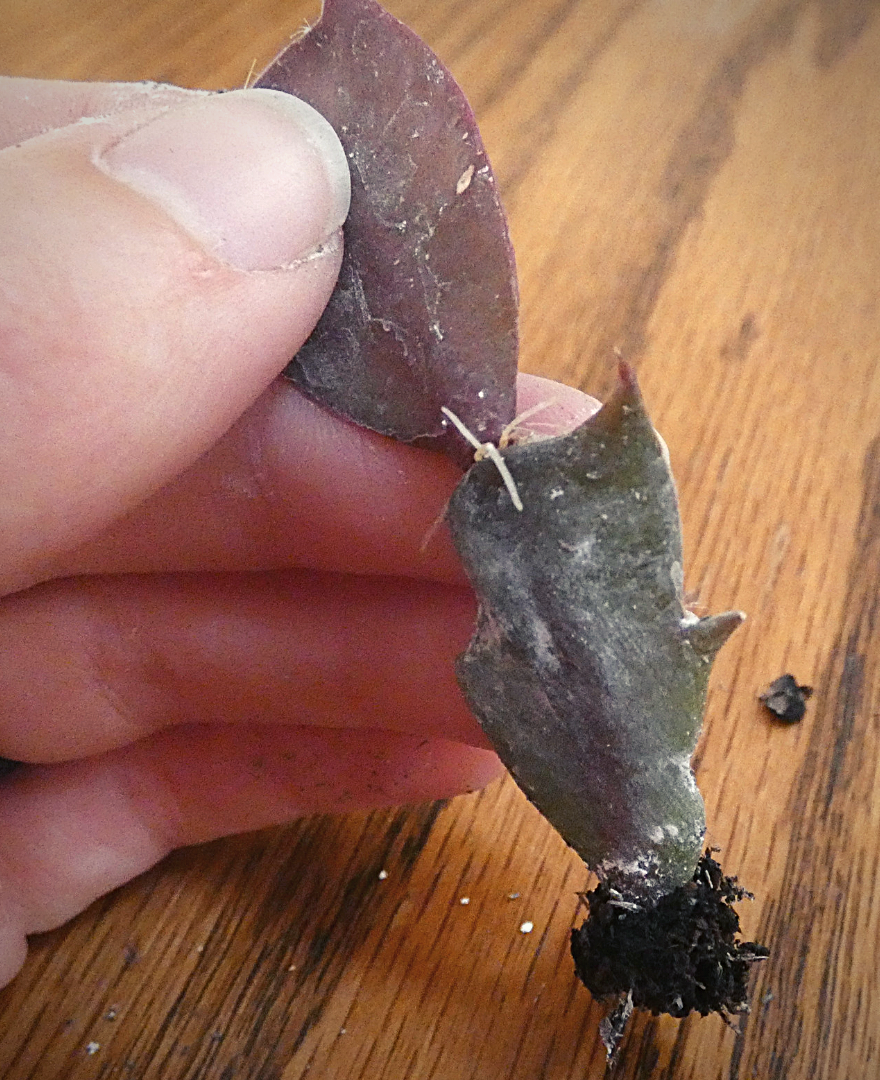
The key to having success with water propagation is to have a good callus. To do this, first, get a good cutting by following the instructions above. Then, make sure that you leave it out to dry. Keep it out of direct sunlight and let it dry to the point that the leaf gets thinner, but put it in water before it gets any wrinkles. If it starts to get wrinkle lines, then you’ve left your cutting out a bit too long.
Once your cutting has dried enough (but not too much!), it will have formed a good enough callus that you can put it in water without the risk of it rotting. If your cutting does rot, then this is a sign that it didn’t form a good enough callus and it should be left out to dry longer next time.
Leave your cutting in water for several weeks, or until it has roots that are about an inch or two in length. While your cutting is in water, make sure that you change out its water every few days. This keeps the water fresh and cuts down on the chances that you will have problems with bacterial rot on your cuttings or on your roots.
Once your cuttings are ready to pot, use a well-draining soil (such as cactus & succulent soil mix, or regular soil mixed with perlite), as well as a well-draining pot. This will be extremely important in successfully transitioning your plant from water to soil.
Transitioning from Water to Soil
As you transition your cuttings, plant them in soil just like you would with any other cutting, then water it thoroughly. Keep it in a warm location with a fair amount of indirect light. At this point it can also withstand some direct morning or evening sunlight as long as temperatures don’t get too hot.
Let your plant’s soil only get slightly dry before watering it again. This means that you will be watering these cuttings a lot more than your regular Christmas cactus. Slowly decrease your watering until your plant can withstand the soil becoming almost dry between watering. This transition should be over the course of a few months and will slowly transition your plant from being in water to being in soil.
Method#3 Summary
- Let cuttings form a callous
- Switch out water frequently
- Use well-draining soil
- Keep moist when potted in soil
- Slowly transition from water to soil
So that’s how to have successful Christmas cactus propagation! Remember to choose the method that is best for your situation. And let me know how it goes! Leave any additional questions or comments below. And feel free to join my email list for more awesome tips on how to keep your plants alive and healthy!
Happy Digging!

33 Stunning Succulents that are Safe for Cats

Cats and houseplants. I get it. Your furry, feline friends are always exploring, touching, sniffing, and sometimes even taste-testing your houseplants. You can’t get them to stop, so instead you want to make sure that whatever plant you bring into your home won’t hurt them. This can sometimes make cat-owners hesitant to purchase houseplants. But today I’m going to show you 33 succulents that you can safely keep, as they are non-toxic to cats! So enjoy the peace-of-mind that comes with knowing your succulent collection can grow while your precious furry friend remains safe!
*Note: I have researched these plants to the best of my ability and have found them to be safe for cats. However, I hold no liability for any incorrect information or any harm or damages caused to yourself, your pets, or your property because of this information. For further details about plant toxicity levels and what to do if your pet ingests any of these plants, please visit aspca.org or call their help number at 1-(888)-426-4435*
*Each of these plants contain an affiliate link to purchase these products at succulentsbox.com. Unfortunately, succulentsbox.com does not ship outside of the continental USA. Any readers who live outside of the continental USA will have to find a local source to purchase these succulents. I am sorry for any inconvenience this may cause.*

#1: Crinoline Ruffles Echeveria
This beautiful Echeveria has ruffled leaves with light pink edges surrounding a blue-green center. Crinoline Ruffles is for anyone looking for something unique to add to their collection!
Purchase Crinoline Ruffles Echeveria

#2: Cymbiformis var. obtusa Haworthia
Transparent tips??? Stunning! This Haworthia variety has thick, dense leaves that open up to transparent tips. These leaves can be somewhat soft, so make sure it is protected from tipping over.
Purchase Cymbiformis var. obtusa Haworthia

#3: Red Lion Sempervivum
This deep red Sempervivum will definitely add some color to your succulent collection! The red leaves can also have green tints on the leaf edges depending on the plant and the amount of sunlight.

#4: Ghost Echeveria
The Echeveria lilacina (Ghost) has striking silver leaves that stand out when placed near other green succulents. This loose rosette also does not produce offsets very quickly, making it very happy in the same pot for a while.

#5: Topsy Turvy Echeveria
This large succulent has a very unique shape. Silver-green leaves twist into the center of the rosette, leaving this topsy-turvy succulent highly sought after.
Purchase Topsy Turvy Echeveria

#6: Afterglow Echeveria
Afterglow is another large Echeveria variety. It is characterized by its pink and purple leaves that form a loose, free-style rosette.

#7: Living Stones Lithops
Known as “Living Stones”, Lithops are one of the coolest, trending succulents of the decade! As they grow, they produce a large flower in the middle of their two leaves, then they go dormant for several months, sometimes completely receding back into the soil. If you want an ultra low-maintenance succulent, then this is right for you!
Purchase Living Stones Lithops

#8: Venosa Haworthia
This triangular succulent is sure to make a statement with its green, webbed leaves. It is also a fast producer of offsets, giving you plenty of little plants to either add to your collection or to gift to a friend.

#9: Cubic Frost Echeveria
Cubic Frost is a soft pink succulent with wedge-shaped leaves. It also grows relatively fast for a succulent, making it perfect for the impatient gardener!
Purchase Cubic Frost Echeveria

#10: Black Knight Echeveria
The ‘Black Knight’ Echeveria isn’t your typical soft pastel succulent. Instead, dark green centers fade to black edges! The more sun this plant gets, the darker its leaves… so plan accordingly!
Purchase Black Knight Echeveria

#11: Mardi Gras Aeonium
This colorful succulent shows the best of nature’s paint brush! Yellow and green stripes give way to purple tips on these stunning succulents.

#12: Suncup Variegata Aeonium
Each Suncup is a unique blend of green variegation on a yellow rosette. It is one of the smaller Aeoniums, but it does readily produce offsets to make up for its smaller size.
Purchase Suncup Variegata Aeonium

#13: Elegans Echeveria (Mexican snowball)
The ‘Mexican Snowball’ Echeveria has a dense, thick covering of blue-tinted leaves. These dense leaves remind us all why these succulents are called rosettes!

#14: Crested Frosty Echeveria
This unusual succulent is covered in soft white fur, which makes it a huge favorite! However, it’s name is deceiving as this Crested Frosty actually does not do well in the cold.
Purchase Crested Frosty Echeveria

#15: Cobweb Sempervivum
It’s no wonder this variety is known as the ‘Cobweb’ Sempervivum. The white threads would be worrisome on any other plant!

#16: Calcareum Sempervivum
The Calcareum features dense leaves, all tipped with a deep red. This warns people of its somewhat sharp tips, though it’s still a lot safer than your cacti!
Purchase Calcarium Sempervivum

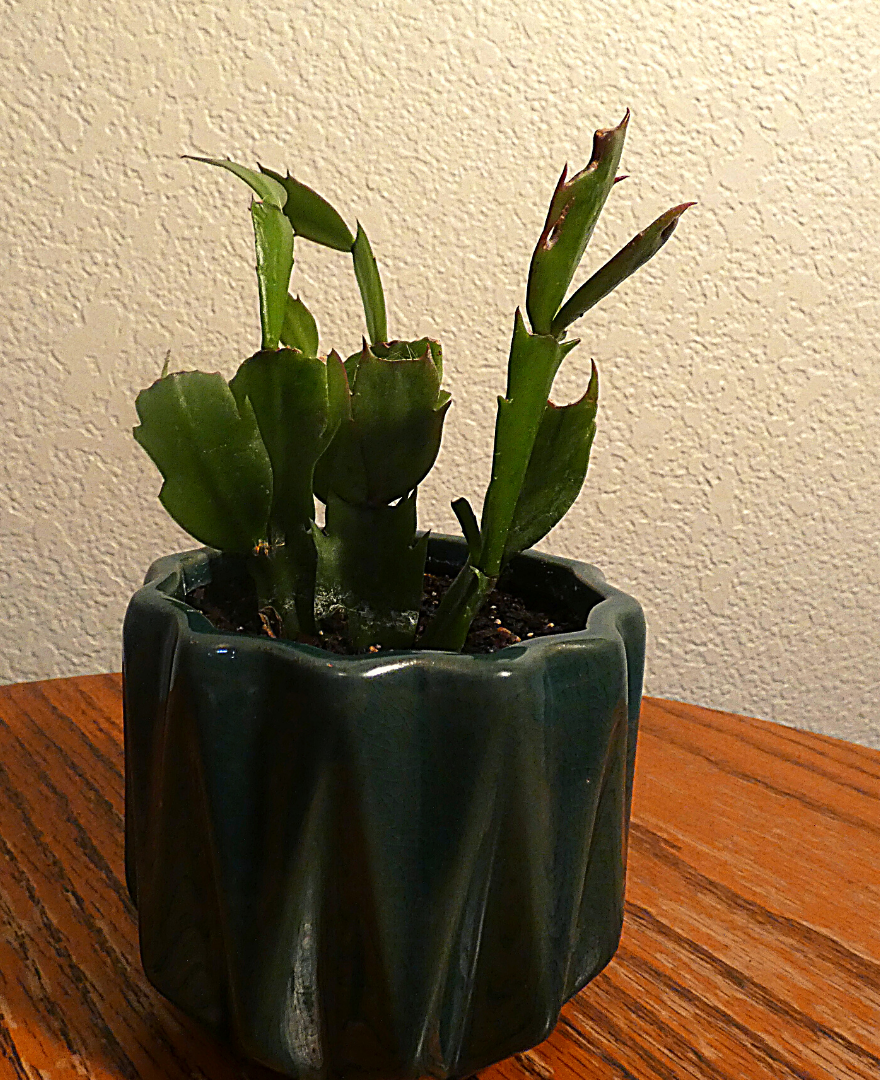
#17: Holiday Cactus Schlumbergera
Speaking of cacti, this tropical cactus should be treated more like an orchid than a cactus. Long, scale-like stems bear large, bright flowers when given a strict lighting regiment during the fall.
Purchase Holiday Cactus Schlumbergera

#18: Mahogany Sempervivum
A more open version of the ‘Calcarium’, the ‘Mahogany’ also has red-tipped leaves. But the more sun this plant receives, the darker the leaves will become!

#19: Violet Queen Echeveria
The Violet Queen has long, blue-green leaves that take on a pastel pink color on the edges when it gets cold. It also produces offsets rapidly, so be prepared to have several of these cuties!
Purchase Violet Queen Echeveria

#20: Black Rose Zwartkopf Aeonium
‘Black Rose’ is one of the most popular Aeonium varieties. And it’s no wonder! The deep black leaves with the green center is so stunning it makes everyone want to start up a succulent collection!
Purchase Black Rose Zwartkopf Aeonium

#21: Kiwi Aeonium
The Kiwi is one of my personal favorites! Its leaves range from green to yellow to white depending on the amount of sunlight. And to top it off, the edges stay perfectly lined in an almost fruity shade of red!

#22: Subsessilis Echeveria
For a softer shade of pink, get yourself a Subsessilis! The light pink tips paired with the blue-green color of its leaves makes it a dreamy pallet of soft pastels.
Purchase Subsessilis Echeveria

#23: Dinner Plate Aeonium
This succulent is named ‘Dinner Plate’ because of its large, flat shape that can get up to 2 feet in diameter! However, under good care it doesn’t stay flat and instead forms smooth, rounded hills of green.

#24: Lily Pad Aeonium
When people think of succulents, they usually picture something like the Lily Pad. Thick, fleshy green leaves form a picture-perfect rosette every time!

#25: Doris Taylor Echeveria
This furry succulent is the perfect companion to your own furry feline friend! The hard part will be keeping your hands off this little guy!
Purchase Doris Taylor Echeveria

#26: Perle von Numberg Echeveria
Perle von Numberg is one of the most widely sold succulents. It’s easy to find this beautiful, pink Echeveria, so pick one up today, or feel free to have it shipped straight to your door!
Purchase Perle von Numberg Echeveria

#27: Painted Nodulosa Echeveria
The Painted Nodulosa is truly a masterpiece of dark green and wine red. And it’s beauty is only improved by the fact that it is one of our succulents that are safe for your cat! Just be aware that this plant tends to grow upwards instead of having a spreading habit.
Purchase Painted Nodulosa Echeveria

#28: Zebra Plant Haworthia
Zebra plants are easily identified for their white spines that travel up each individual leaf. As they continue to grow upward, they will also produce lots of new offsets at their base. This is why Haworthias are perfect for people wanting to fill their house with succulents!
Purchase Zebra Plant Haworthia

#29: Window Haworthia
The ‘Window’ Haworthia is a succulent that uses its transparent leaves as a window! This allows light to penetrate deeper into its leaves. This zero-waste succulent shows how something can be efficient and stunning at the same time.

#30: Blue Rosette Echeveria Minima
This succulent is one of the small varieties of Echeveria. However, this doesn’t stop it from producing lots of offsets. This succulent fills its pot with little blue rosettes in no time!
Purchase Blue Rosette Echeveria Minima

#31: Chroma Echeveria
Each and every ‘Chroma’ Echeveria is slightly different! Leaf colors can be green, brown, purple, red, or even pink. This little succulent is definitely one-of-a-kind!

#32: Donkey’s Tail Sedum
This Sedum is widely known and loved! Very few people know that it’s actually one of our succulents that are safe for your cats! As if we need any more reasons to buy this beautiful trailing succulent!

#33: Raindrops Echeveria
Raindrops is truly unique with its large ‘raindrops’ that grow on the tips of its leaves! This blue-green succulent can also get pink tips when given lots of sunlight!
That’s it for my list of 33 stunning succulents that are safe for cats! Enjoy your succulents, while knowing that your curious cats are safe! And check out this list of Houseplants that are Safe for Pets for even more ideas!
If you have any questions or comments, feel free to leave them below. Then to get even more awesome tips, join my email list! Every new subscriber gets a free welcome gift!
Then, if you want some more help with your succulents, here’s my post that explains the secret to succulent watering! Here is the answer to How Often Should You Water Succulents?
Happy Digging!
5 Effortless Indoor Herb Garden Kits
Wouldn’t you love it if you could just press a button and have all the fresh culinary herbs that you want?! Some people might think this is crazy, but with modern technology, we are pretty close to having fresh, kitchen-grown herbs at just the press of a button! Still seem too good to be true? Well check out these five indoor herb garden kits that truly make growing herbs effortless.
Wouldn’t you love it if you could just press a button and have all the fresh culinary herbs that you want?! Some people might think this is crazy, but with modern technology, we are pretty close to having fresh, kitchen-grown herbs at just the press of a button! Still seem too good to be true? Well check out these five indoor herb garden kits that truly make growing herbs effortless.
As far as Indoor Herb Garden kits go, the two leading brands for ease of use and sustainability are Aerogarden and Click and Grow. While this post does contain affiliate links, this in no way swayed my opinion of these products. These grow kits really are as awesome as they seem! So here are the top 5 indoor gardens, along with the pro’s and con’s of each to ensure you get the one that fits your personal needs!
#1: Click & Grow Smart Gardens
Click & Grow’s Smart Gardens are simple to set up and easy to grow. Just attach the light, pop in the seed pods, and add water mixed with the provided nutrients. Then when you plug it in, a timer will automatically start, setting you up for 16 hours of lights on, and 8 hours of lights off. This is convenient for people who struggle with setting manual timers, but it might require you to get up early one day if you want it to turn off earlier in the evening.
Click & Grow offers 3-pod systems, 9-pod systems, or a bundled shelving set of 3, 9-pod systems totaling 27-pods. All of the features are the same regardless of size, so simply purchase according to your needs!
Pro’s
- 3-pod system one of the cheapest indoor garden systems
- relatively quiet
- lights blink when low on water (effective reminder)
- comes with height extenders to make the light taller or shorter
- automatic 16 hours on, 8 hours off
Con’s
- no manual light settings
- some people have difficulty refilling the water without spilling
- low water lights (blinking) can be annoying to some people
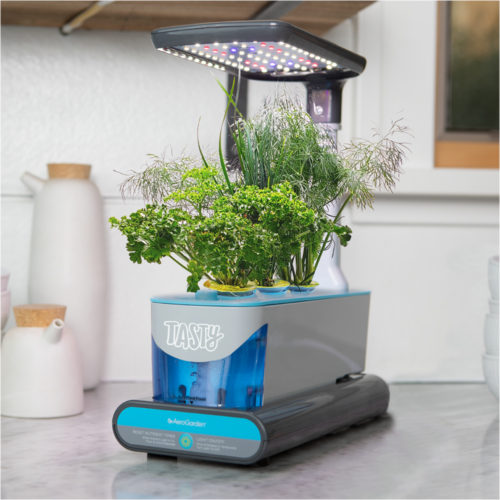
#2: Tasty Sprout by Aerogarden
This is a unique system as it was a mix of Aerogarden’s indoor systems along with Tasty’s low-cost practical cooking methods. What you get is a small, recipe-driven indoor herb system that appeals to the masses, but only has a few of Aerogarden’s touches.
If you are limited on space, or you want a cheap option to get started with indoor gardening, then this is the kit for you!
Pro’s
- Small, 3-pod design
- Pods sold in recipe packs of southwestern, ranch, Caprese salad, and coctail/mocktail packs
- inexpensive for an automatic growing kit
Con’s
- no manual timing system – run 18 hours on, 6 hours off from time it’s plugged in
- only 12″ tall
- made from a light plastic material
- uses an aerator pump, which some people find to be too loud
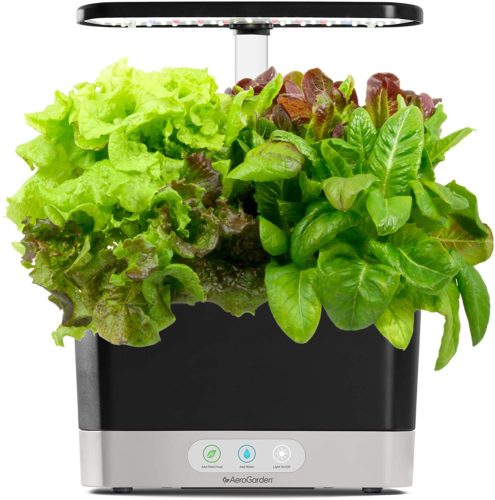
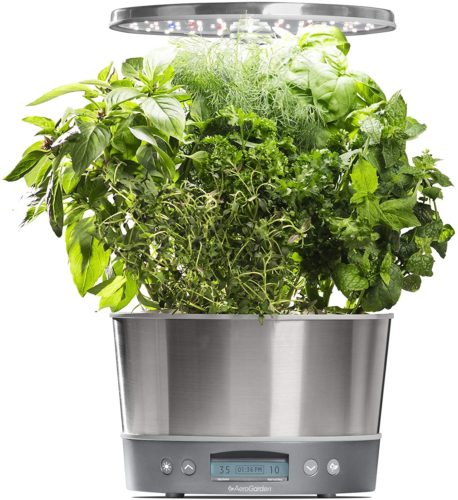
#3: Aerogarden Harvest
The Aerogarden Harvest is the most basic of Aerogarden’s indoor garden systems (aside from their Tasty hybrid). That being said, it is still an amazing system! It uses a water pump system instead of an aerator pump, making it run silently when compared to the Tasty Sprout. The Harvest also has several buttons on the front to manually set your light timings. It also keeps track of how many days you’ve been growing, as well as tells you how many more days you have until you need to add more liquid fertilizer (included in purchase).
Overall, this 6-pod system is perfect for anyone who is serious about indoor gardening, but not quite ready to take the leap to one of the more expensive models.
Pro’s
- Cheapest of the mainstream Aerogarden systems
- quiet pump system
- adjustable manual lighting settings
Con’s
- plastic build
- takes up slightly more space than the 6-pod Harvest Elite
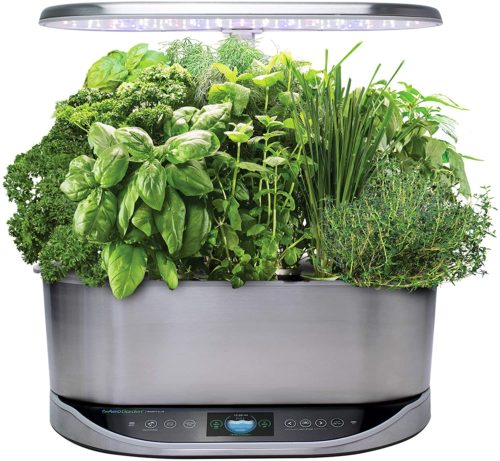
#4: Aerogarden Harvest Elite 360
At first glance, this system appears to be only a rounded, metal version of the Aerogarden Harvest. However, the Harvest Elite 360 has a few essential features that left customers feeling glad they made the upgrade.
First, the LCD display makes the system much more user-friendly than the Harvest. For example, you can simply choose the type of plants you are growing (such as herbs or flowers), and it will automatically set up the optimal growth settings for you.
Another game-changer is the vacation mode. By activating vacation mode, your system will automatically shorten the light times and decrease the water usage so you won’t have to worry about running out of water while you’re gone! This system really takes care of you! So if you want an indoor garden system that won’t die during your extended holidays, then you should consider the Harvest Elite!
Pro’s
- LCD display with manual timing adjustments
- Suggested settings for different plant types
- smaller than Harvest, but still fits 6 pods
- Stainless Steel build
- Vacation mode!!!
Con’s
- Several people complained that their LCD display was broken out-of-the-box and they had to get a replacement system from the company (free of charge, but took longer)
- More expensive than the Harvest system
#5: Aerogarden Bounty Elite
Now this system truly has it all! With a touchscreen display you can connect it to your WiFi and use either your Alexa device or the Aerogarden app to adjust any settings, turn on/off your lights, and check on the status of your plants. The lights are also dimmable with the touch of a button, as well as has a sunrise/sunset setting to slowly fade in or out of the day.
Overall, this indoor herb garden kit has everything you need to be as involved or as hands-free as you want in the growing process! From the suggested settings and vacation mode, to the voice-command lights off, this system is any smart gardener’s dream come true!
Pro’s
- Touchscreen manual adjust settings
- WiFi enabled
- Alexa compatible
- 9-pod capability
- Water-level indicator
- Vacation mode
- Suggested settings based on plant type
- Choice to have water and fertilizer alerts sent to cell phone
- 1-touch light dimmer
- Sunrise/Sunset mode
Con’s
- Takes up slightly more space
- Most expensive of the Aerogarden systems
That’s it for the top 5 effortless indoor herb garden kits! Honestly, all of these systems require very little setup and maintenance and will have you harvesting your favorite herbs all year long! For some quick inspiration, check out this list of The 5 Best Vegetables to Grow Indoors. And as always, feel free to leave any questions or comments below, including any comments of any experiences you’ve had with any of these machines! Then, make sure to join my email list to get more awesome tips, as well as to receive a free welcome gift straight to your inbox today!
Happy Digging!
9 Things to Avoid when Planting Strawberries
Are you looking to plant strawberries this year? Maybe you’ve tried before and for some reason you didn’t get the great harvest you wanted. Or maybe you’re simply new to this and want a few extra tips. Either way, I understand how sometimes we don’t need people telling us how to plant strawberries. Instead, we need to know what you could be doing wrong, and how to avoid it! So here are the 9 things to avoid when planting strawberries. Because by avoiding these things, you are sure to have an amazing harvest!
#1: Avoid Planting Strawberries from Seed
It can be a lot cheaper to plant your strawberries from seed, but if you want to actually harvest strawberries, then you will be better off purchasing bare-root or potted plants. This is because it will take at least 2 years of nurturing your seedling before it will finally give you strawberries. I don’t know about you, but this is a long time when compared to your potted plants producing strawberries in as little as 2 months…
Also, if you use seed from a store-bought strawberry, then you won’t know your strawberry variety. I’ll explain a bit more about why this is important in #4. So go ahead and just pay the extra couple of dollars for an established plant. You will be extremely glad that you did.

#2: Avoid Planting Strawberries in Pots
If pots are your only option, then go for it. However, if you live in a climate that gets below freezing, then any unprotected potted plants will freeze. This means that they will not come back in the winter. Because of this, it is much smarter to plant them in the soil where they have extra protection from the cold. This will ensure that they come back year after year.
If you HAVE to grow in pots, then once temperatures begin to drop and your plant is done producing, place it somewhere it will be protected from extremely cold temperatures. A lot of people choose to place their pots in an unheated garage. Also try to insulate it from the cold using straw, mulch, old blankets, etc. This will keep your strawberries’ roots from freezing and will ensure that they come back the next year.
#3: Avoid Poor Soil
Strawberry plants need a lot of nutrients in the soil in order to maintain high production of strawberries. If you plant in poor soil, then you won’t get as many strawberries. To improve your soil, mix in some compost before planting and consider adding a vegetable fertilizer halfway through the growing season.

#4: Avoid Unknown Varieties
You need to know what type of strawberries you have because it will ultimately determine the size of berry and the size and time of harvest. These are your three main options:
June-bearing Strawberries
These plants produce one large harvest of strawberries (usually in the early spring). Then, they produce runners for the rest of the season. This variety is best if you need a large harvest of strawberries all at once. These strawberries are usually used to make jams, pies, etc.
Ever-bearing Strawberries
These varieties will usually give you two harvests: one in the early spring, and one in the early fall. They can also produce a few strawberries in between these two larger harvests. One downside to ever-bearing, however, is that they don’t produce as many runners because they are busy producing fruit. These varieties are best for people wanting some larger harvests, but also want some continuous fruit throughout the season.
Day-neutral Strawberries
These strawberry varieties are technically in the ever-bearing group, but they produce a more even, continuous supply of strawberries throughout the growing season. These are also a great choice for people who want a lighter, but continuous supply of strawberries.

#5: Avoid Planting Strawberries Too Deep or Too Shallow
These plants are extremely picky when it comes to rooting depth. If you plant it too deep (covering the crown of the plant), then it is likely to rot. On the other hand, if it is planted too shallow, the roots are likely to dry up (and strawberry plants do not like dry roots). I try to plant my strawberries at the depth that they are already growing in their pot.
If you are planting bare-root plants, then find the little skirt where the leaf stems are attached to the base of the plant. This little skirt of plant material is the crown. Plant it at a depth where the soil will cover about half of the crown. Make sure to watch the video below to see the correct depth to plant your bare-root strawberries.

#6: Avoid Planting Too Close Together
Each variety has a specific spacing recommendation. Follow this recommendation. If you place your plants too close together, it decreases the air flow around your plant’s base and lower leaves. This can increase your chances of having a disease problem.
You also want to keep in mind any runners that might develop. If your plants are too close together, then you will need to remove the runners in order to keep your plants from crowding your space.
A little unsure of plant spacing? Check out this awesome video that explains your optimal plant spacing, as well as shows you how to plant your bare-root strawberries at the correct depth!
#7: Avoid Planting Near These…
Avoid growing your strawberries next to any plants in the Brassica family. These include cabbage, broccoli, Brussels sprouts, cauliflower, kohlrabi, and kale. These plants will have stunted growth when grown next to each other.
You should also avoid planting your strawberry plants next to tomatoes, potatoes, peppers, melons, mint, or eggplants. These plants are all susceptible to the same diseases as your strawberry plants. So by planting near these other plants, or in a bed that has been growing these plants in the past several years, it will increase your chances of having diseases in your strawberry plants.
For a list of plants that would be good to place near your strawberries, check out Balcony Garden Web’s post, 13 Best Strawberry Companion Plants.

#8: Avoid Letting your Plant Dry Out
Strawberry plants like to stay a bit on the moist side. If your plants get too dry (especially in the hot summer temperatures), then it will stop any fruit production. This is especially harmful to the ever-bearing varieties, as it will stop your harvest. So make sure to keep your plants lightly moist and avoid letting it dry out.

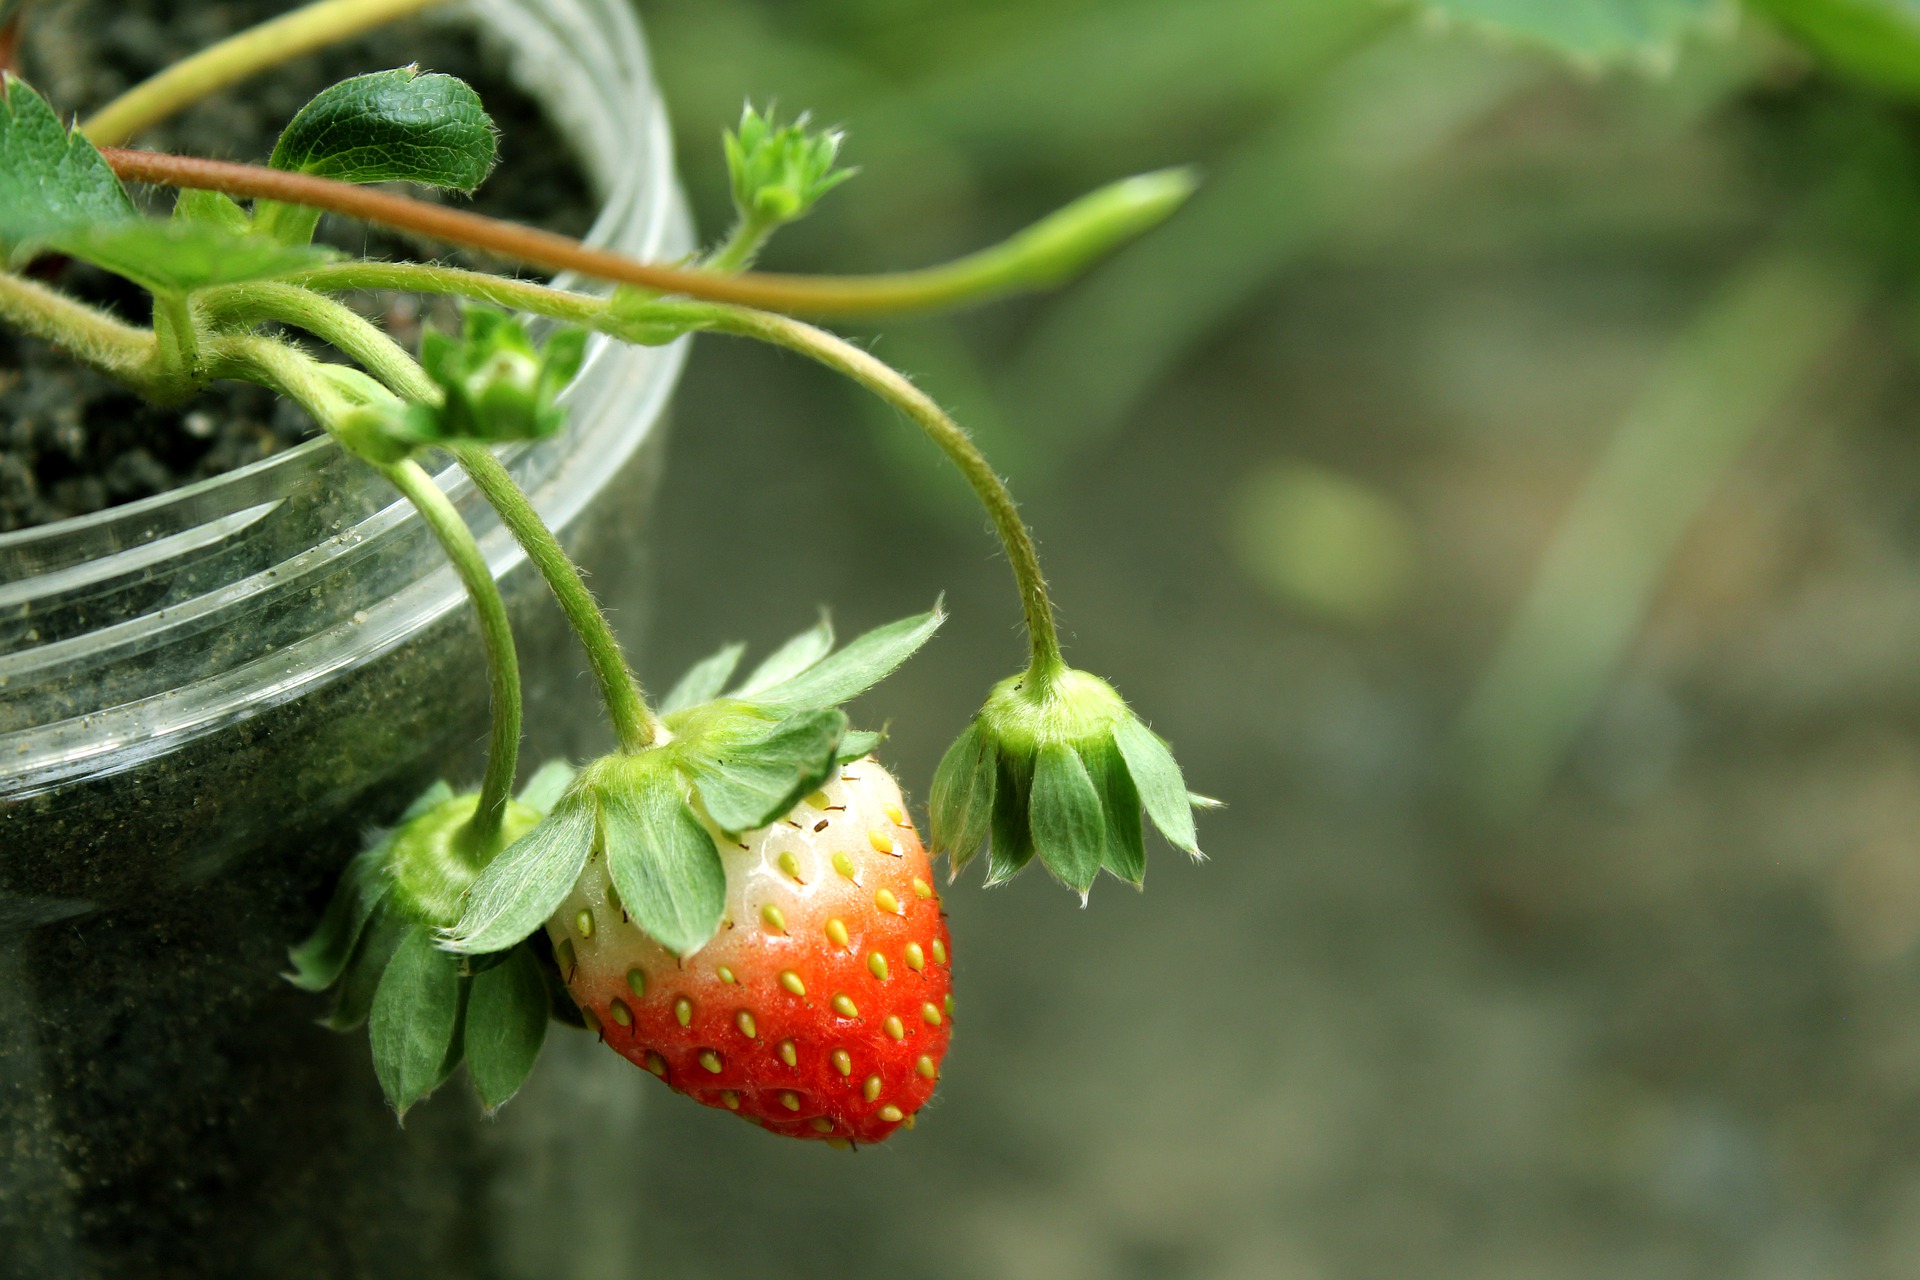
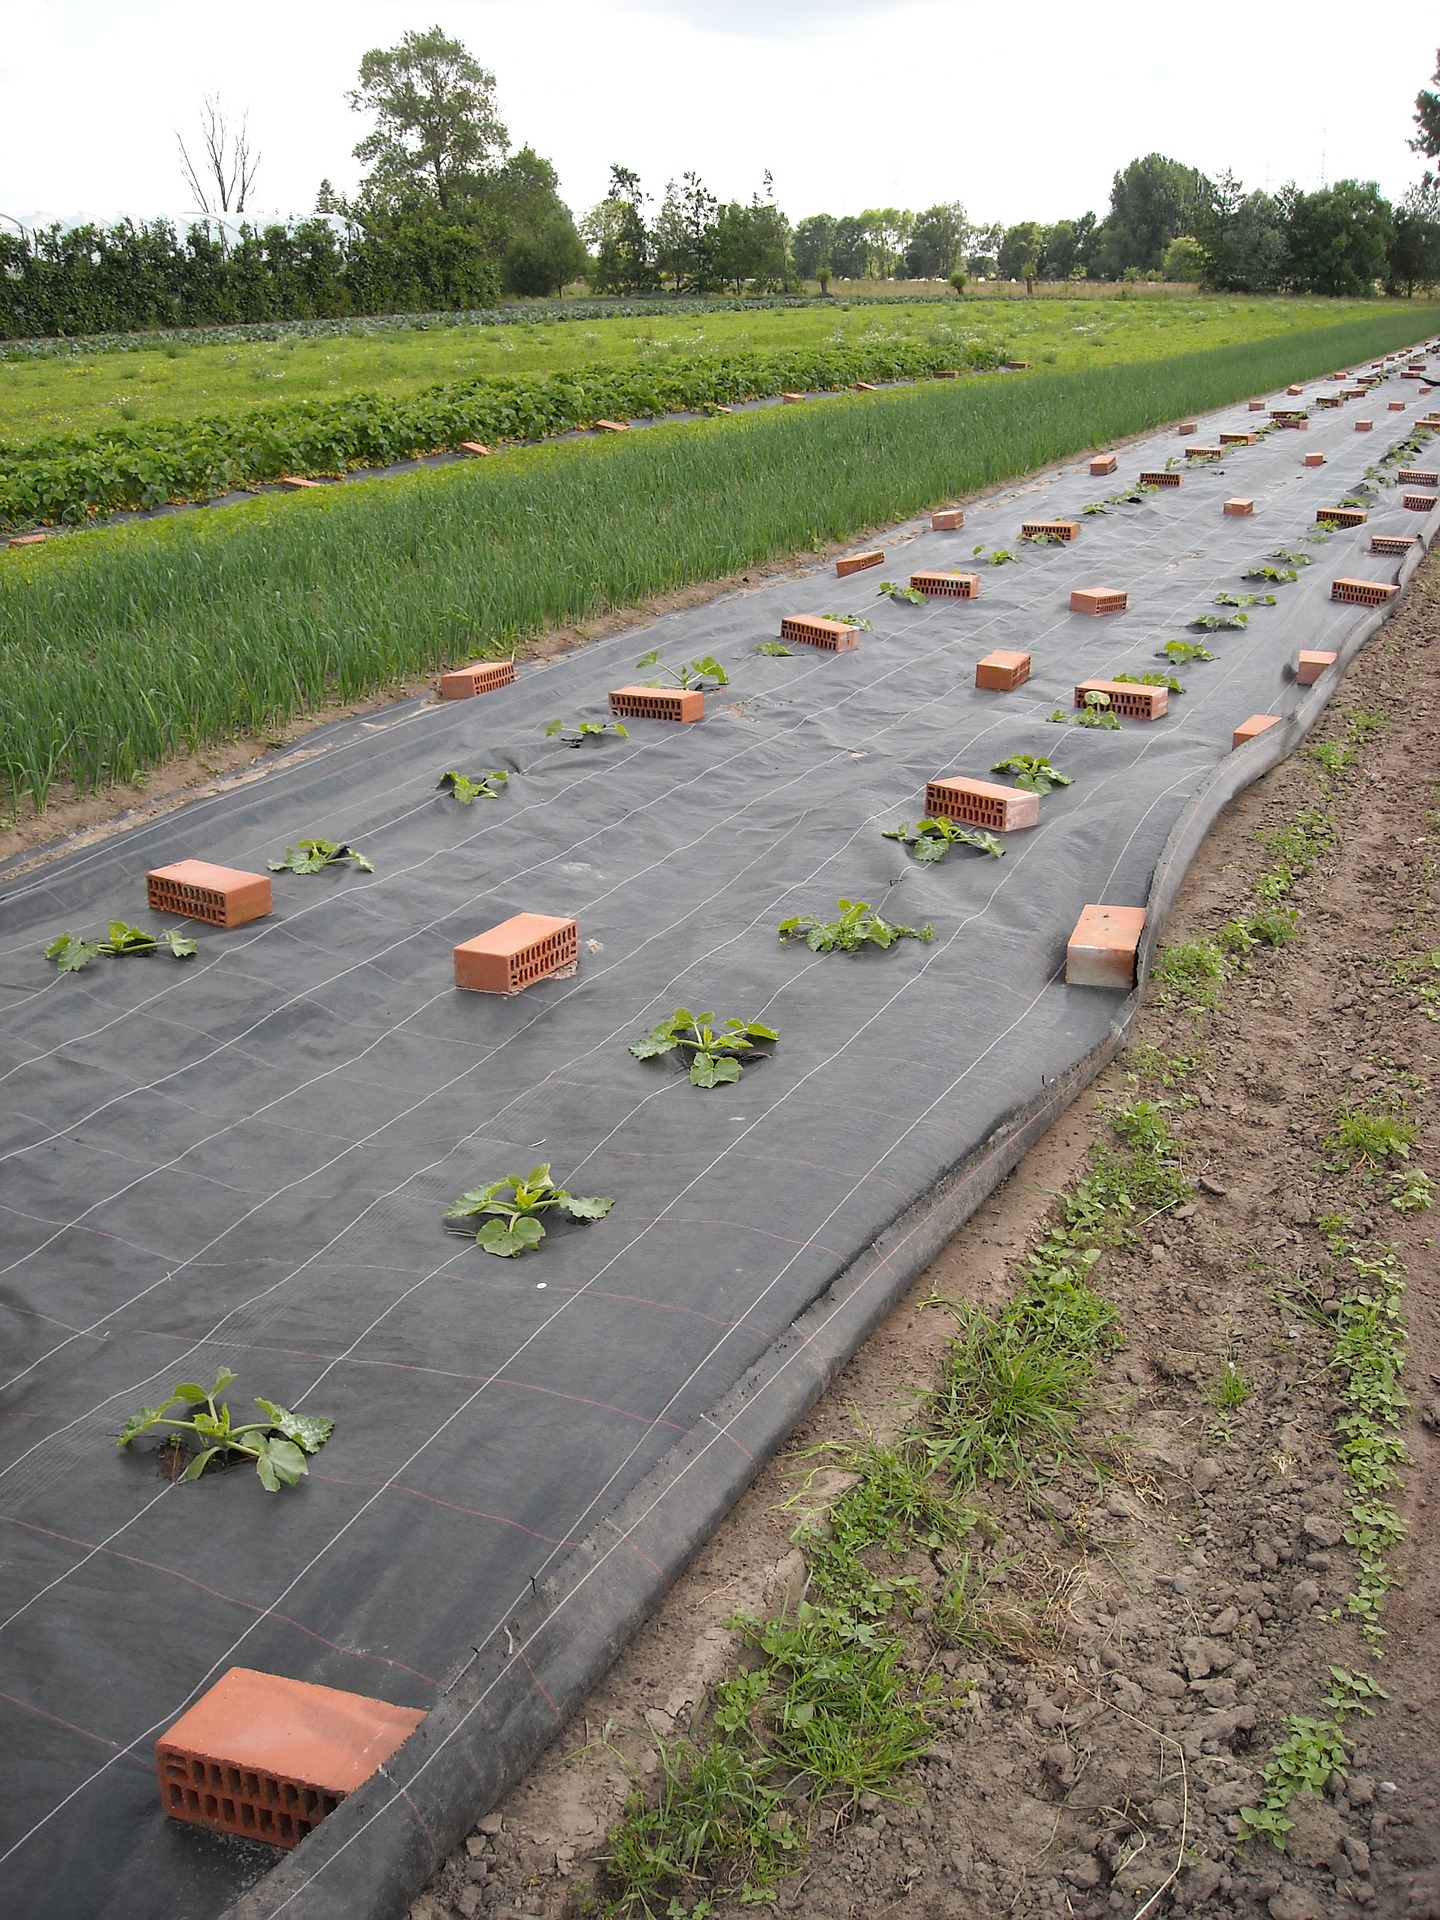
#9: Avoid Letting Fruit Sit on the Ground
Strawberries will hang down to the ground as they get larger and heavier. Because of this, most strawberries end up laying directly on the soil. However, strawberries laying directly on the soil are much more likely to have diseases and pests claim them before you do. So make sure that you lay down something like straw, gravel, or black plastic to keep your strawberries from sitting directly on the soil.

Those are the 9 things to avoid when planting strawberries! Let me know if you have any other questions or comments by leaving them below. And for more awesome tips, subscribe to my email list! Every new subscriber gets a free welcome guide full of expert tips to help you become a master grower! Then make sure that you share this post on your favorite social media channel! You never know how many of your friends are also wanting to enjoy harvesting their own delicious, home-grown strawberries!
Happy Digging!

7 Things You Should Never Do when Planting Tomatoes
Do you want to do things right when planting your tomatoes? Do you want to grow lots of large, tasty tomatoes? If you do these 7 things, then you will probably still get a tomato harvest. However, if you don’t do these 7 things when you plant your tomatoes, then your harvest has the potential to be HUGE!!! So, if you want to be the envy of all your gardening friends, then make sure you never do these 7 things…
#1: Never Plant your Tomatoes in the Same Place
Now, I know this is a pretty heated topic that gets tossed around a lot between home gardeners. Some will tell you that rotating your vegetable’s location is a must, while others will say they’ve never rotated their plants and they’ve have had great results for over 20 years. But here’s the deal…
Tomatoes will use different nutrients than other vegetables. They also have specific pests that enjoy eating them. Ideally, you can supplement the nutrients by adding compost and fertilizer year after year. So that problem is solved. And some would say that if you have a small garden, then your pests are going to find your tomatoes eventually.
However, for the new gardener, I would say don’t worry about making a huge spreadsheet tracking plant families and religiously rotating. Instead, if you don’t want to add a lot of nutrients to your soil year after year, then just plant your tomatoes somewhere they haven’t been for a couple of years. So for all of you beginners, NEVER plant your tomatoes in the same place, and your plants will stay healthy!

#2: Never Plant in Cold Soil
Tomato plants like to stay warm. If you plant your tomatoes too early, it will actually stunt your tomato plant’s growth. Don’t plant it until night temperatures are consistently around 50 F (10 C). At this point your soil should be warm enough for your plants.

#3: Never Place at Original Planting Depth
When you plant your tomatoes, cut off any lower branches. Leave the top branches intact (more or less depending on the size of your plant). Then place it low enough in the soil that all of the bare stem is buried. Roots will grow from the exposed stem and will give your plant a much larger and established root system. And more roots will give you a healthier plant, which will in turn give you a bigger, better harvest.
Confused by this step? Watch the YouTube video at the bottom of this post to see it in action!

#4: Never Cut the Edges of your Stem
Some people ‘nick’ the sides of their tomato plant stem before planting it beneath the soil. In theory, this will stimulate more locations of root growth. however, this also opens up more locations for bacteria to enter your plant. This can also severely damage your plant if you aren’t experienced with this method. Because of these two reasons, I suggest that you should never cut your stem. The only marks it should have is the pruning cuts where you removed the lower branches.

#5: Never Wait to Add Support
You should add your support system (tomato cage, poles, trellis, etc.) at the time you are planting. If you wait to install a support system until the plant is large enough to need it, you will most likely damage your plant’s root system during installation. And if you damage the root system, then your harvest will definitely take a hit as well. So don’t wait to add support! Instead, make it a habit to install it when you plant.

#6: Never Plant in an Empty Hole
When you dig a hole for your tomato plant, don’t just refill it with soil and be done with it. Instead, you should fill your hole with things your plant will use over the course of the summer. The most common items added to the bottom of the hole includes egg shells, coffee grounds, worm castings, and small amounts of compost. If you nourish your plants from the start, then they will reward you with a great harvest!

#7: Never Plant Next to These…
There are several types of plants that will fight with your tomatoes. You should never plant your tomatoes next to these:
- Fennel, Walnut, or Dill – all inhibit growth of tomato plants
- Corn, Potatoes, Eggplant, or Peppers – all share the same pests and diseases, so grouping causes an increase of pests or diseases
- The Entire Brassica Family – broccoli, cabbage, kale, kohlrabi, Brussels sprouts, turnips, collards, and rutabaga… these guys just don’t get along

So those are the 7 things you should never do when planting tomatoes. I hope this list gave you some ideas of what not to do, as well as some ideas of what you should be doing instead! If you have any questions or comments, feel free to leave them below.
I’ve also included an awesome YouTube video from The Rusted Garden showing exactly how to plant your tomatoes. He also includes a few great tips on how to care for them as they grow, so make sure to hit the play button below!
Happy Digging!